Pi-hole
Building a Headless Raspberry Pi Ad-Blocking Server with Pi-hole
Equipement for this project
Raspberry Pi 3B+
Case: Smraza For Raspberry Pi 3 B+ Case + 5 V 2.5 A Power Supply with On/Off Switch + Fan + 3 x Aluminium Heatsink Compatible with Raspberry Pi 3 2 Model B+
SD Reader: Simulatneous 4-in1 Memory Card Reader
Switch: TP-Link TL-SG605E 5-Port Gigabit Easy Smart Managed Network Switch (Plug and Play, Metal Housing, QoS, IGMP Snooping, VLAN, Central Management, Energy Efficient)
On-Off Cable: RIITOP USB C Extension On Off Cable 1 m 10 Gbps, Supports Video/Data/PD Charging, USB 3.1 Type-C Male to Female Extension Cable with On/Off Switch
Storage: 32 GB Pro Plus micro sd
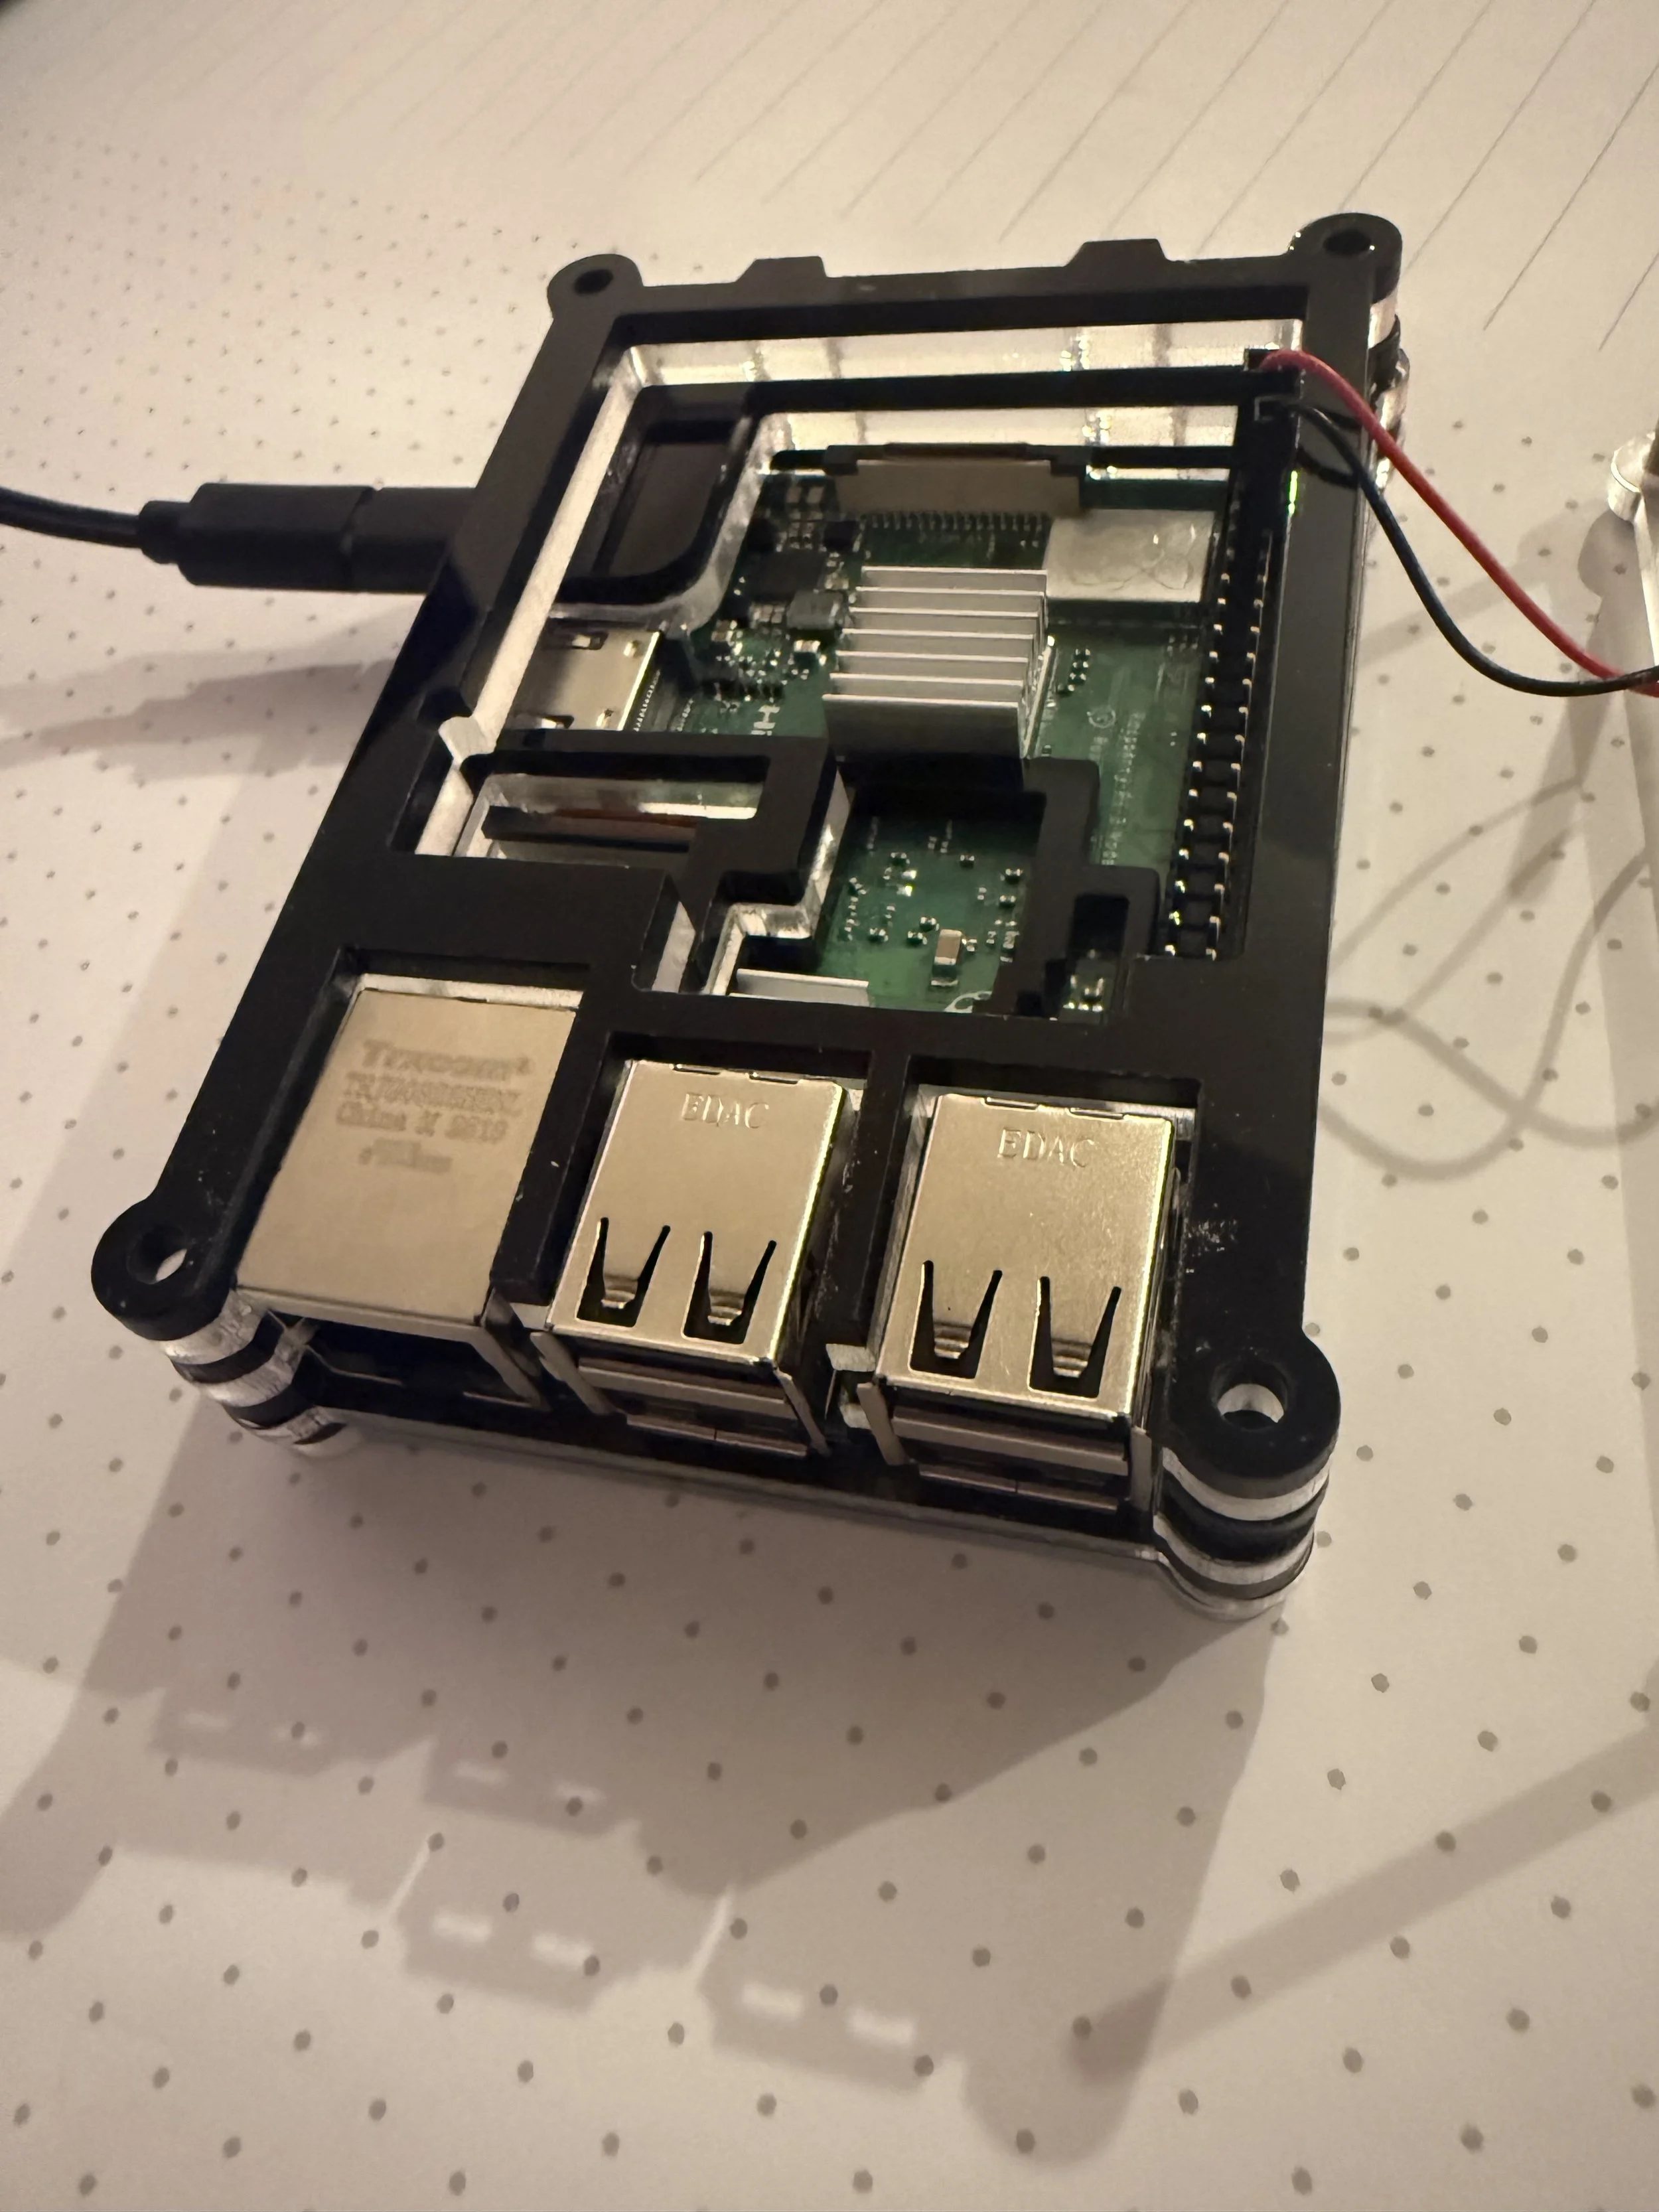
Raspberry Pi in a case
Project Summary
This project involves setting up a Pi-hole on a headless Raspberry Pi to provide network-wide ad blocking and DNS filtering. The Raspberry Pi is configured as a dedicated Pi-hole server, demonstrating how ads and trackers can be blocked across an entire home network while introducing fundamental networking concepts such as DNS, remote management, and basic network configuration.
Rationale for Headless Configuration:
Using a headless configuration eliminates the need for a full desktop operating system and additional peripherals, resulting in a lightweight and efficient setup. All system management is performed remotely via SSH, reducing resource usage and allowing the Raspberry Pi to function as a dedicated network service. The only requirement for operation is that the Raspberry Pi be connected to the same network as the management computer.
Raspberry Pi Headless Setup
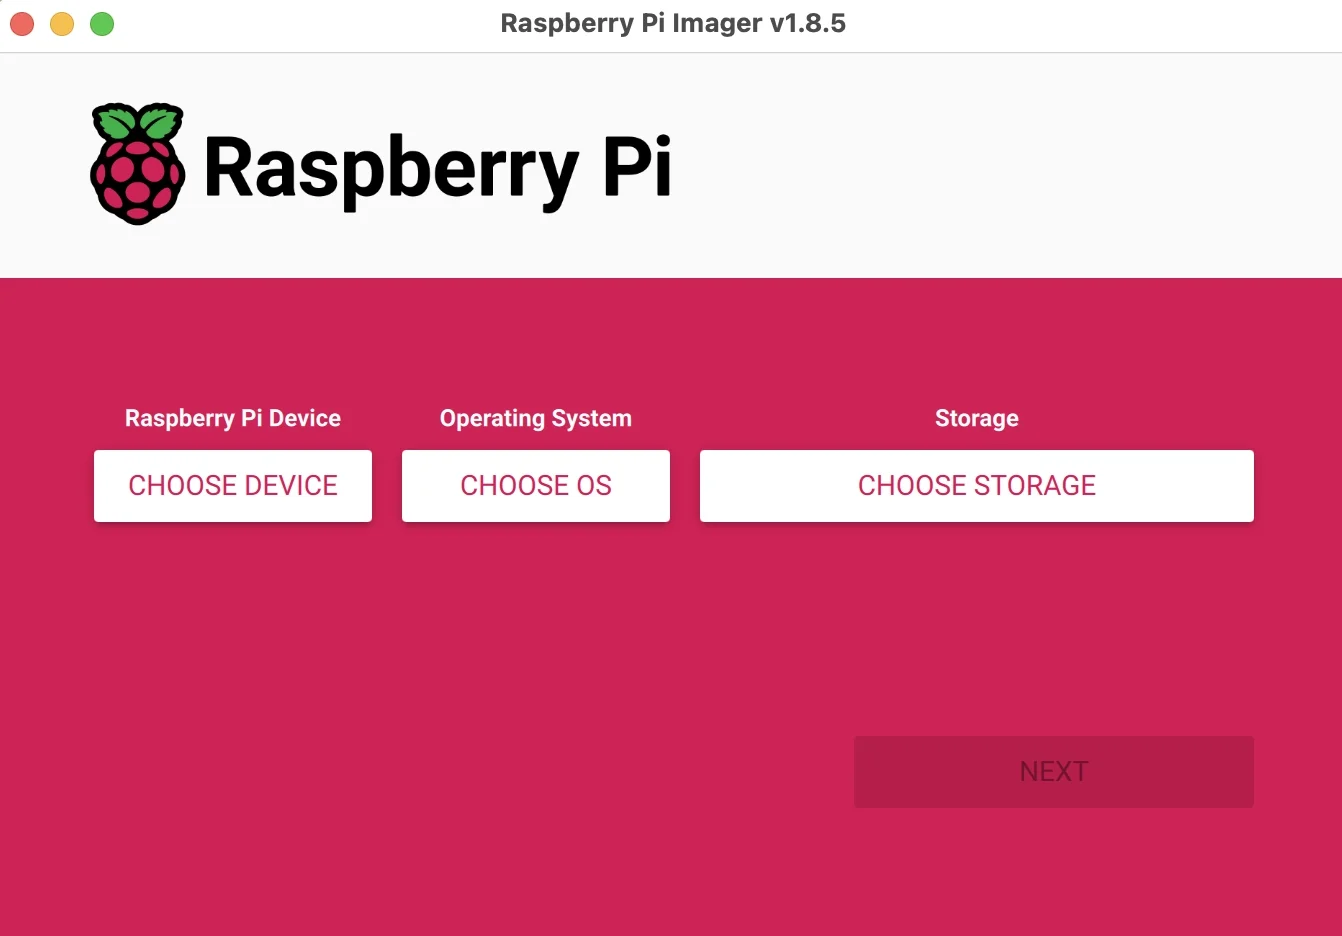
First, download the Raspberry Pi OS Imager to your computer. It’s available for Mac, Windows, and Ubuntu.
Open the imager. It will look like this:
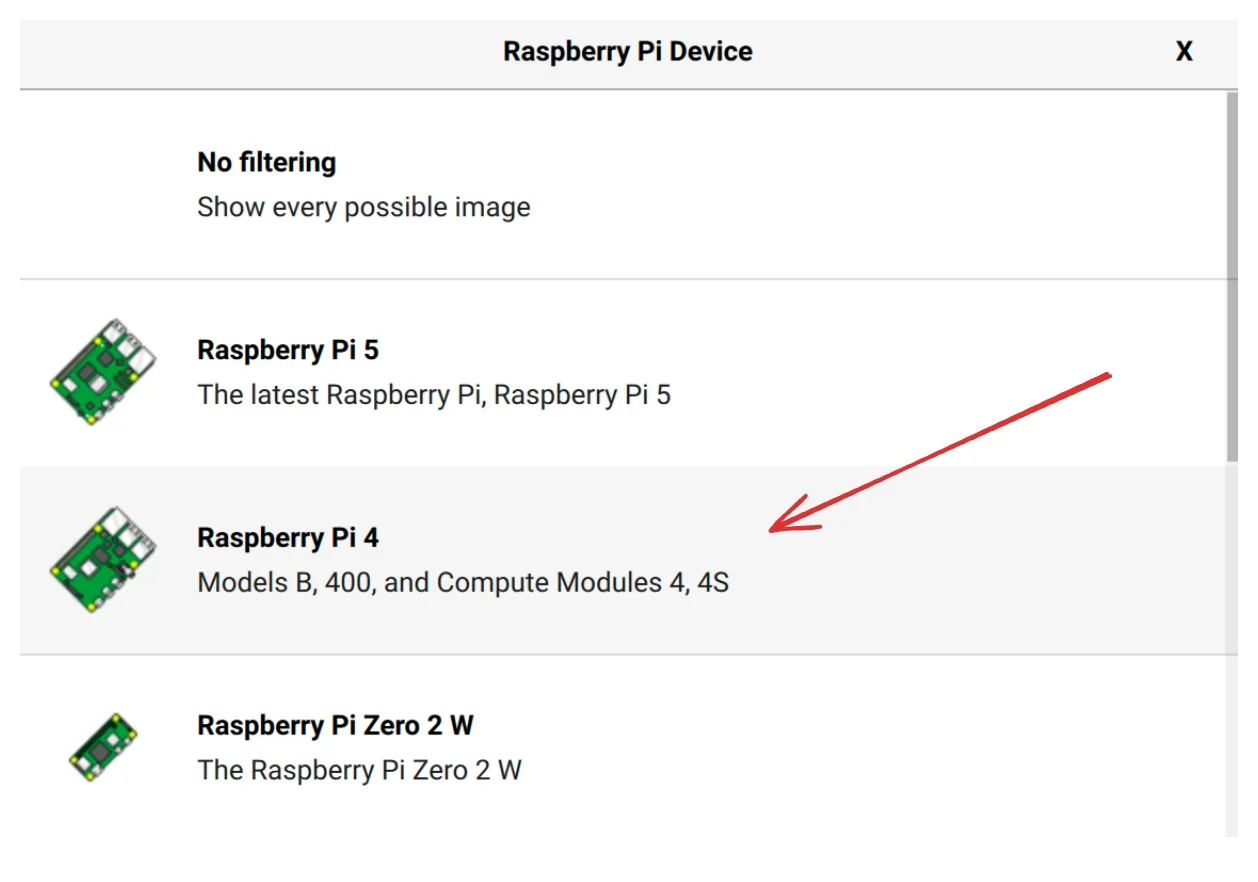
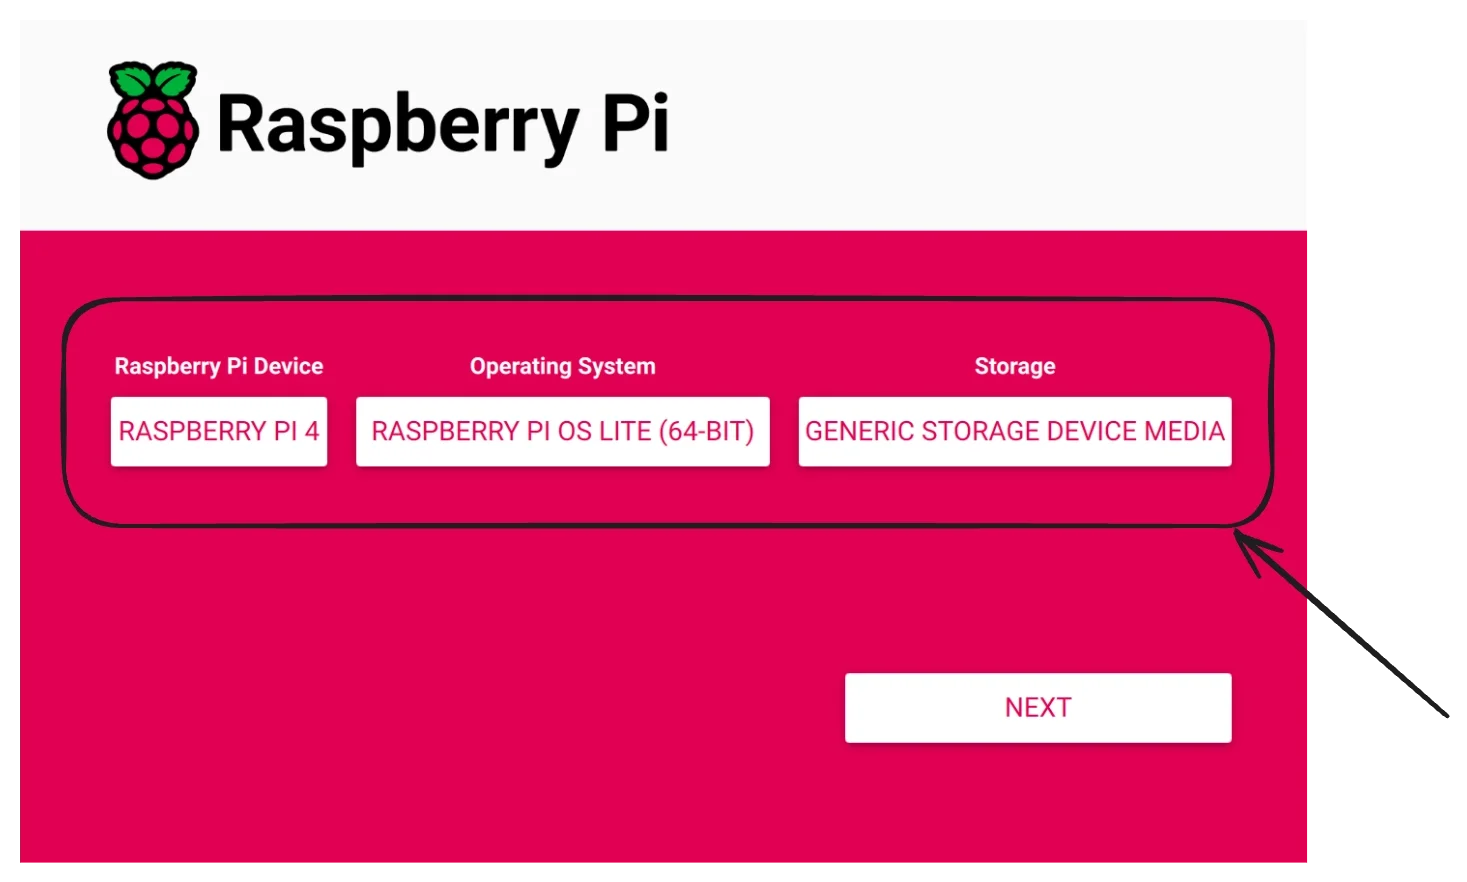
Select your Raspberry Pi device type (Choose Device). In my case, it was Raspberry Pi 4.
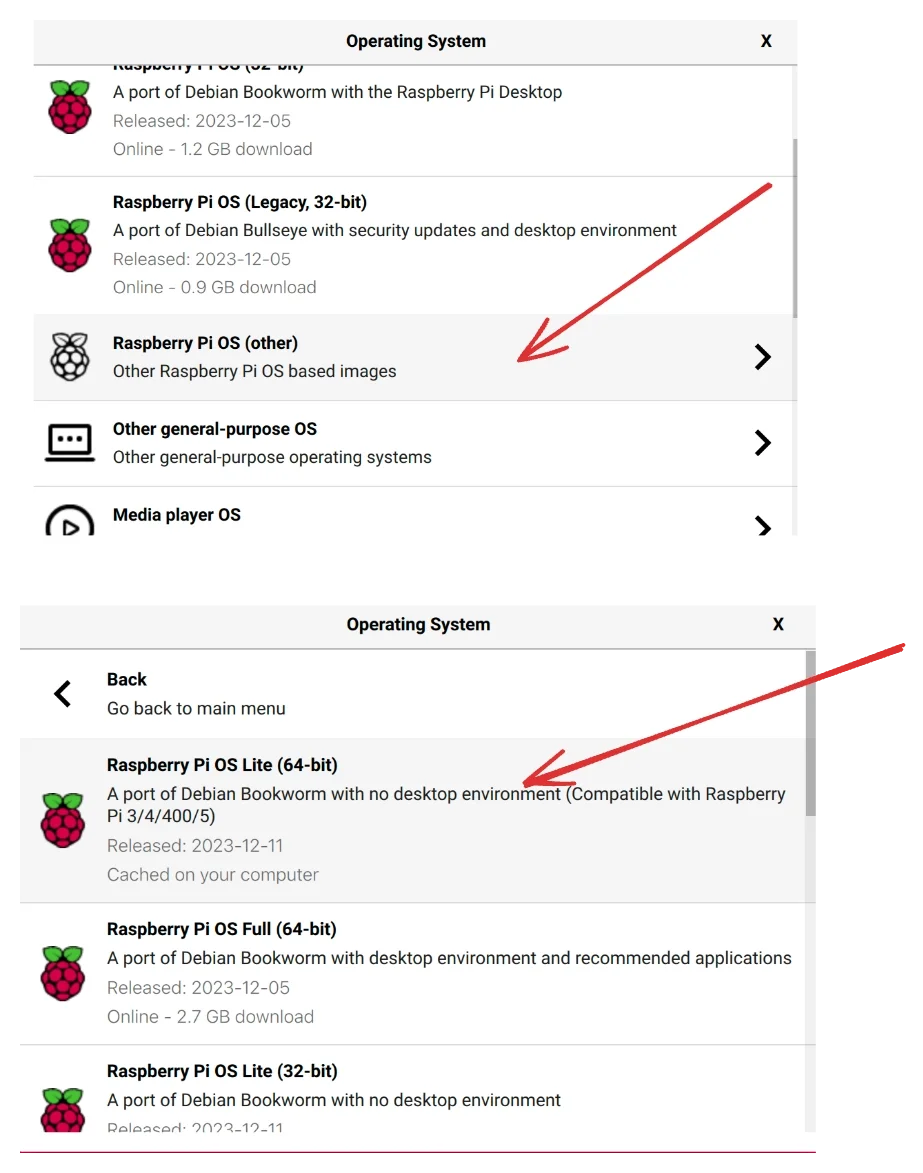
Choose an operating system. I chose **Raspberry Pi OS Lite (64-bit)**. “Lite” because I didn’t need the desktop environment. This is the recommended OS for a headless setup.
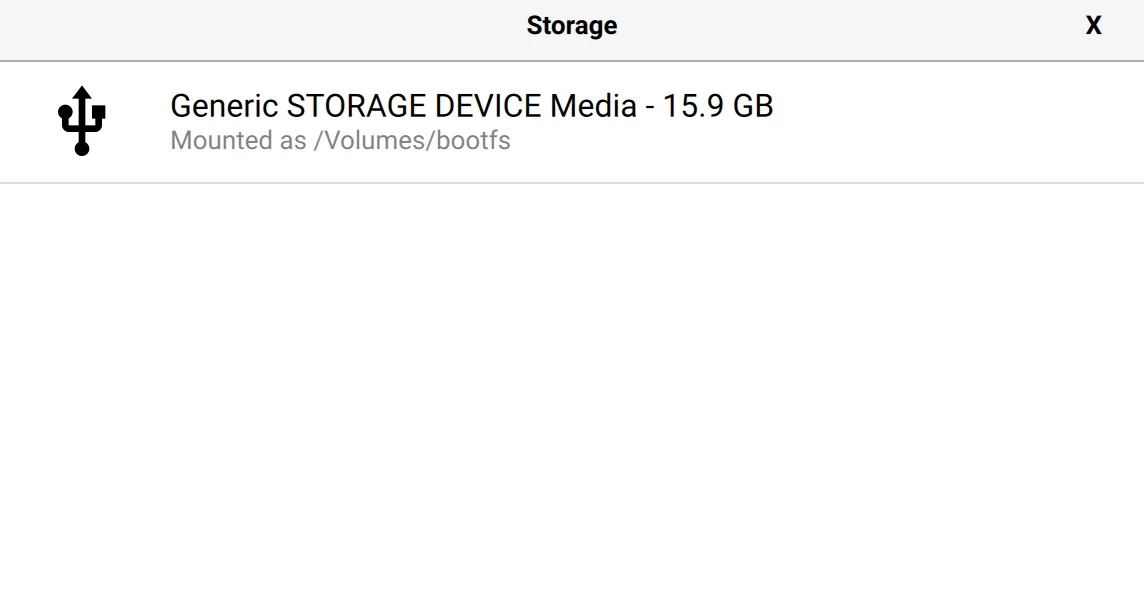
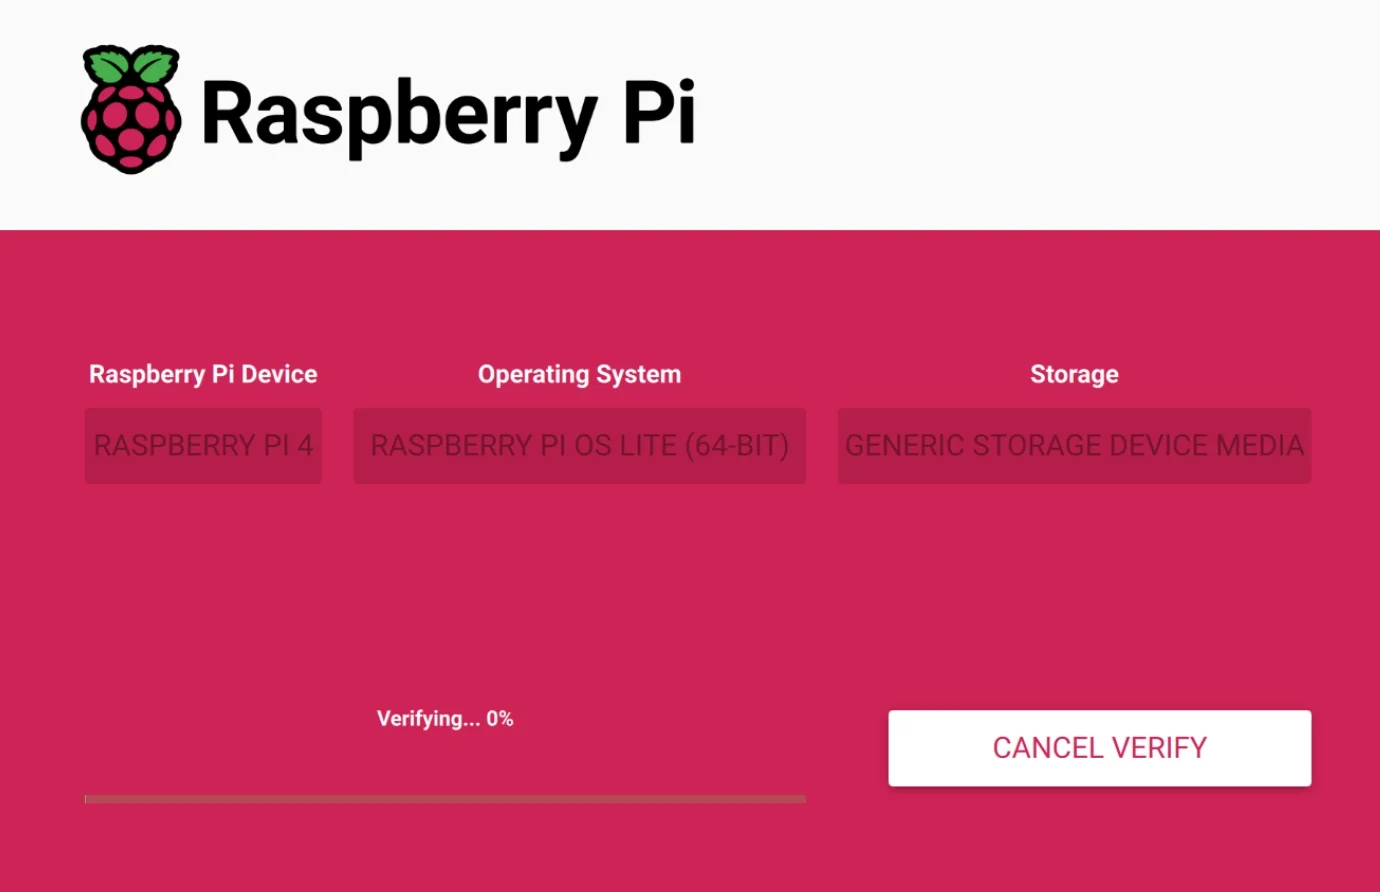
Choose the Storage. This is your SD Card (if you haven’t yet, connect it to your computer). Storage names can be confusing. Verify with the storage size (very important, as the booting process deletes all data).
The imager screen will look like this after selecting those 3. Then, click “Next”.
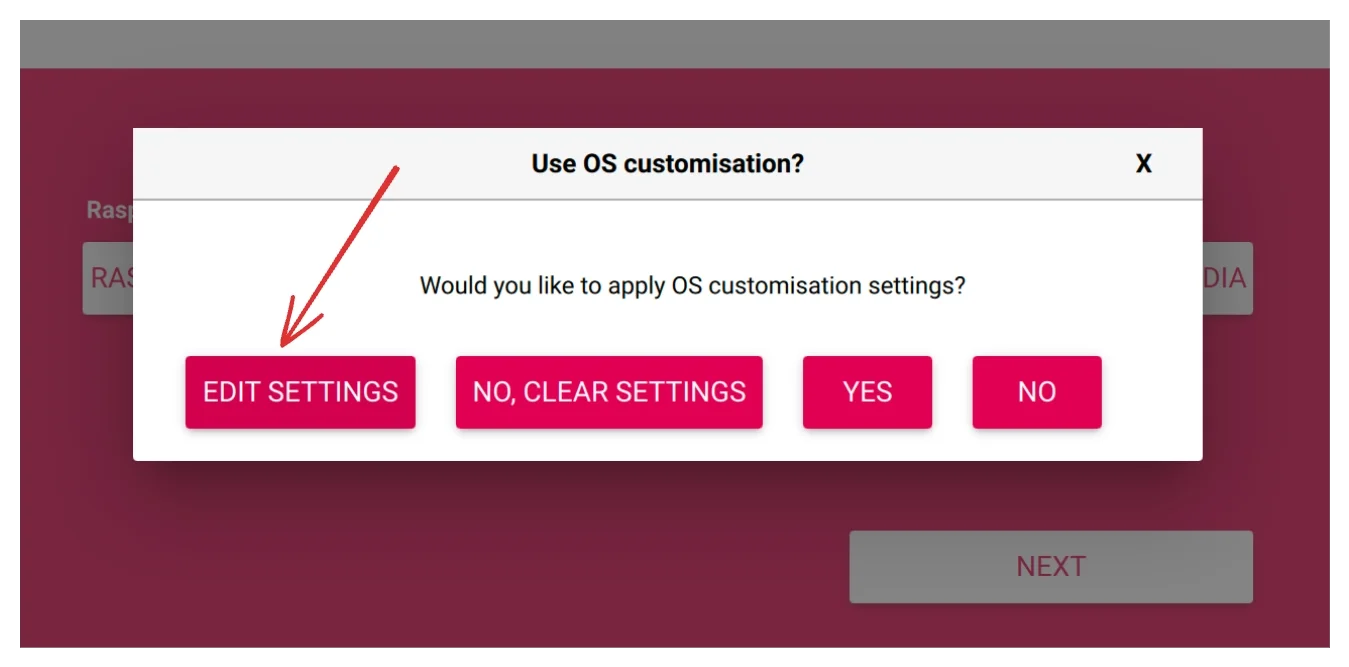
Click “Edit Settings”.
The imager is good enough to automatically fill in the Wifi details from your computer. Make sure these are CORRECT!
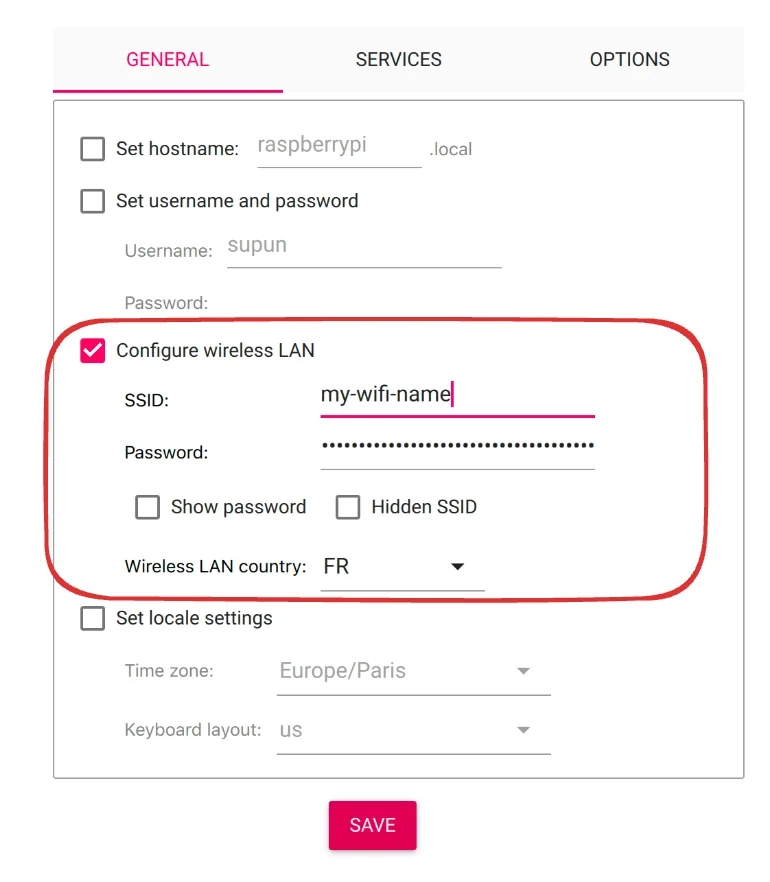
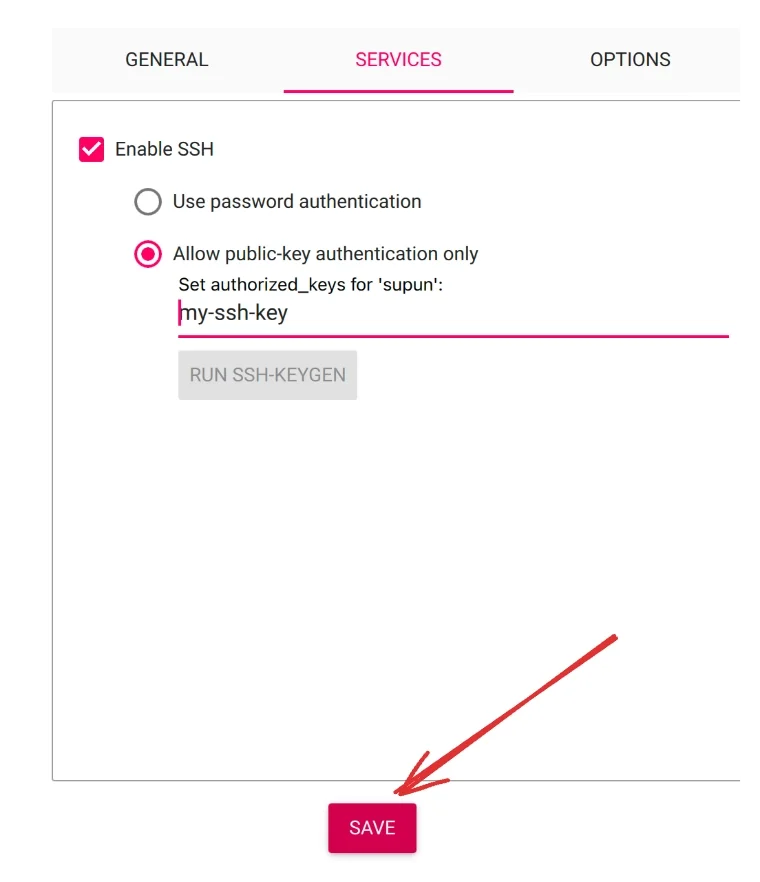
In the next services tab, choose how you want to connect to the Raspberry Pi. If you are already familiar with SSH, I recommend using public key authentication (add your public key in the field). Otherwise, set a password.
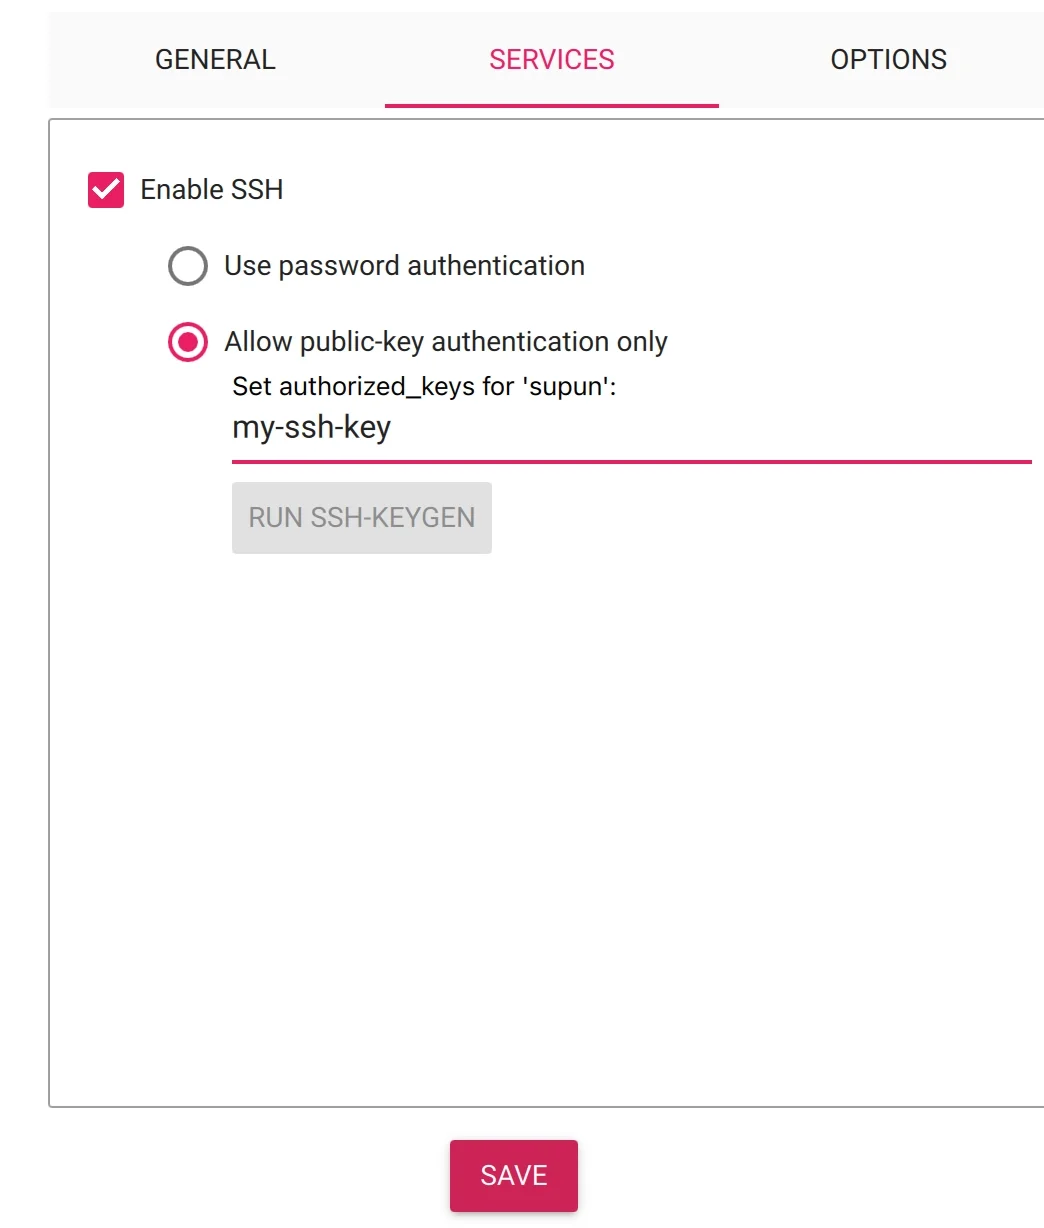
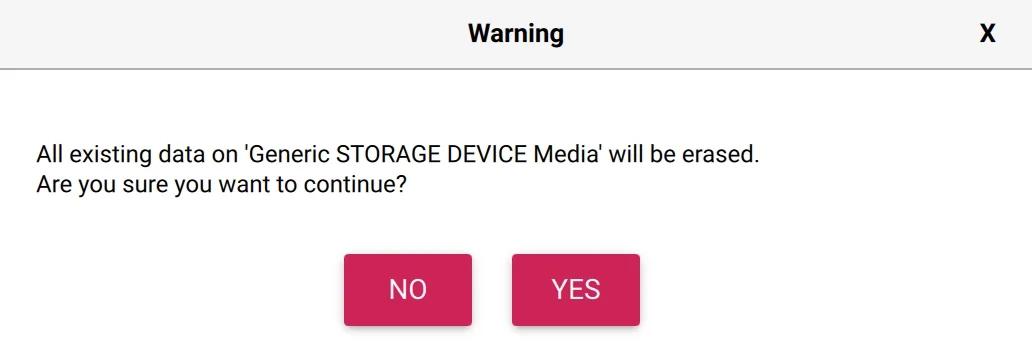
Click “Save”.
Then, “Yes”.
The imager will do its thing and boot the OS into the SD card.
Eject the SD card and remove it.
Plug it into your Raspberry Pi. The SD card slot is on the bottom side of the Pi.
Finally power the Raspberry Pi.
Wait a couple of minutes for the first boot.
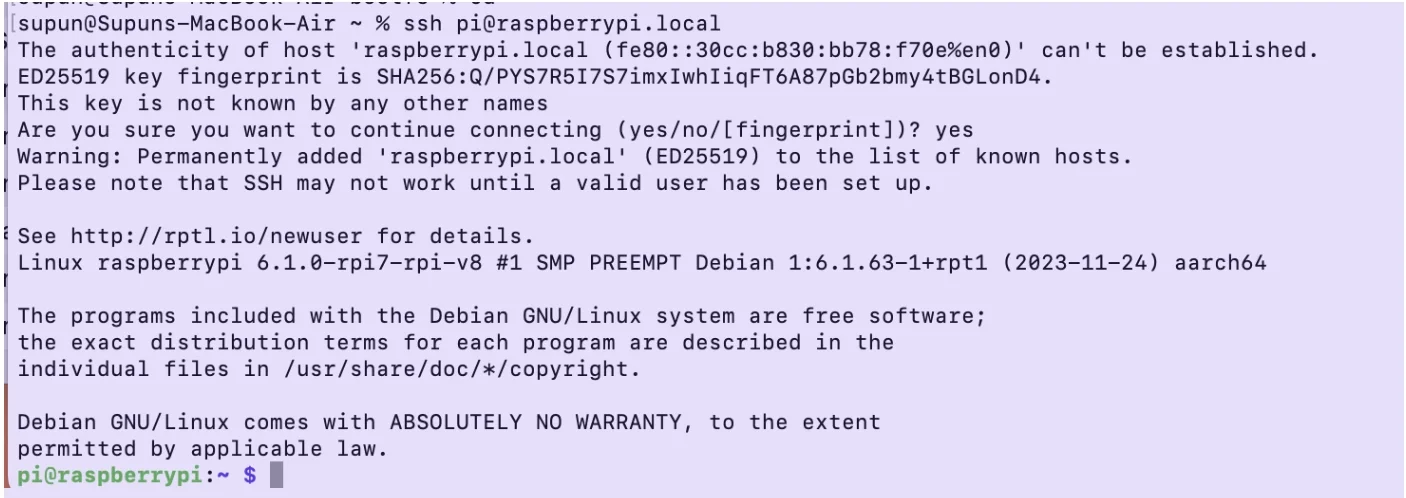
Then, open the terminal/command line on your computer and connect to the Raspberry Pi via SSH. If you used a password, you will be prompted to enter it.
ssh pi@raspberrypi.local
If all went well, you’ll be connected to your Raspberry Pi
Installing Pi-Hole
I decided to install Pi-hole directly on the server as this was my first time. I’ll probably move to Docker in the future, as it’s much easier if I wanted to run multiple apps.
Raspberry Pi has a [nice tutorial](https://www.raspberrypi.com/tutorials/running-pi-hole-on-a-raspberry-pi/) on how to set this up. I’ll explain the steps here. If you need a more in-depth understanding of the concepts, I recommend reading their tutorial.
curl -sSL https://install.pi-hole.net | bash
- **Continue** when warned about static IP address
- Interface: `wlan0`
- DNS Provider: OpenDNS
- Yes for **StevenBlack’s Unified Hosts List**
- Yes for **Install the Admin Web Interface**
- Yes for web server and PHP modules
- Enable query logging
- I selected the privacy model "show everything". I’ll maybe change this later.
Once the installation is completed, you will see the following details. You will need the login password to log into the admin panel. So, make sure to save it.
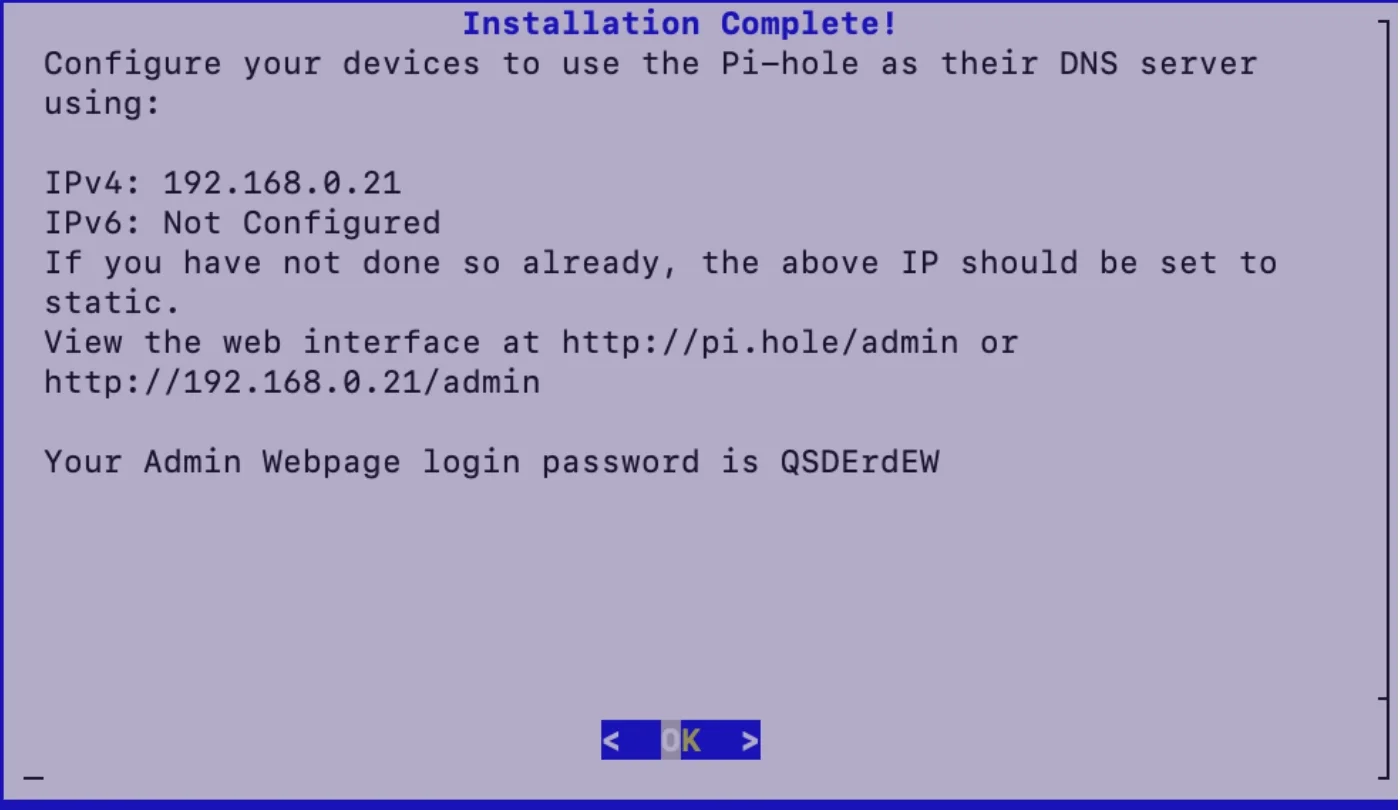
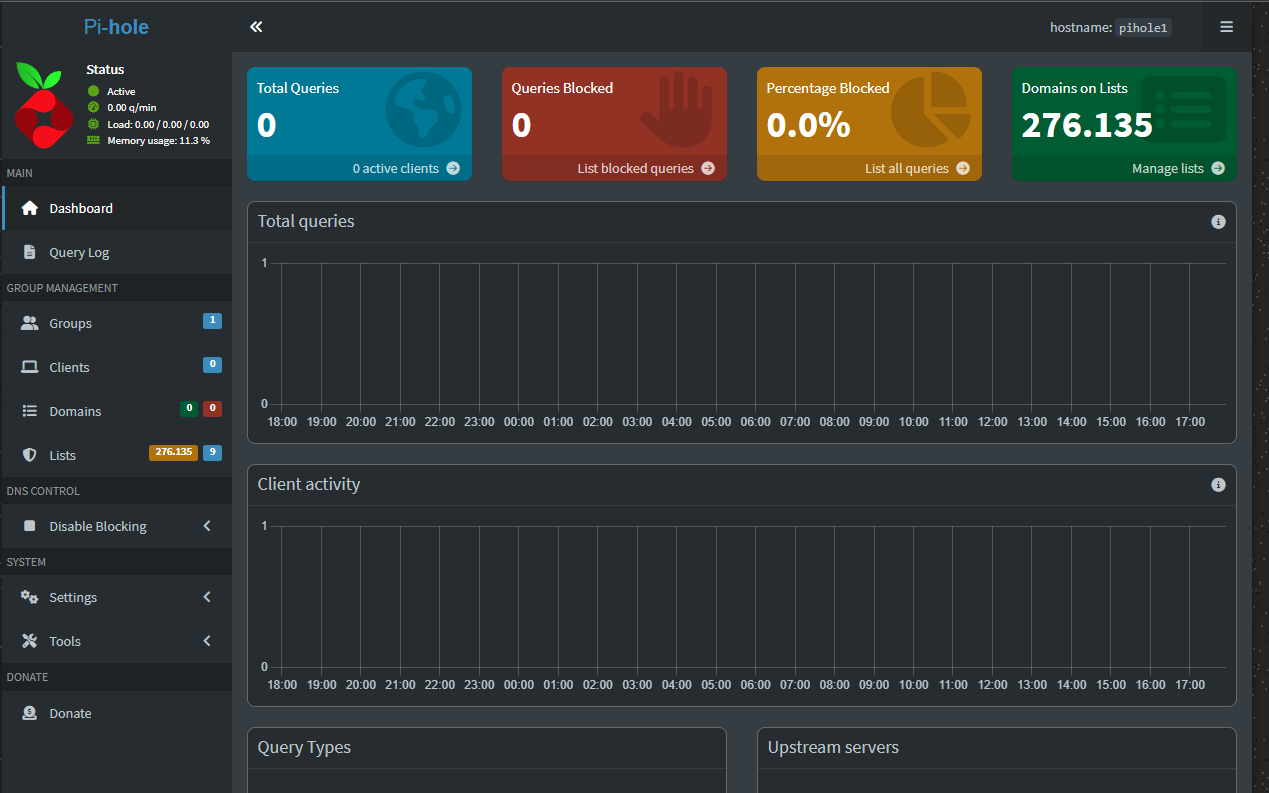
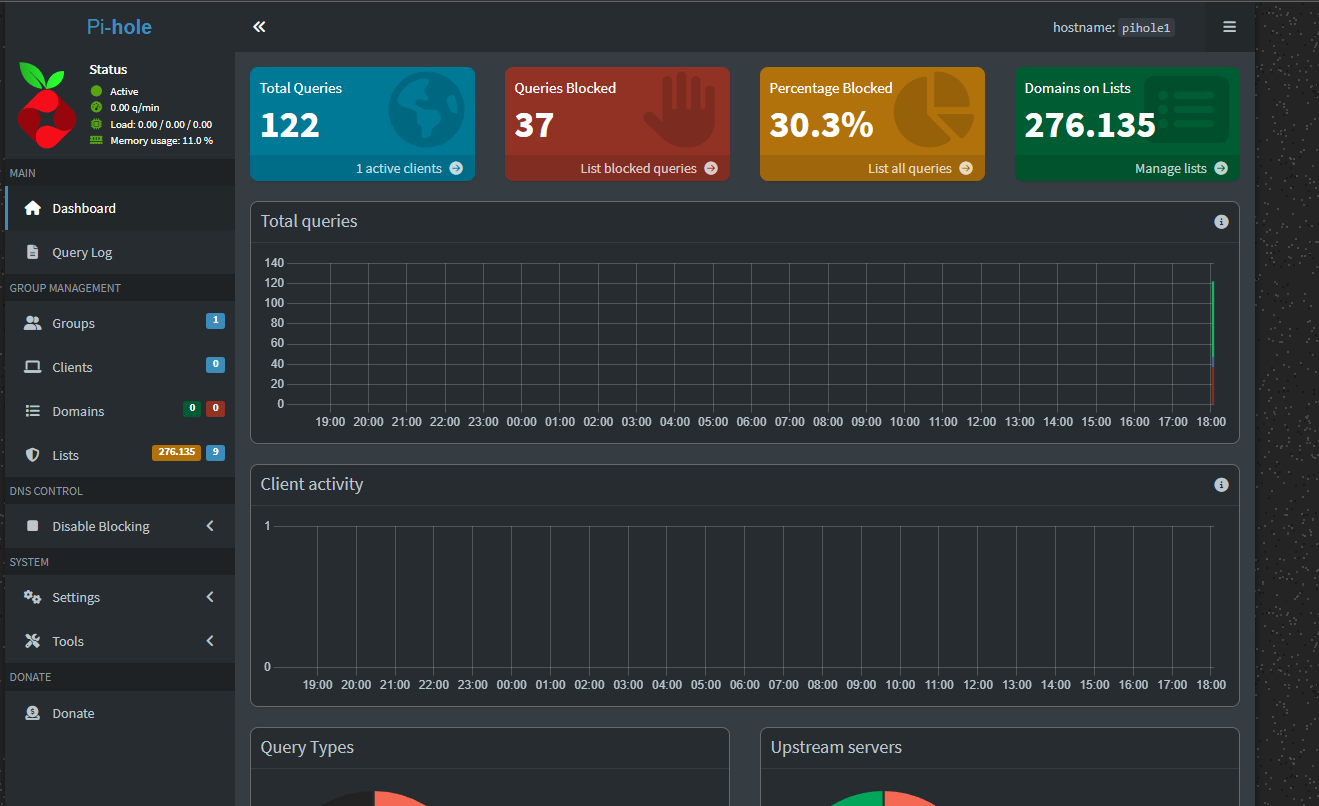
Next, visit the admin URL (IP version, not the `pi.hole/admin` one) and log in. You’ll see the Pi-hole dashboard.
Updating Router Config
It depends heavily on the ISP whether this is possible or not. In my case, since I’m using a Fritz!Box, it doesn’t allow me to set a different local DNS server—I'm limited to the one built into the modem. Because of that, I had to configure each PC to use the Pi-hole as its primary DNS server.
Go to Network and Internet -> Advanced network Settings.
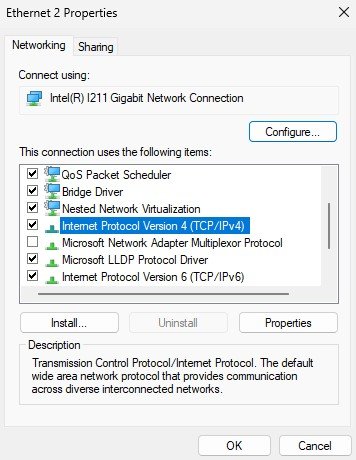
Then click twice on Internet Protocol Version 4.
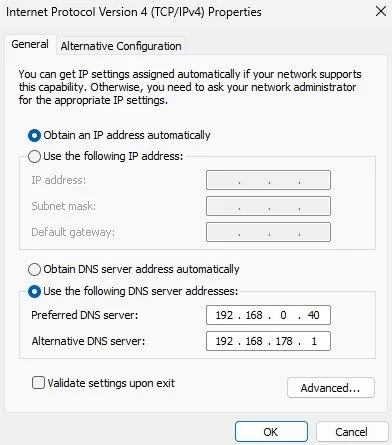
Set up the Pi-hole IP address to the static IP address you want.
Set up the Raspberry IP address to the static IP address on the command line with nmtui.
This video shows how to do it https://www.youtube.com/watch?v=qy1_jV1fgJU.
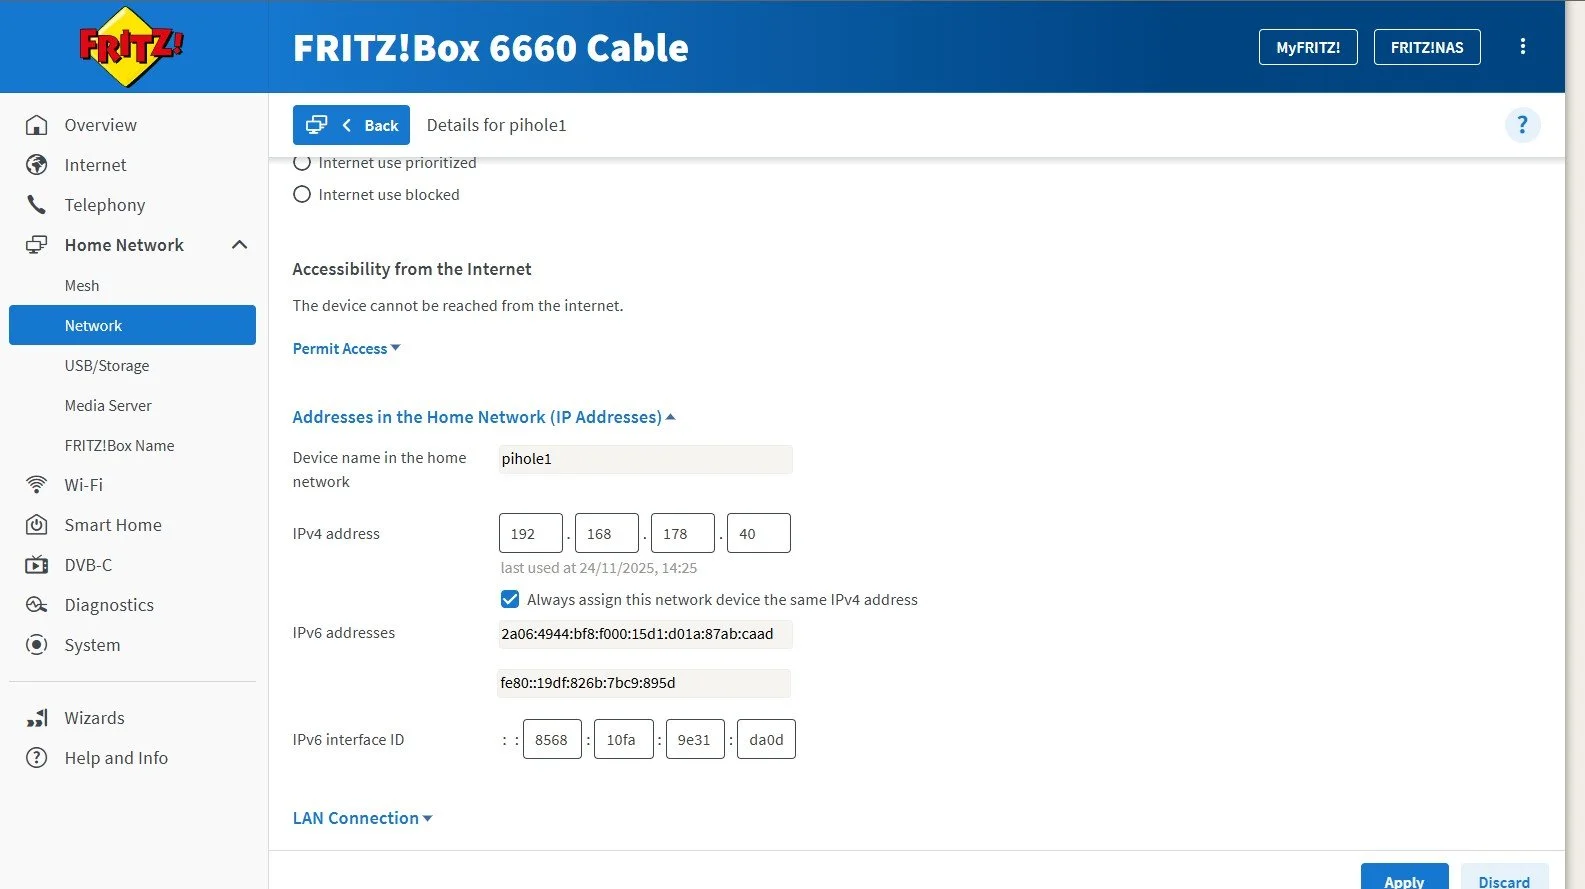
Then set the same static IP address on the ISP interface for the Raspberry Pi.
And, done! You should be able to visit `http://pi.hole`from your web browser to see the Pi-Hole dashboard.
And, all devices in your network should block most ads by default, without needing additional extensions.
Conclusion
I hope this helps you set up a Pi-hole server on your home network for ad blocking. It’s been a genuinely interesting project for me. Pi-hole has been running on our network for a few weeks now, and it’s worked flawlessly—no maintenance needed so far.
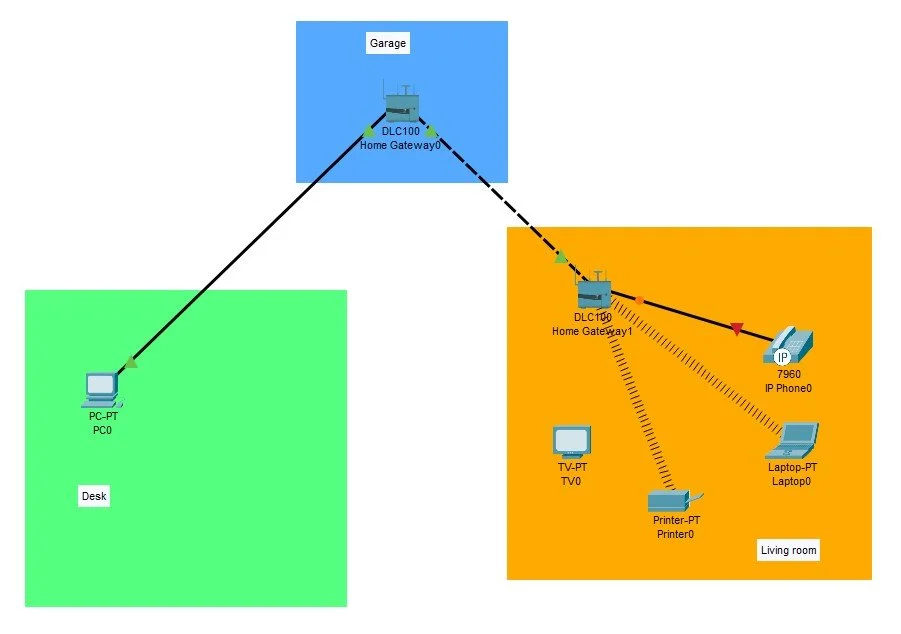
My home network went from looking like this.
to this

Taking Pi-hole Further: Adding Unbound for Recursive DNS
Installing Unbound alongside Pi-hole turns your setup into a fully independent, privacy-focused DNS system. Instead of relying on an external DNS provider (like Google or Cloudflare), Unbound works as a local recursive DNS resolver, meaning it queries the root servers directly and resolves domains itself. This improves privacy because no third party can see your DNS requests, and it can also speed up lookups after the initial query thanks to local caching. Overall, pairing Pi-hole with Unbound gives you a faster, more secure, and more private DNS setup.
To install Unbound, SSH into the Pi-hole and run this command:
sudo apt install unbound -y
Next, we need to add a whole wall of text to an Unbound configuration file – create this file by running this command to edit it:
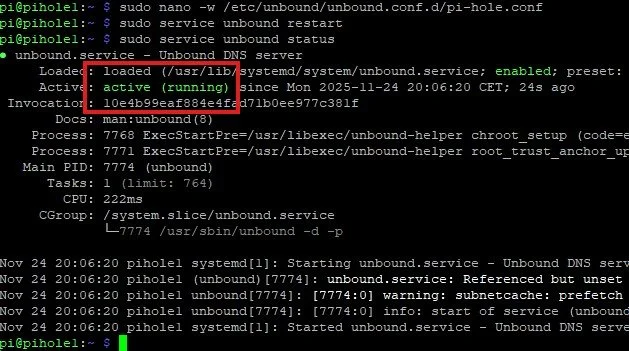
sudo nano -w /etc/unbound/unbound.conf.d/pi-hole.conf
Copy all of the text – you can find text in the Pi-hole documentation Here.
Once you’ve pasted in that text, hit CTRL+X followed by Y and ENTER to save and exit. Then we’ll restart the Unbound service:
sudo service unbound restart
If you then run:
sudo service unbound status
You should see that the Unbound service is active (running).
Note in the Unbound config that we pasted in a few steps ago that we’re running Unbound on IP 127.0.0.1 (localhost) and port 5335. In order to test that Unbound is working, we can send a DNS query to that IP and port:
dig example.com @127.0.0.1 -p 5335
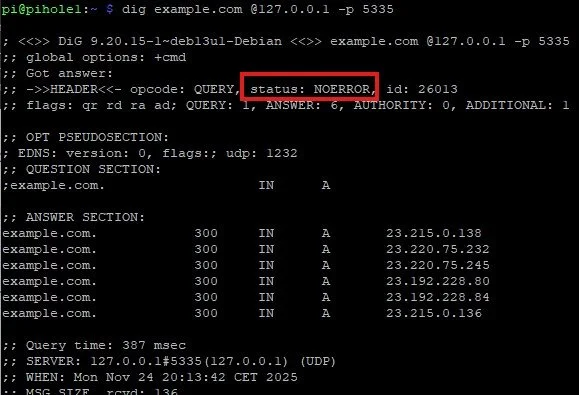
In this case, we can see that the status is NOERROR and we received an IP address for our query. Looks like we’re ready to use Unbound with Pi-hole!
Using Unbound with Pi-hole
Log into the Pi-hole Admin GUI and navigate to Settings –> DNS.
Uncheck the boxes next to Goolgle (or whichever DNS provider you picked during the install wizard), and then add a new custom entry for Unbound:
127.0.0.1#5335
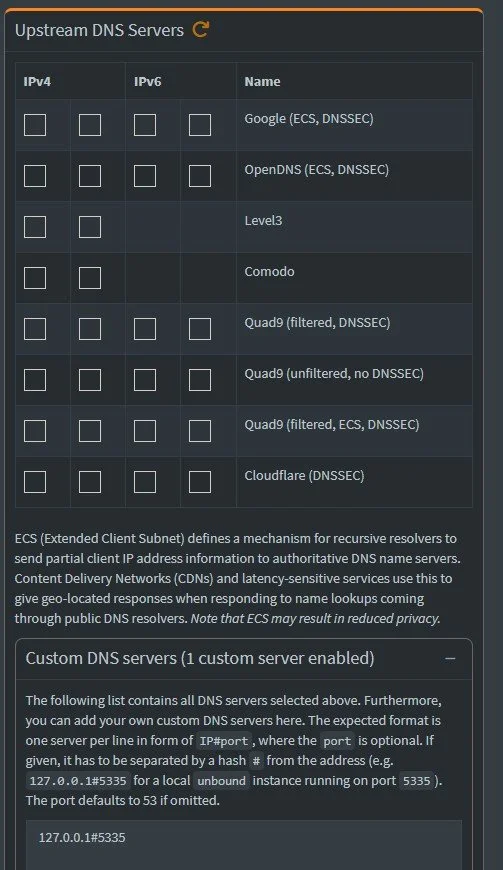
Click ‘Save’ at the bottom of this screen. All done!
Sources
https://www.youtube.com/watch?v=cE21YjuaB6o
https://pi-hole.net/
https://docs.pi-hole.net/guides/dns/unbound/
https://www.crosstalksolutions.com/the-worlds-greatest-pi-hole-and-unbound-tutorial-2023/