Active Directory Lab (WS2019)
Building an Acitve Directory lab
I’m building an Active Directory lab because it’s at the core of most corporate networks, and I want to understand how it really behaves—how authentication works, how permissions stack up, how Group Policy affects machines, and where common misconfigurations come from. Instead of relying on theory, a lab lets me see all of this in action.
It also gives me a safe place to experiment with the same techniques and issues that show up in real environments. I’m not trying to make anything flashy; I just want a practical, hands-on setup that helps me get comfortable with the systems companies depend on every day.
Lab Network Overview
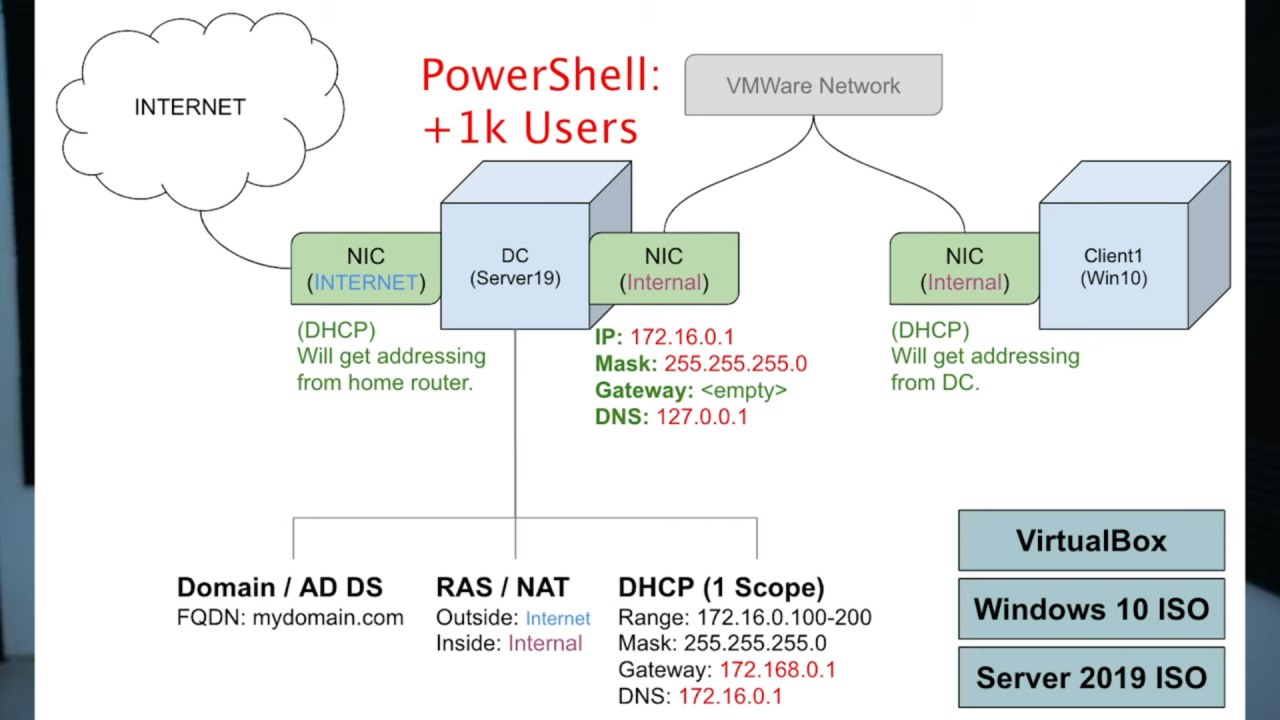
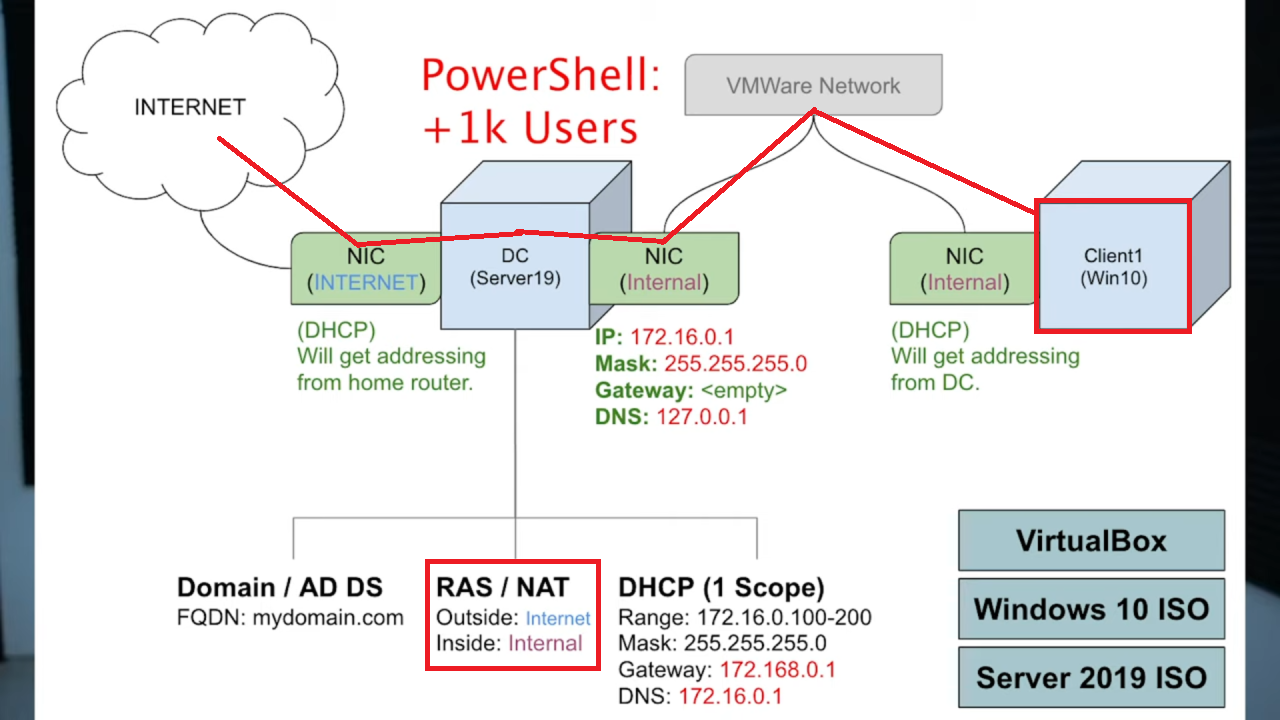
We will be using VirtualBox to create two virtual machines: one for the Domain Controller (DC) and one for the client system. The DC will run Windows Server 2019, while the client machine will run Windows 10.
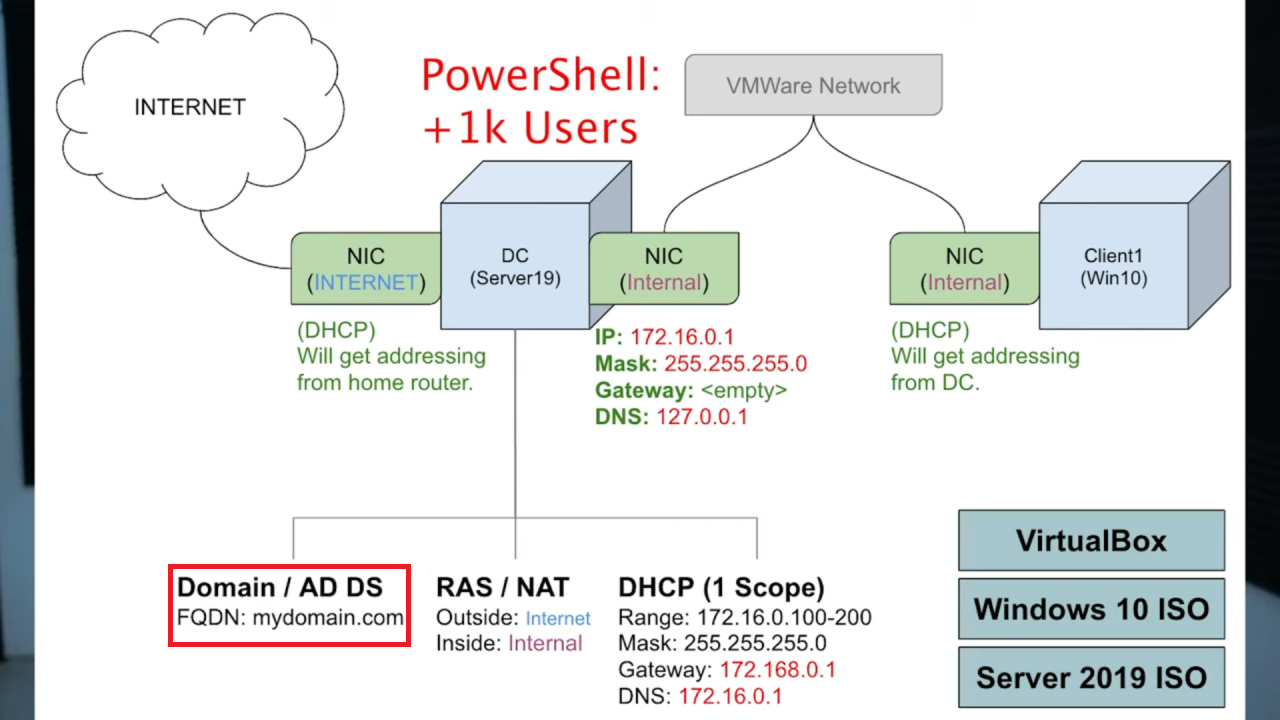
The Domain Controller will host Active Directory and will be configured with two network adapters. The first adapter will connect to the external network (the internet), and the second will connect to VirtualBox’s internal/private network. The client machines on the internal network will receive their IP addresses from the DC, while the server’s external adapter will obtain its IP address from the home router.
After setting up the networking, we will install Active Directory on the server and create our domain. We will then configure RAS/NAT to allow the internal clients to access the internet through the server, and set up DHCP to automatically assign IP addresses to the clients.
Windows Server Setup
First, I downloaded two software's. namely windows 10 and windows server 2019 iso. Another program that is needed to run all the software's is Virtual box. For the project I used the virtual box for windows so some of the screenshots might look a little different from user to user. Alongside the virtual box I also used the virtual box extension pack to gain USB 2.0 access like a flash drive for example.
Link for windows 10: https://www.microsoft.com/en-us/software-download/windows10ISO
Link for windows server 2019: https://www.microsoft.com/en-us/evalcenter/download-windows-server-2019
Link for virtual box and extension pack: https://www.virtualbox.org/wiki/Downloads
Windows Server Virtual Machine
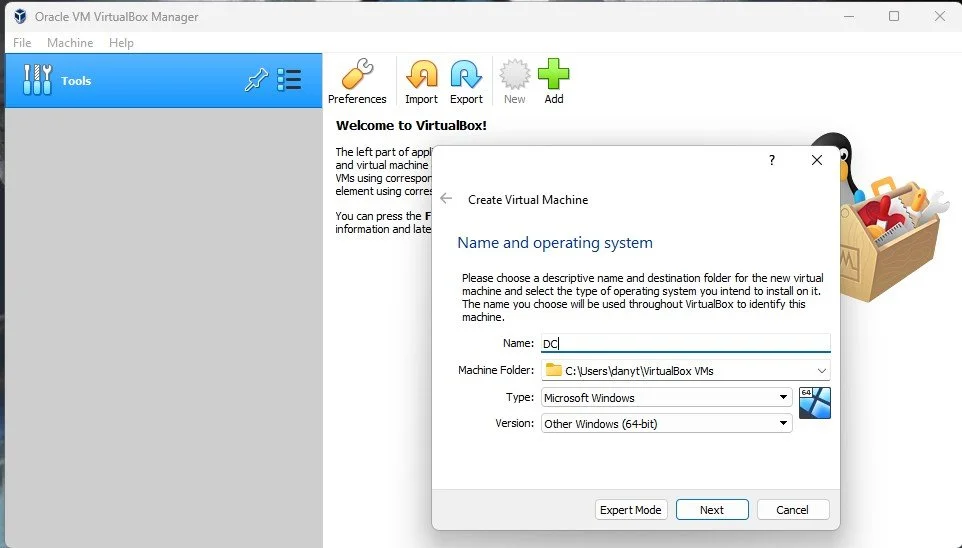
Create a new virtual machine for the windows server 2019 with name DC and OS version Other Windows (64-bit)
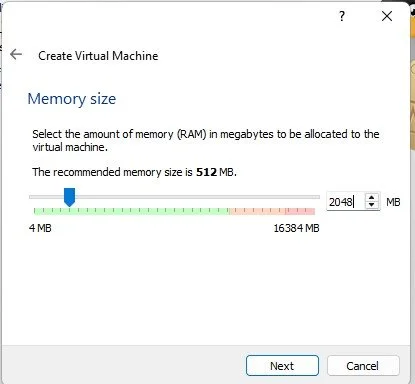
Use 2048MB of RAM which equates to 2 GB and create a disk with 20GB, then select next twice.
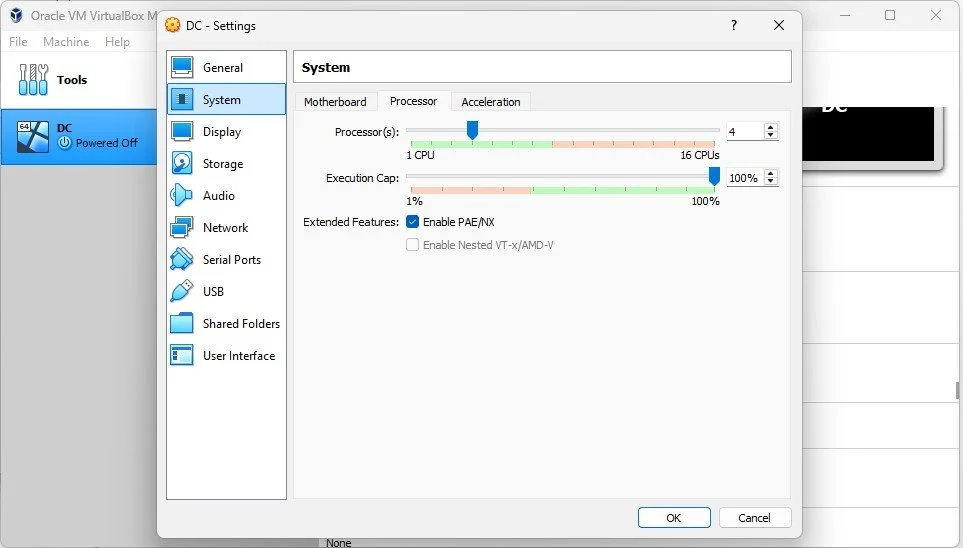
Put at least 4 core cpu’s. I am using 8 for my lab.
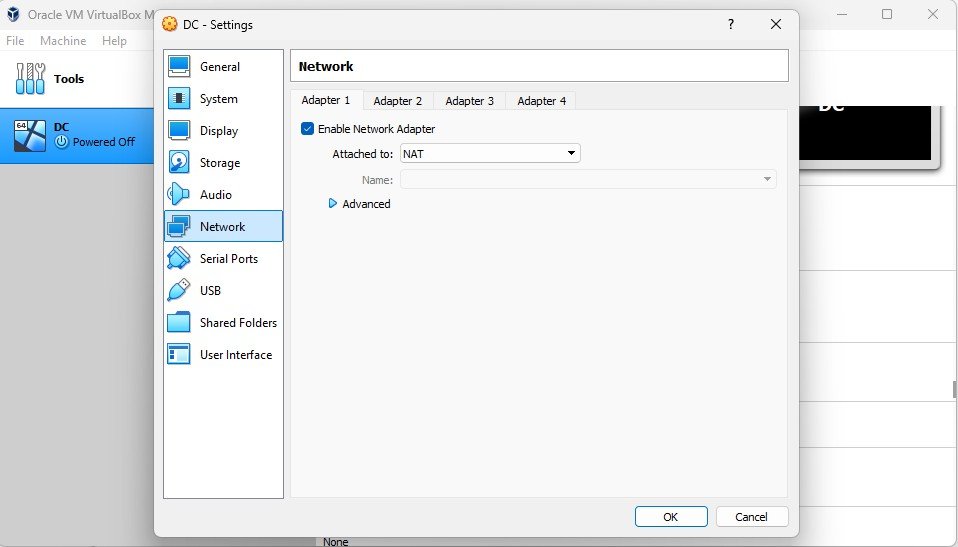
The first adapter is going to be running NAT for the internet.
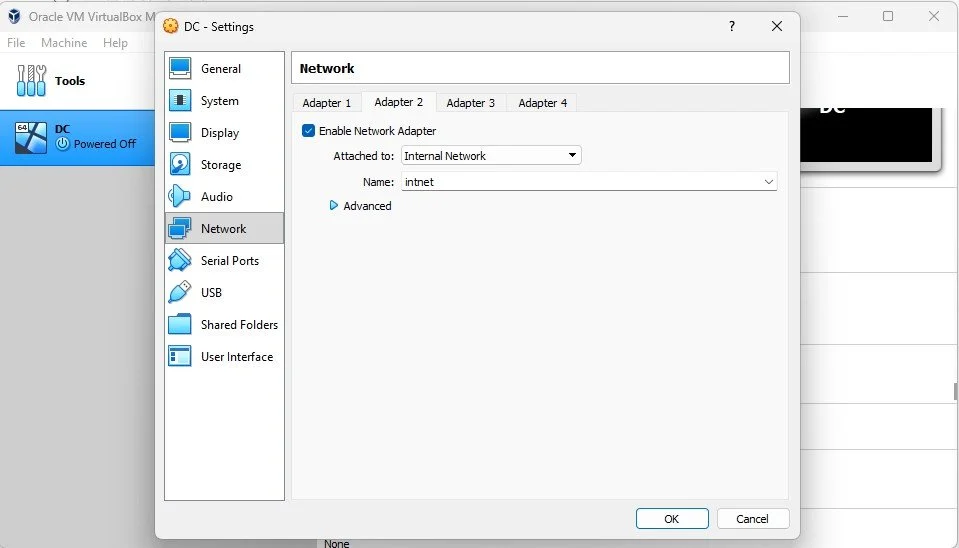
We are then going to add one more adapter for the internal network.
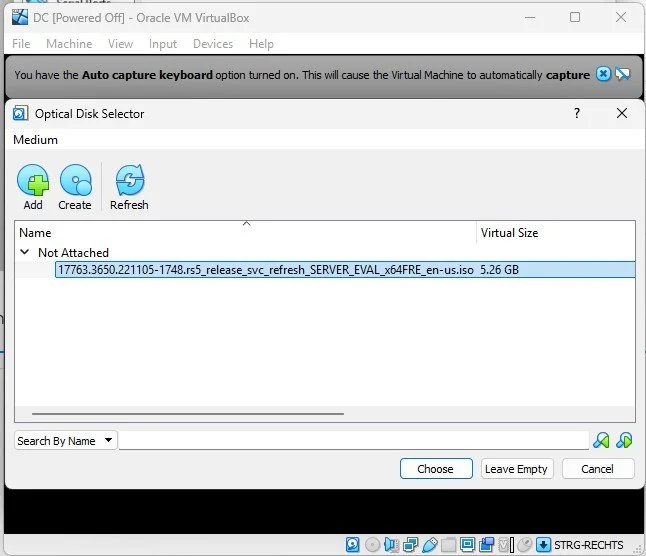
When starting for the first time click twice on the new virtual machine to install the ISO. Since it is still empty, you are going to chose the Server ISO from the place where you have downloaded it, select it and then run it.
Then chose the language you want and click Next and Install.
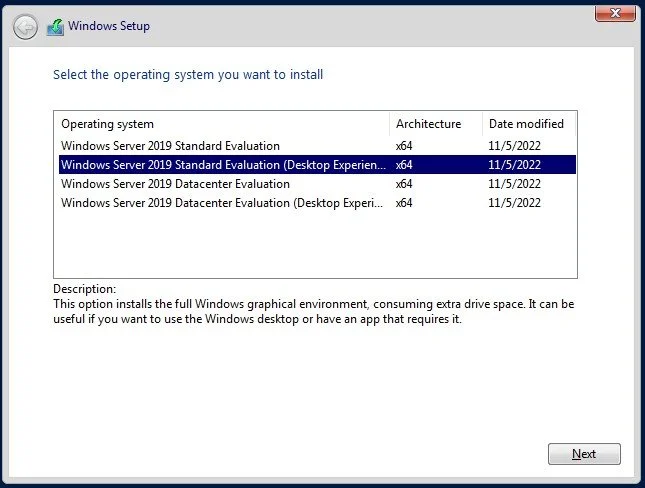
Chose Windows server 2019 Standard Desktop to get the desktop view otherwise we only get the command line. Then select the box with the license agreements and click on next. Chose custom install unless you have already installed a version of windows server on the vm.
Then select the drive with the 20Gb and let it install the rest of the features. After the installation it is going to reboot.
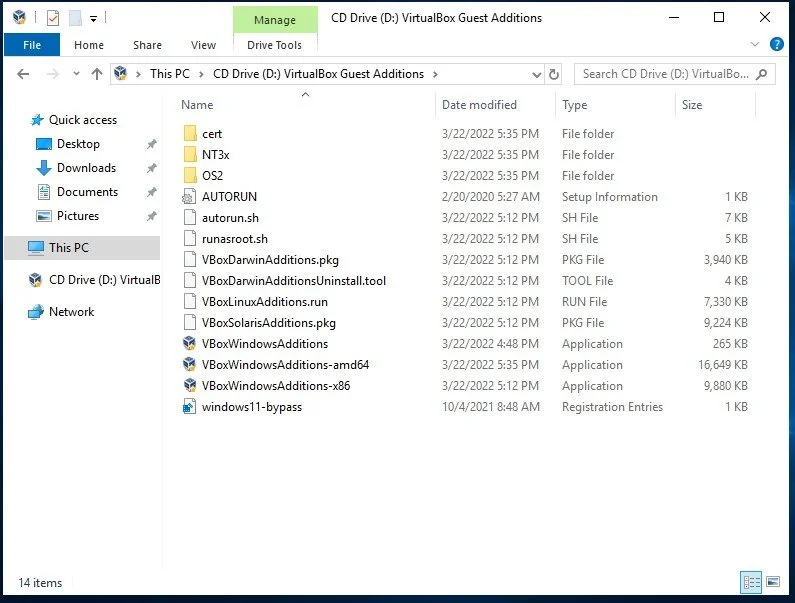
After logging in for the first time, go to this PC and then click on CD Drive (D:) VirtualBox Guest Additions, click on it twice and then execute the VBoxWindowsAdditions-amd64. Click twice next and then install it. Then reboot the OS. This will make the virtual machine slightly faster.
Now we have to manually set up our internal NIC on the virtual machine for our clients. The external NIC is going to get an IP address through the home network. Go to Settings->Ethernet->Change adapter options.
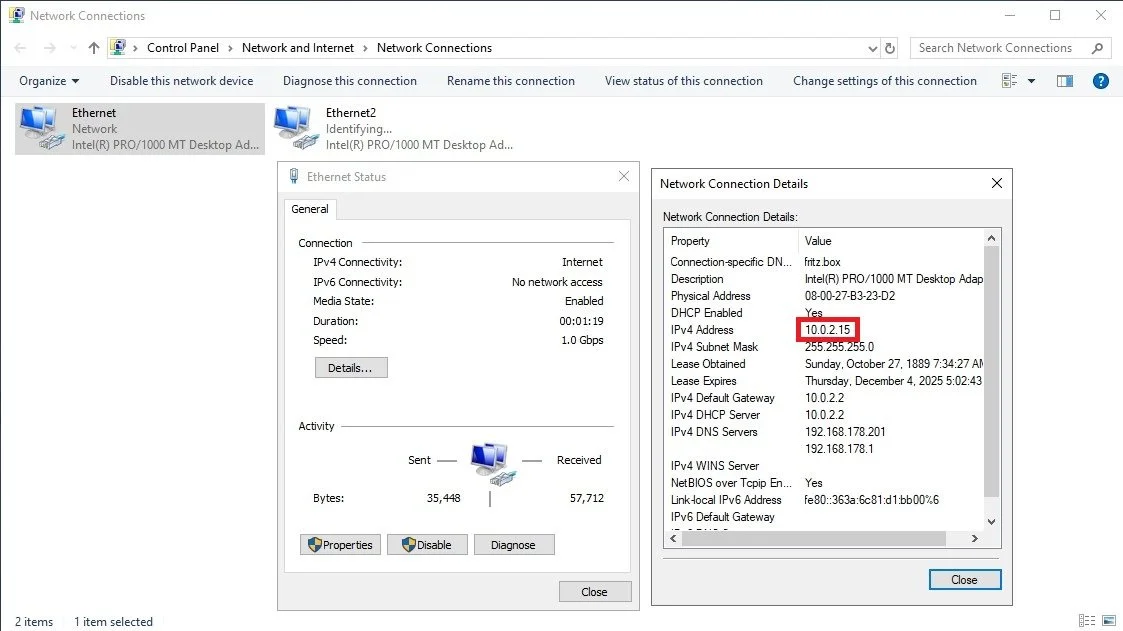
There are two Ethernet adapters, go to Status to and then details of one of them to see which one is connecting the server to the internet, in my case it is Ethernet as i’s IP starts with 10.

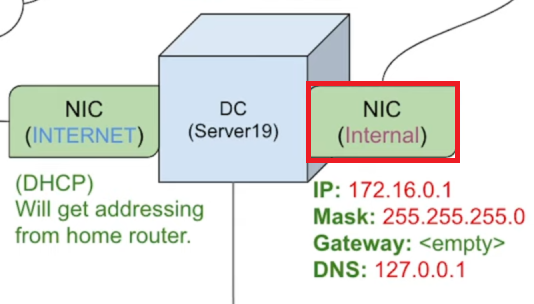
We will rename the firtst NIC to _INTERNET_ and the second one to X_Internal_X.

Then we are going to give our internal NIC an IP address. It’s going to be 172.16.0.1 and mask 255.255.255.0 and we are not going to put a default gateway because the domain controller is going to serve as it. Lastly as DNS server we are going to put the loopback address 127.0.0.1, alternatively, we could also put the IP address of the NIC adapter 176.16.0.1.
Before rebooting again we are going to rename the windows server to DC.

Right click the start menu and then click System. Click on Rename the PC and then write DC. Afterwards reboot PC.
Domain / AD DS
Next step, we are going to install Active Directory Domain Services on the server and create a domain.
On the Server->Dashboard click on Add roles and features. The Next->Next

The pick the DC server and click next.

Add Active directory domain services, click next till you see install, then install it. This process can take a while.
We have now installed the Active Directory Domain Services but not yet created the Domain itself.

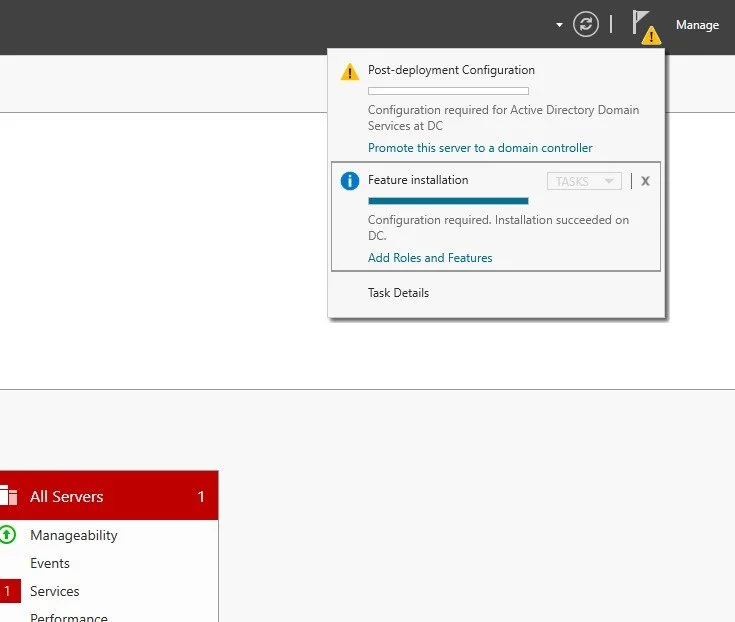
So we are going to promote this server to domain and then give it a domain name with add new forest. Then use the domain name mydomain.com, click next a bunch of times and then install. It is then going to automatically reboot.
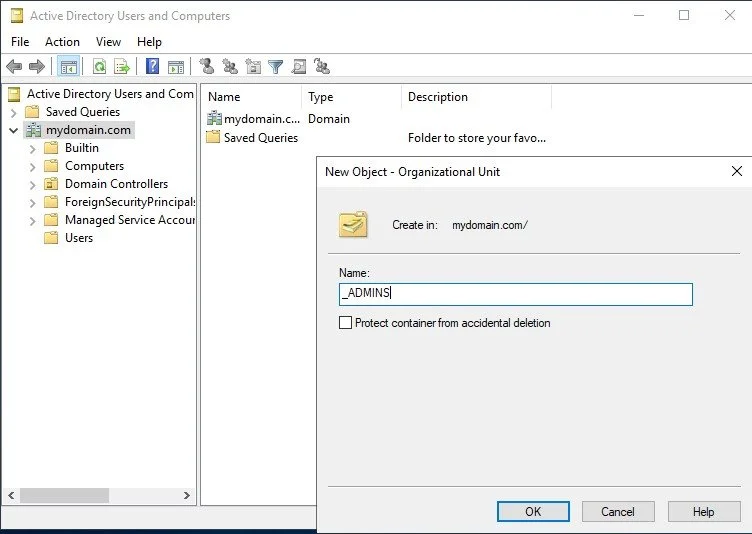
After the reboot, we go and create an organizational unit on the active directory users and computers, to be able to put a admin account. In the organizational unit you can manage what each object is suppose to manage and what group policies should apply to it.
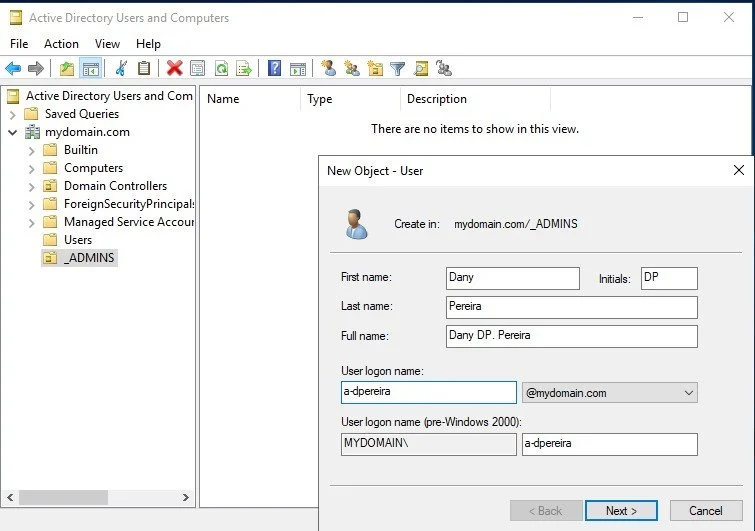
Create a new user in the _ADMINS folder with your name, also create a password, put the password to never expire and click finish.
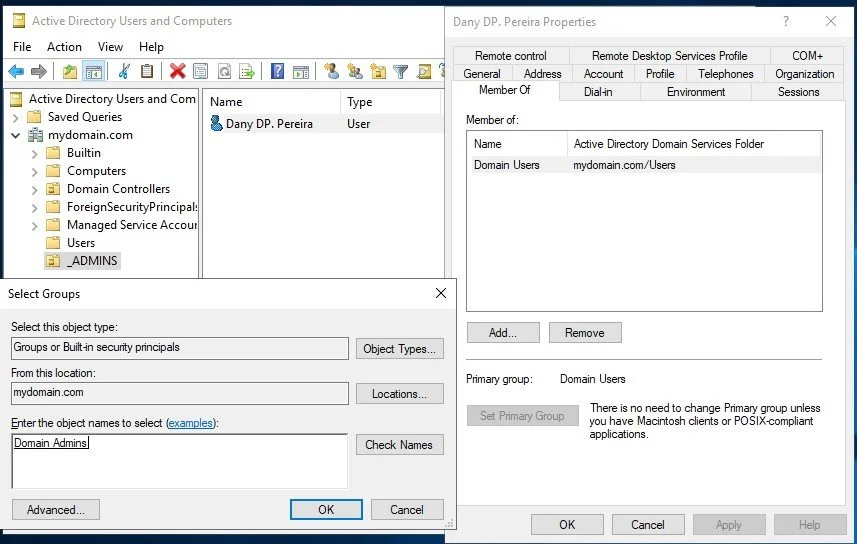
To make the user an admin we have to go to properties of the user, then go to member of, click add, and put in domain admins, apply it, like that the user becomes an admin. To be able to use it we have to first log out and log into the server with the new admin user account.
RAS / NAT
Now we are going to install RAS/NAT. The purpose of it is to allow the client to be on this virtual private network and have access to the internet through the domain controller.
For that we have to go back to add roles and features. Select in roles Remot Access.
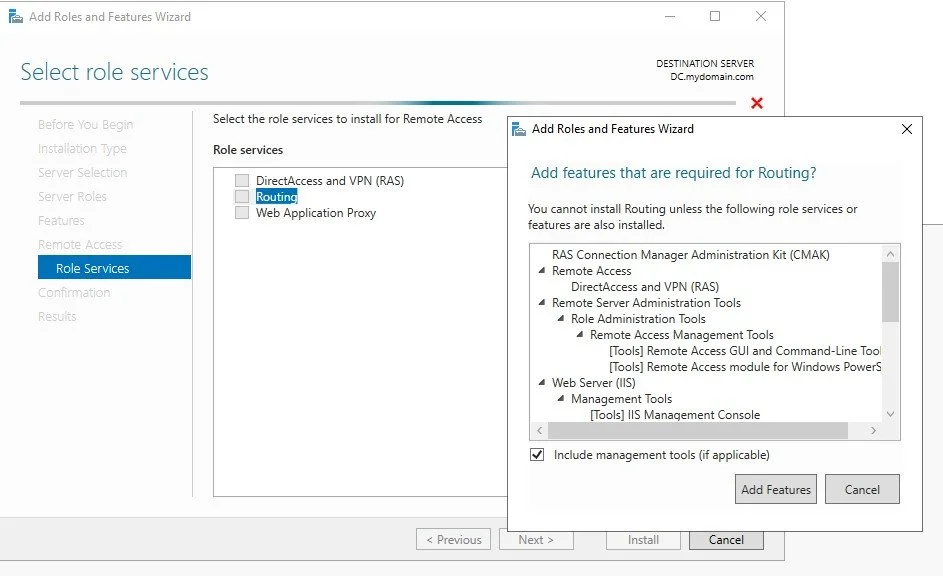
Click on Routing and add feature. Click next, and then install.
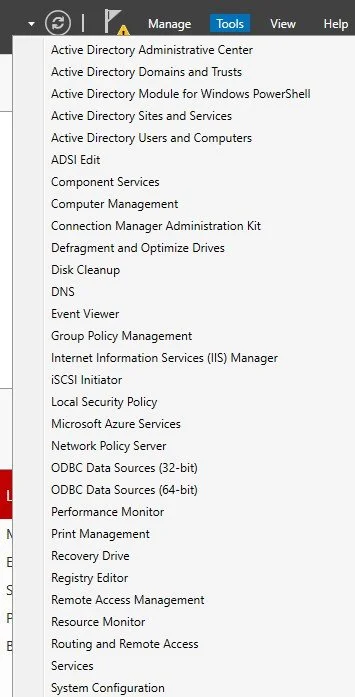
Then select routing and remote access from tool on the server manager dashboard.

Then right click on DC local and then click on configure and enable routing and remote access. Go to NAT to allow internal clients to use the internet.

Use the NIC adapter that is going to be used for the internet connection.

The green dot on the DC local means that the domain controller is now configured.
DHCP (1 Scope)
Next step is to install a dhcp server to be able to assign IP addresses to our clients. To do so we are going back to the Add Roles and Features.

We select the DHCP Server and then Add features, lastly install it.
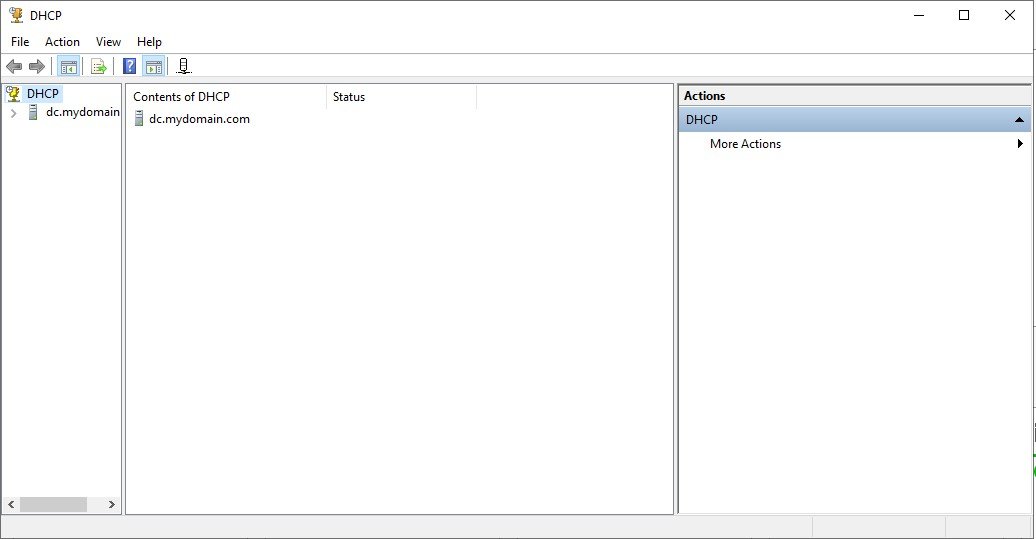
After installing we are going to change the scope of the DHCP. You can change the scope under tools->DHCP.

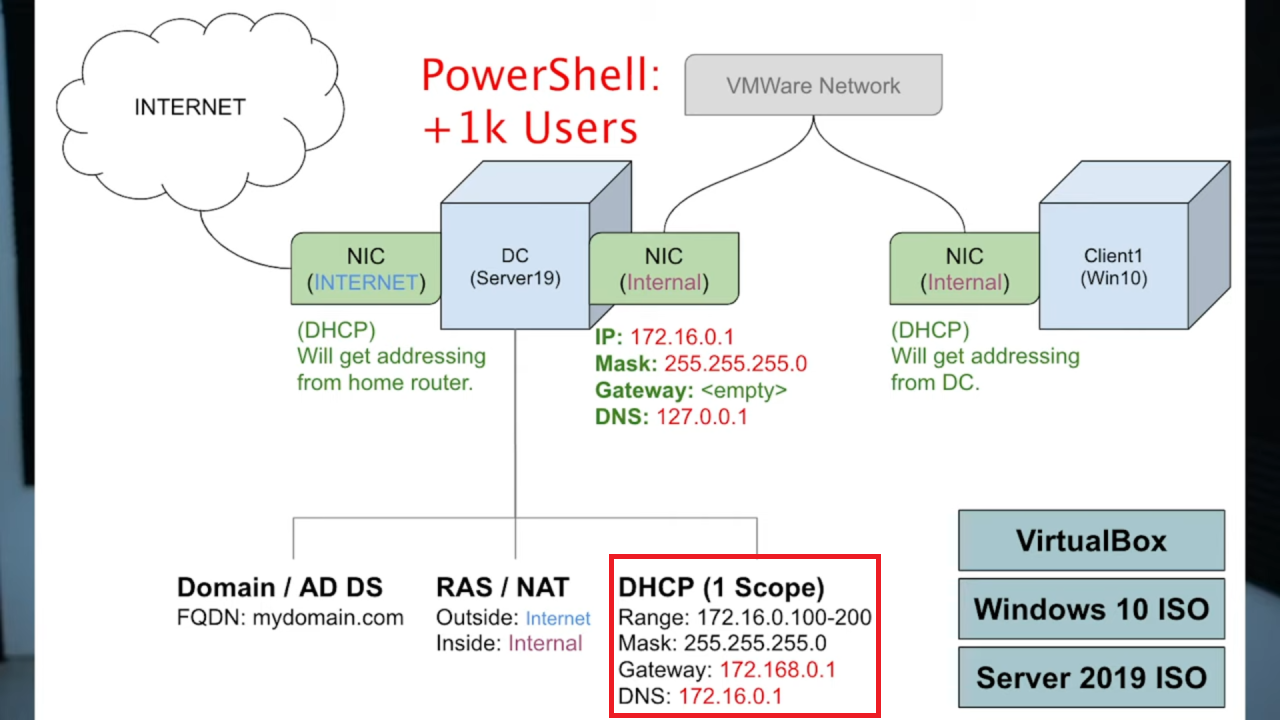
Right click on IPv4 and select new scope. Then select the range from 100 to 200 just like it is on the diagram.
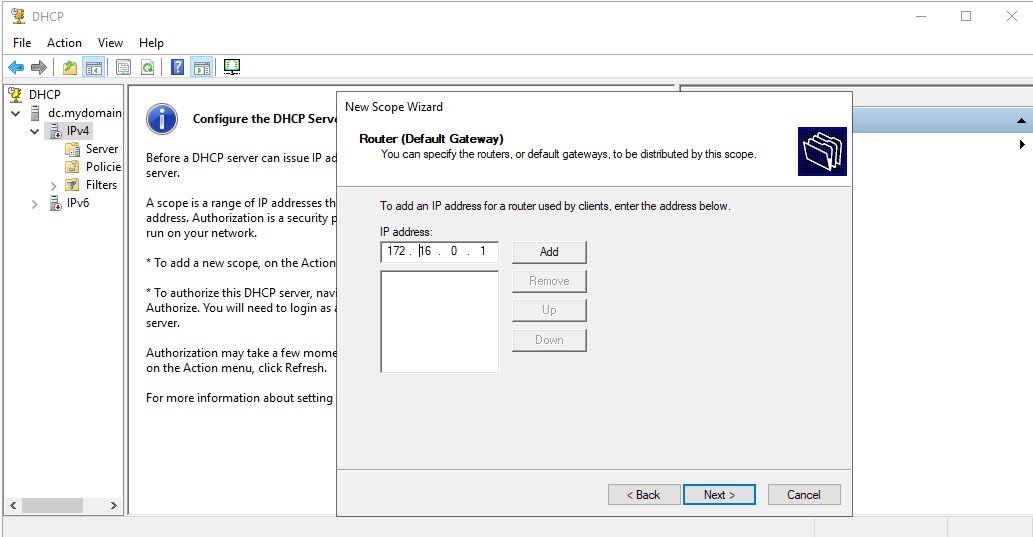
We use here for the clients on the virtual private network the DC’s IP as the default gateway. Please do not forget to click add. At the end click yes to activate the scope.
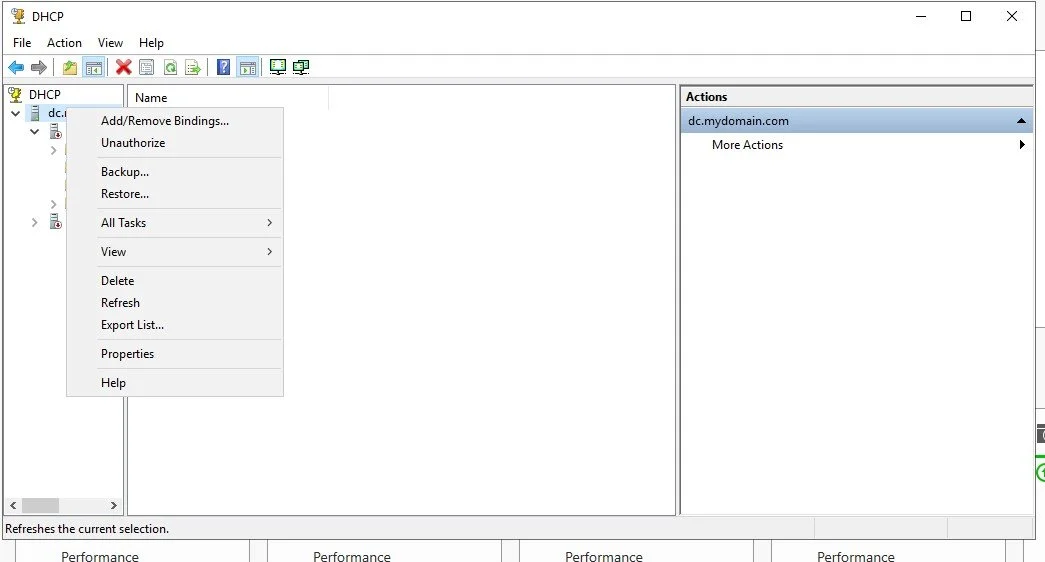
Right click on dc.mydomain, select authorize, then right click again and refresh.
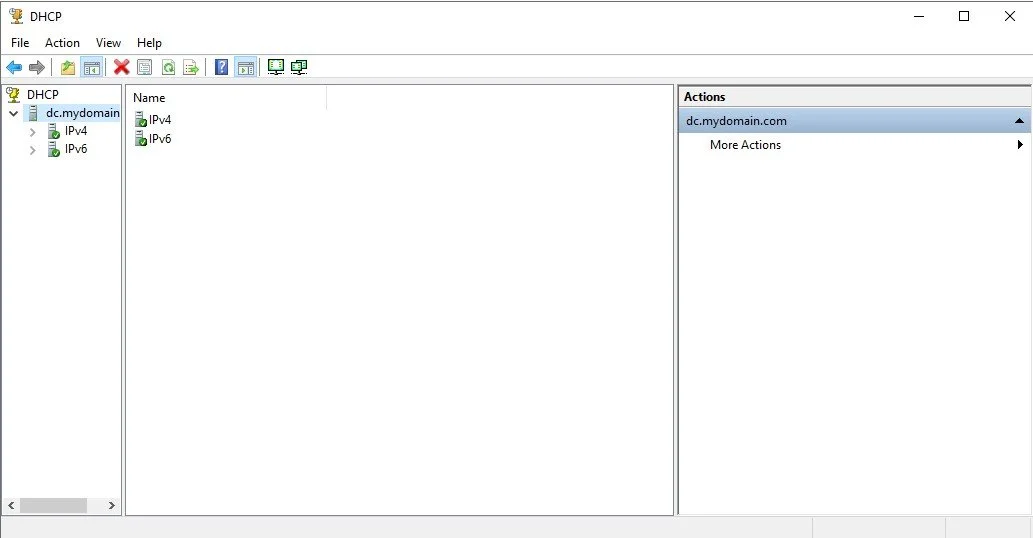
At the end the IPv4 and 6 should have a green circle.

under the scope of IPv4, we can select Address Leases and see all the IP addresses leased to the clients. In this case since we haven’t created any clients yet there are no IP addresses that have been assigned yet.
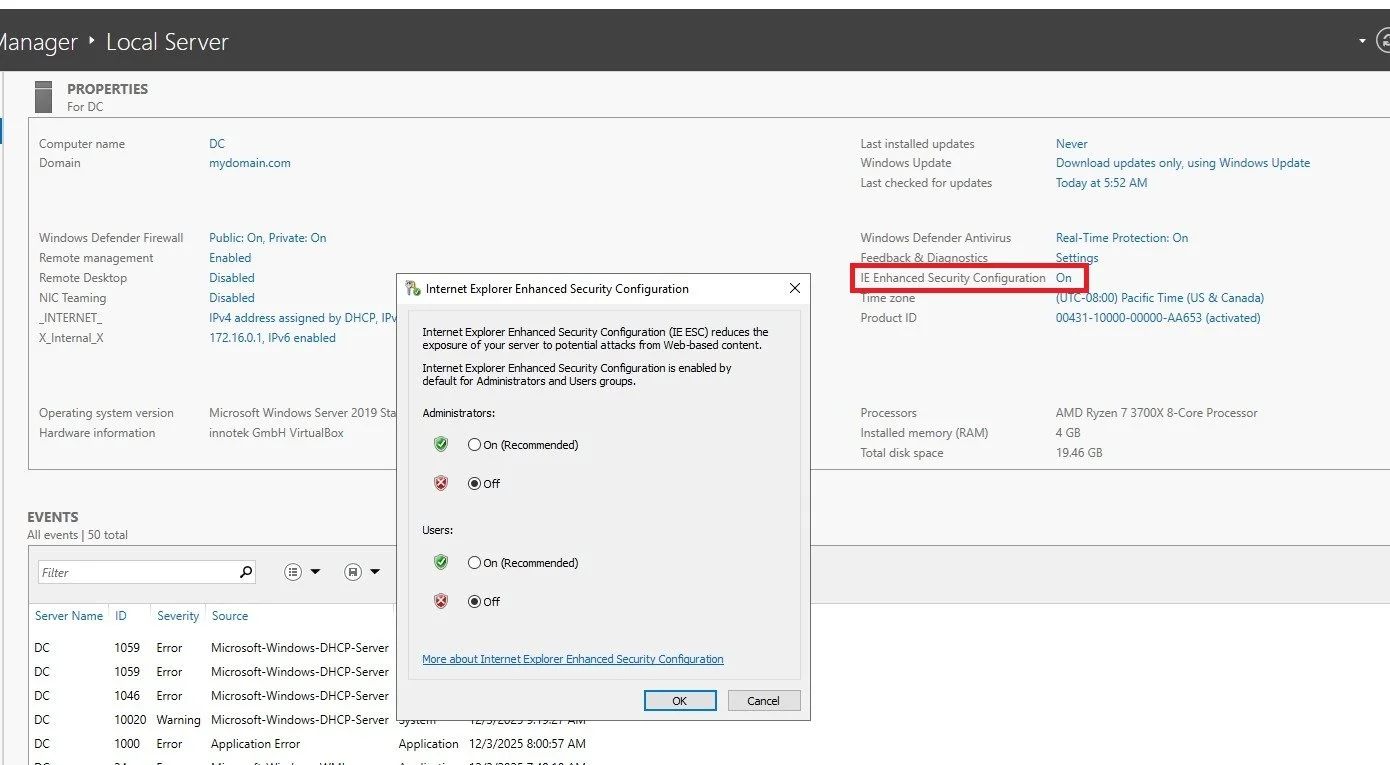
On the main page, dashboard, click configure this local server. We are going to disable the IE Security so it doesn’t spam us all the time if we want to click on a web link or not. Put both options on Off.
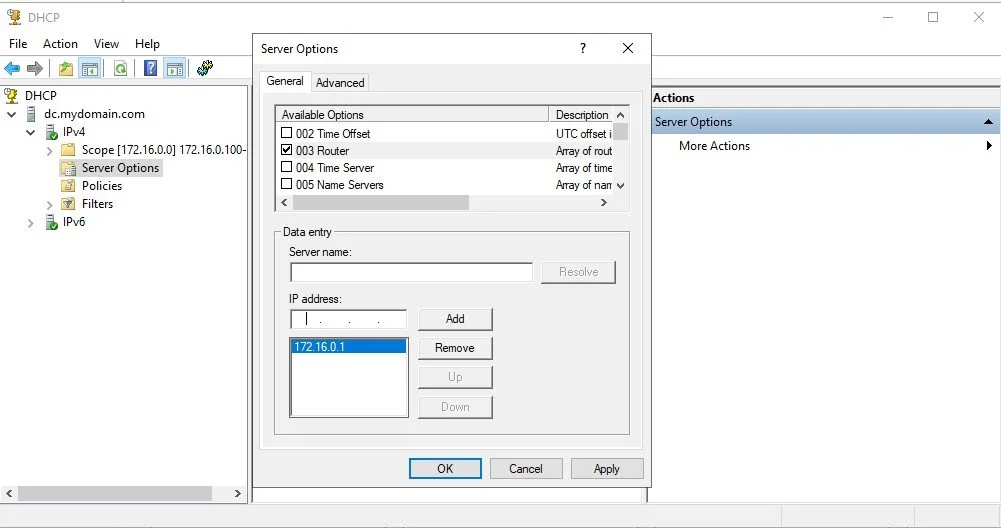
To be able to see the default gateway on the client vm, we have to right click server options, then configure, select router and then add the IP address of the server as gateway, add it and then apply.
Creating Clients on Private Network
Download the script to create a thousand account here:
https://github.com/joshmadakor1/AD_PS/blob/master/1_CREATE_USERS.ps1Then extract the zip file. Make sure the file is extracted on the desktop.
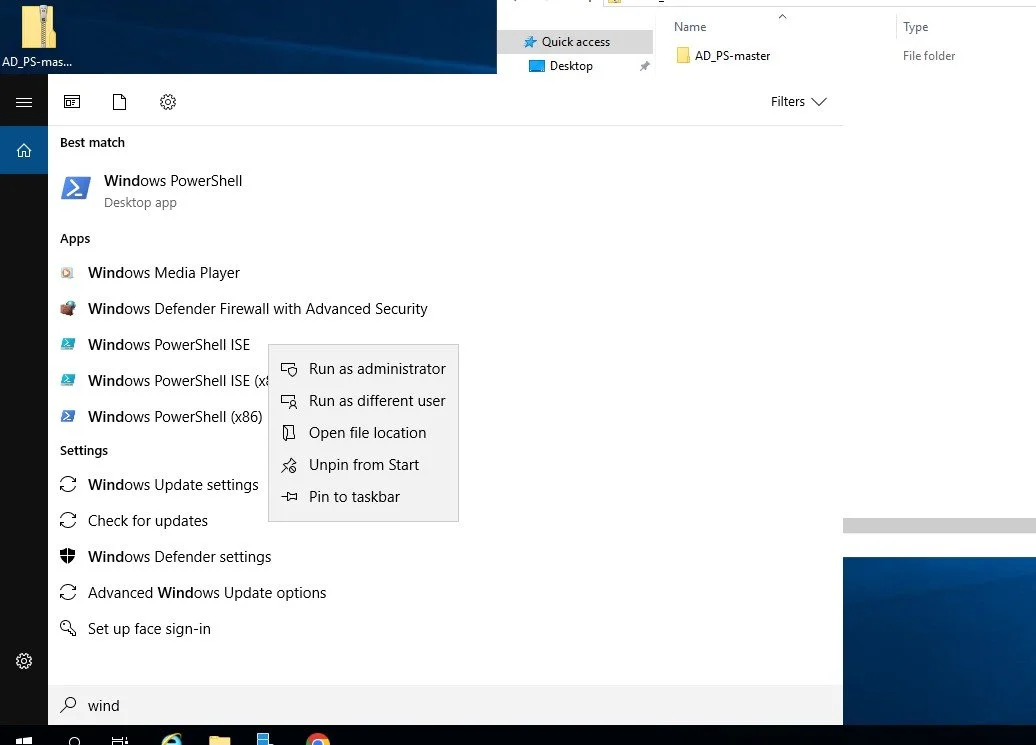
Go to the windows tab, right click on the PowerShell ISE and run it as administrator.
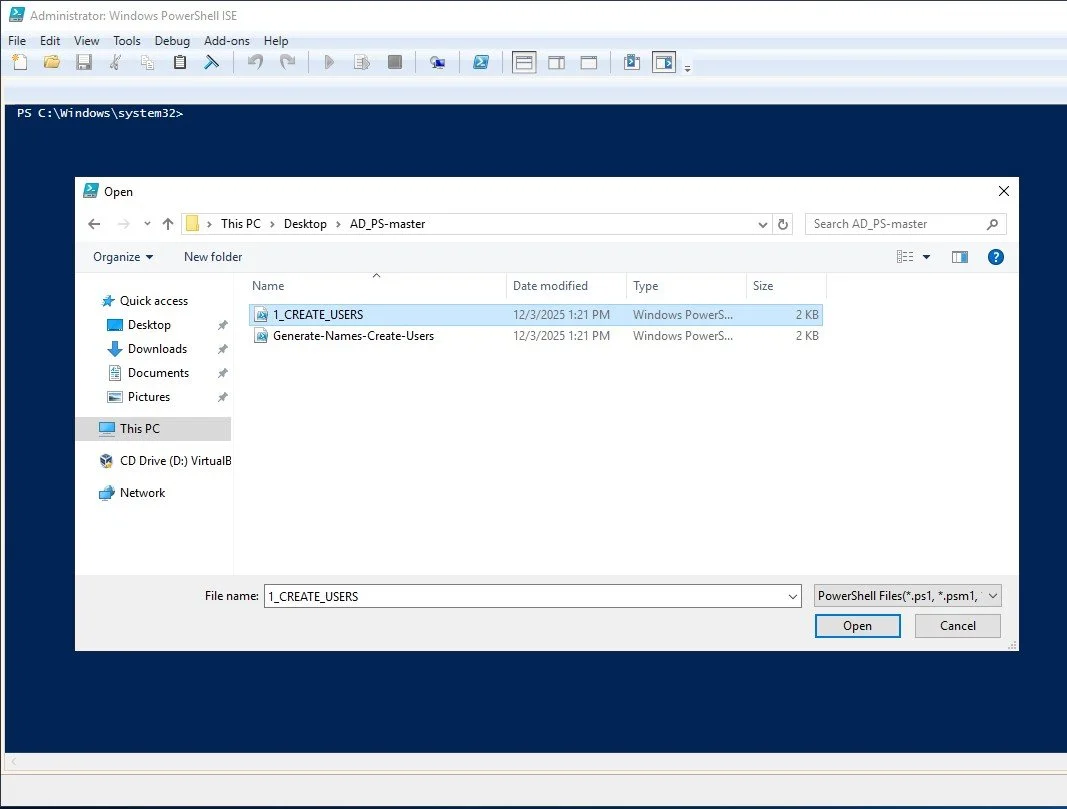
Go to open script and then search for the extracted file. Select 1_CREATE_USER.

Before you can execute the script you have put the command:
Set-ExecutionPolicy Unrestricted.Say yes to all at the end.
Now we have to go to the directory where the script is with the command:
cd C:\users\a-dpereira\desktop\AD_PS-master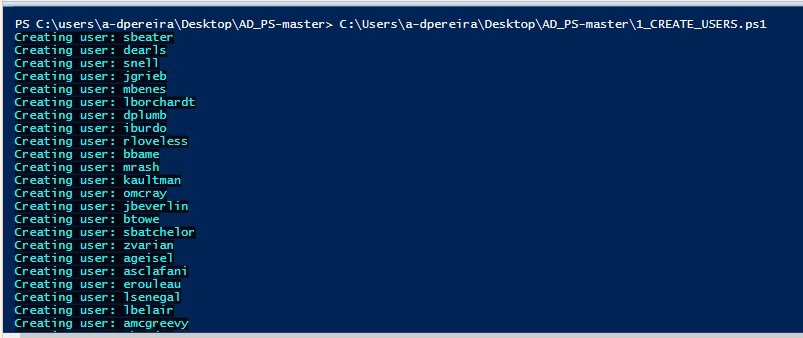
If you put the command ls you should be able to see the four files of AD_PS.
Then use command:
C:\Users\a-dpereira\Desktop\AD_PS-master\1_CREATE_USERS.ps1If successful, the command line should look like this.
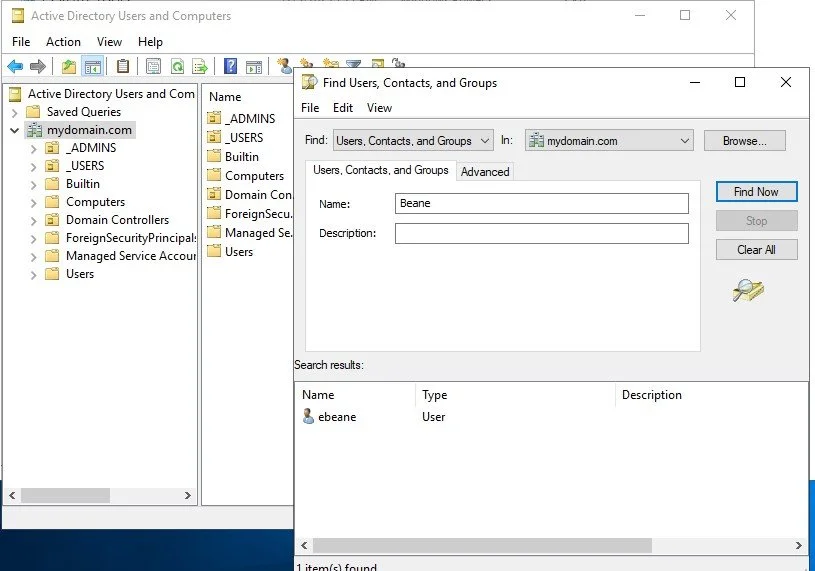
You can then test the list of the users by going to active directory users and computers, put in for instance Beane and see if you can find him. To use the find search bar right click on mydomain.com.
Windows 10 Setup

Last thing is to create this virtual lab is to install a virtual machine with a private client using an internal NIC that is getting an IP address from the DHCP server of the domain controller.
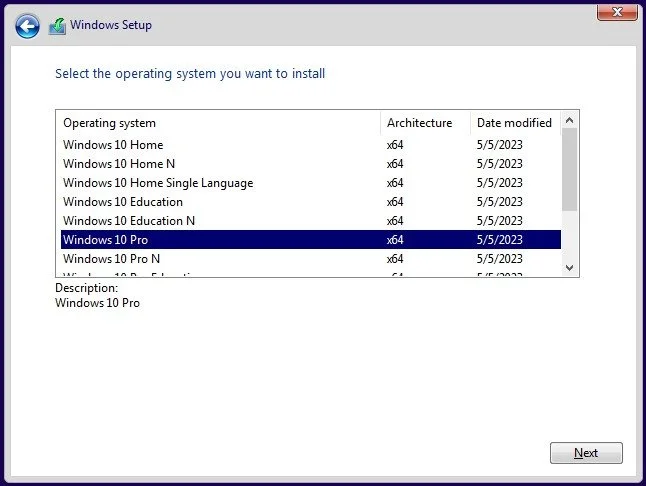
When installing Windows 10 make sure to chose the Pro version.
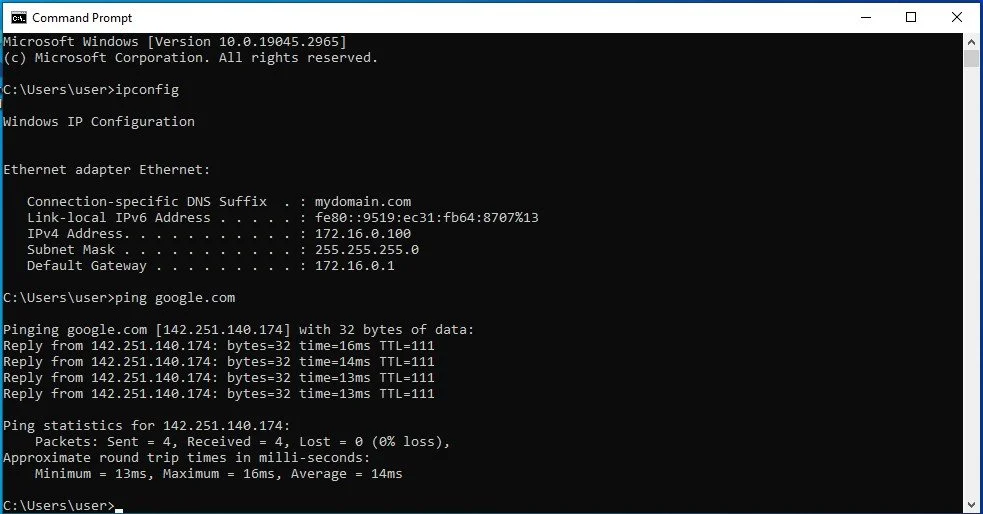
To test to see if the client has a connection to the internet and the RAS/NAT on the server actually is routing the packages between the client and the outside internet you can use ipconfig to see if you have as default gateway the servers IP address. At the end ping google.com to see if it gives a signal back.
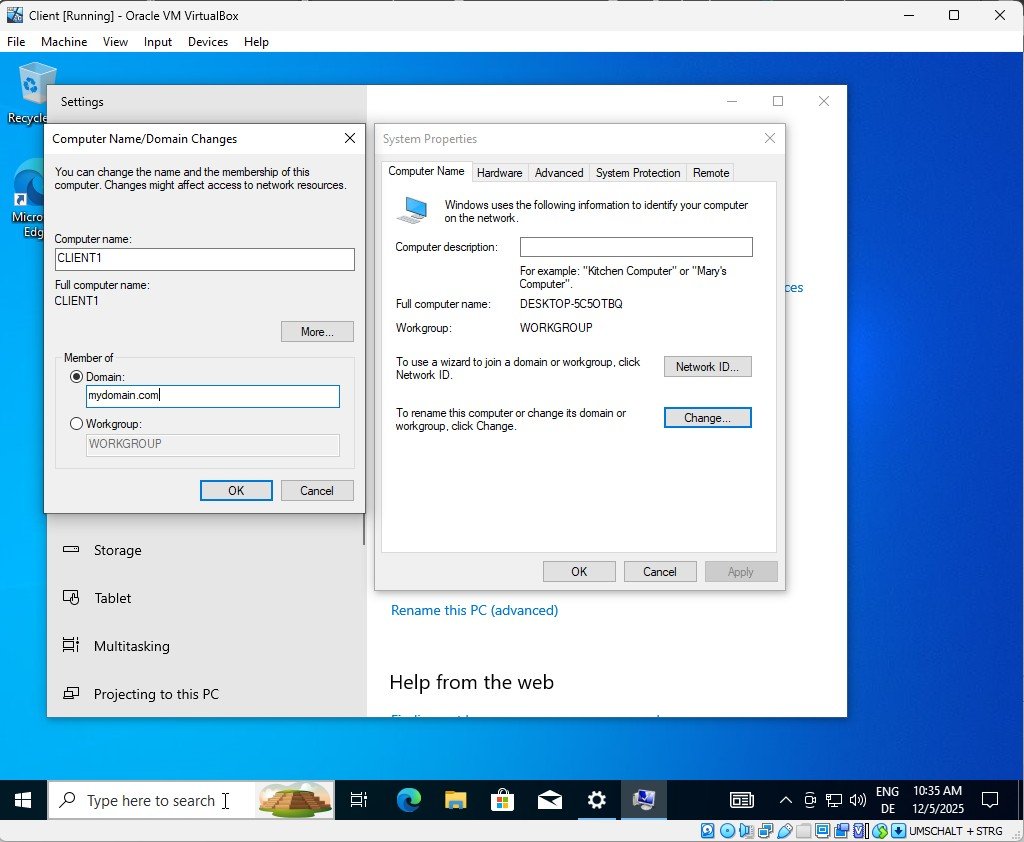
Rename your PC to CLIENT1. Go to windows button, right click on it, click System and then go to rename this PC (advanced). Click change and then write the name and select Domain to enter your DC server’s domain. Lastly restart PC.

Now, if you return to your server, you can see Client1 listed under DHCP → Address Leases.
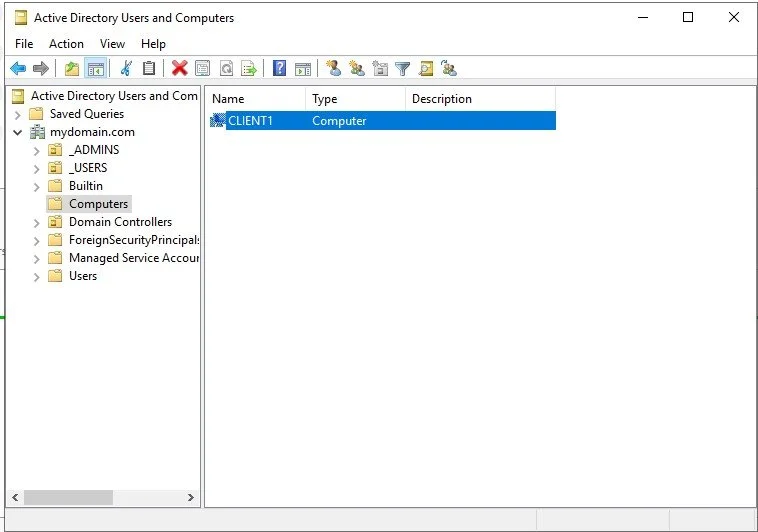
As shown, the PC is now successfully joined to the server.