Converting Mini-PC to Home Router
Equipment
M.2 Storage: WD_BLACK SN850X NVMe SSD 2 TB Internal SSD (Gaming Memory, PCIe Gen4 Technology, Read 7,300 MB/s, Write 6,600 MB/s) Black
Screws for placing ethernet port: Akuoly PC Screws Assorted Set M2 M3 M2.5 Computer Screws HDD M.2 SSD Screws for Universal Laptop PC Computer Repair 355 Pieces
Ethernet port: KALEA-INFORMATIQUE M2 M.2 NGFF E A Key Card 2.5 Gigabit RJ45 LAN ethernet 10 100 1000 1G 2.5G With Realtek RTL8125 Chipset
Lenovo ThinkCenter: Lenovo ThinkCentre Intel i5 6500T Quad-Core 3.1 GHz Business Office Multimedia Computer 16 GB 512 GB SSD USB 3.0 WLAN Windows 11 Prof. 64-Bit #7987
Screwdriver: JOREST 40 Pieces Precision Mechanic Screwdriver Set, Mini Tool Set with Torx T5 T6 T8 T9 T10 T20, etc., Repair Kit for iPhone, iPad, Switch, PS4, Xbox, Laptop, Macbook, Computer, Glasses, Watches, etc
Rufus USB Drive: SanDisk Ultra USB 3.0 flash drive 256 GB (SecureAccess software, password protection, transfer speed of up to 130 MB/s).
2 Ethernet cables: Ercielook Lan Cable 2 m, High Speed Cat8 Network Cable for Outdoor and Indoor Use, 40 Gbps with Gold-Plated RJ45 Connector for Router/Gaming/Modem
Anti-electric Tape: Amazon Basics Insulation Tape, 1.9 cm x 18.3 m, Black, Pack of 6, Ideal for DIY, Repairs, Work on Electrics or Cars and Equipment (Formerly AmazonCommercial Brand)
8 portSwitch: NETGEAR GS308-300PES 8-port Gigabit Switch (fanless design, easy plug & play installation, Layer2, rugged metal chassis, energy saving, metal RJ45 connectors)
Ethernet port with 15 cm length: youyeetoo M.2 to Gigabit Wired NIC, Intel i226 2.5G Ethernet Server NIC, Compatible with M.2 B+M Key, M.2 A+E Key, for youyeetoo X1 (i225 Updated Version) (M.2 A+E Key, 10 cm)
Project Overview: A Purpose-Built Home Router
In this project I am going to convert a mini pc into a router. The reason for it is twofold, on one hand the fritzbox doesn’t offer much on hardware and software to support a very fast and reliable router, especially when it comes to dealing with firewalls it seems to be very limited in what one can configure on it. The second reason it is impossible for instance to change the ethernet ports later on for 10Gib speed or upgrading other components of the router itself. That is why I decided to use a mini pc for that purpose, it is cheap, doesn’t take much electricity and more than that unlike it’s other counterparts it’ not very noisy.
Setting up Lenovo ThinkCenter

The ThinkCentre only offers one Ethernet port, to be able to route packages from. However, there is an unused opening that could be used to install a second port. So the first thing is to bend the metal piece of the opening upwards to later on install the new ethernet port.
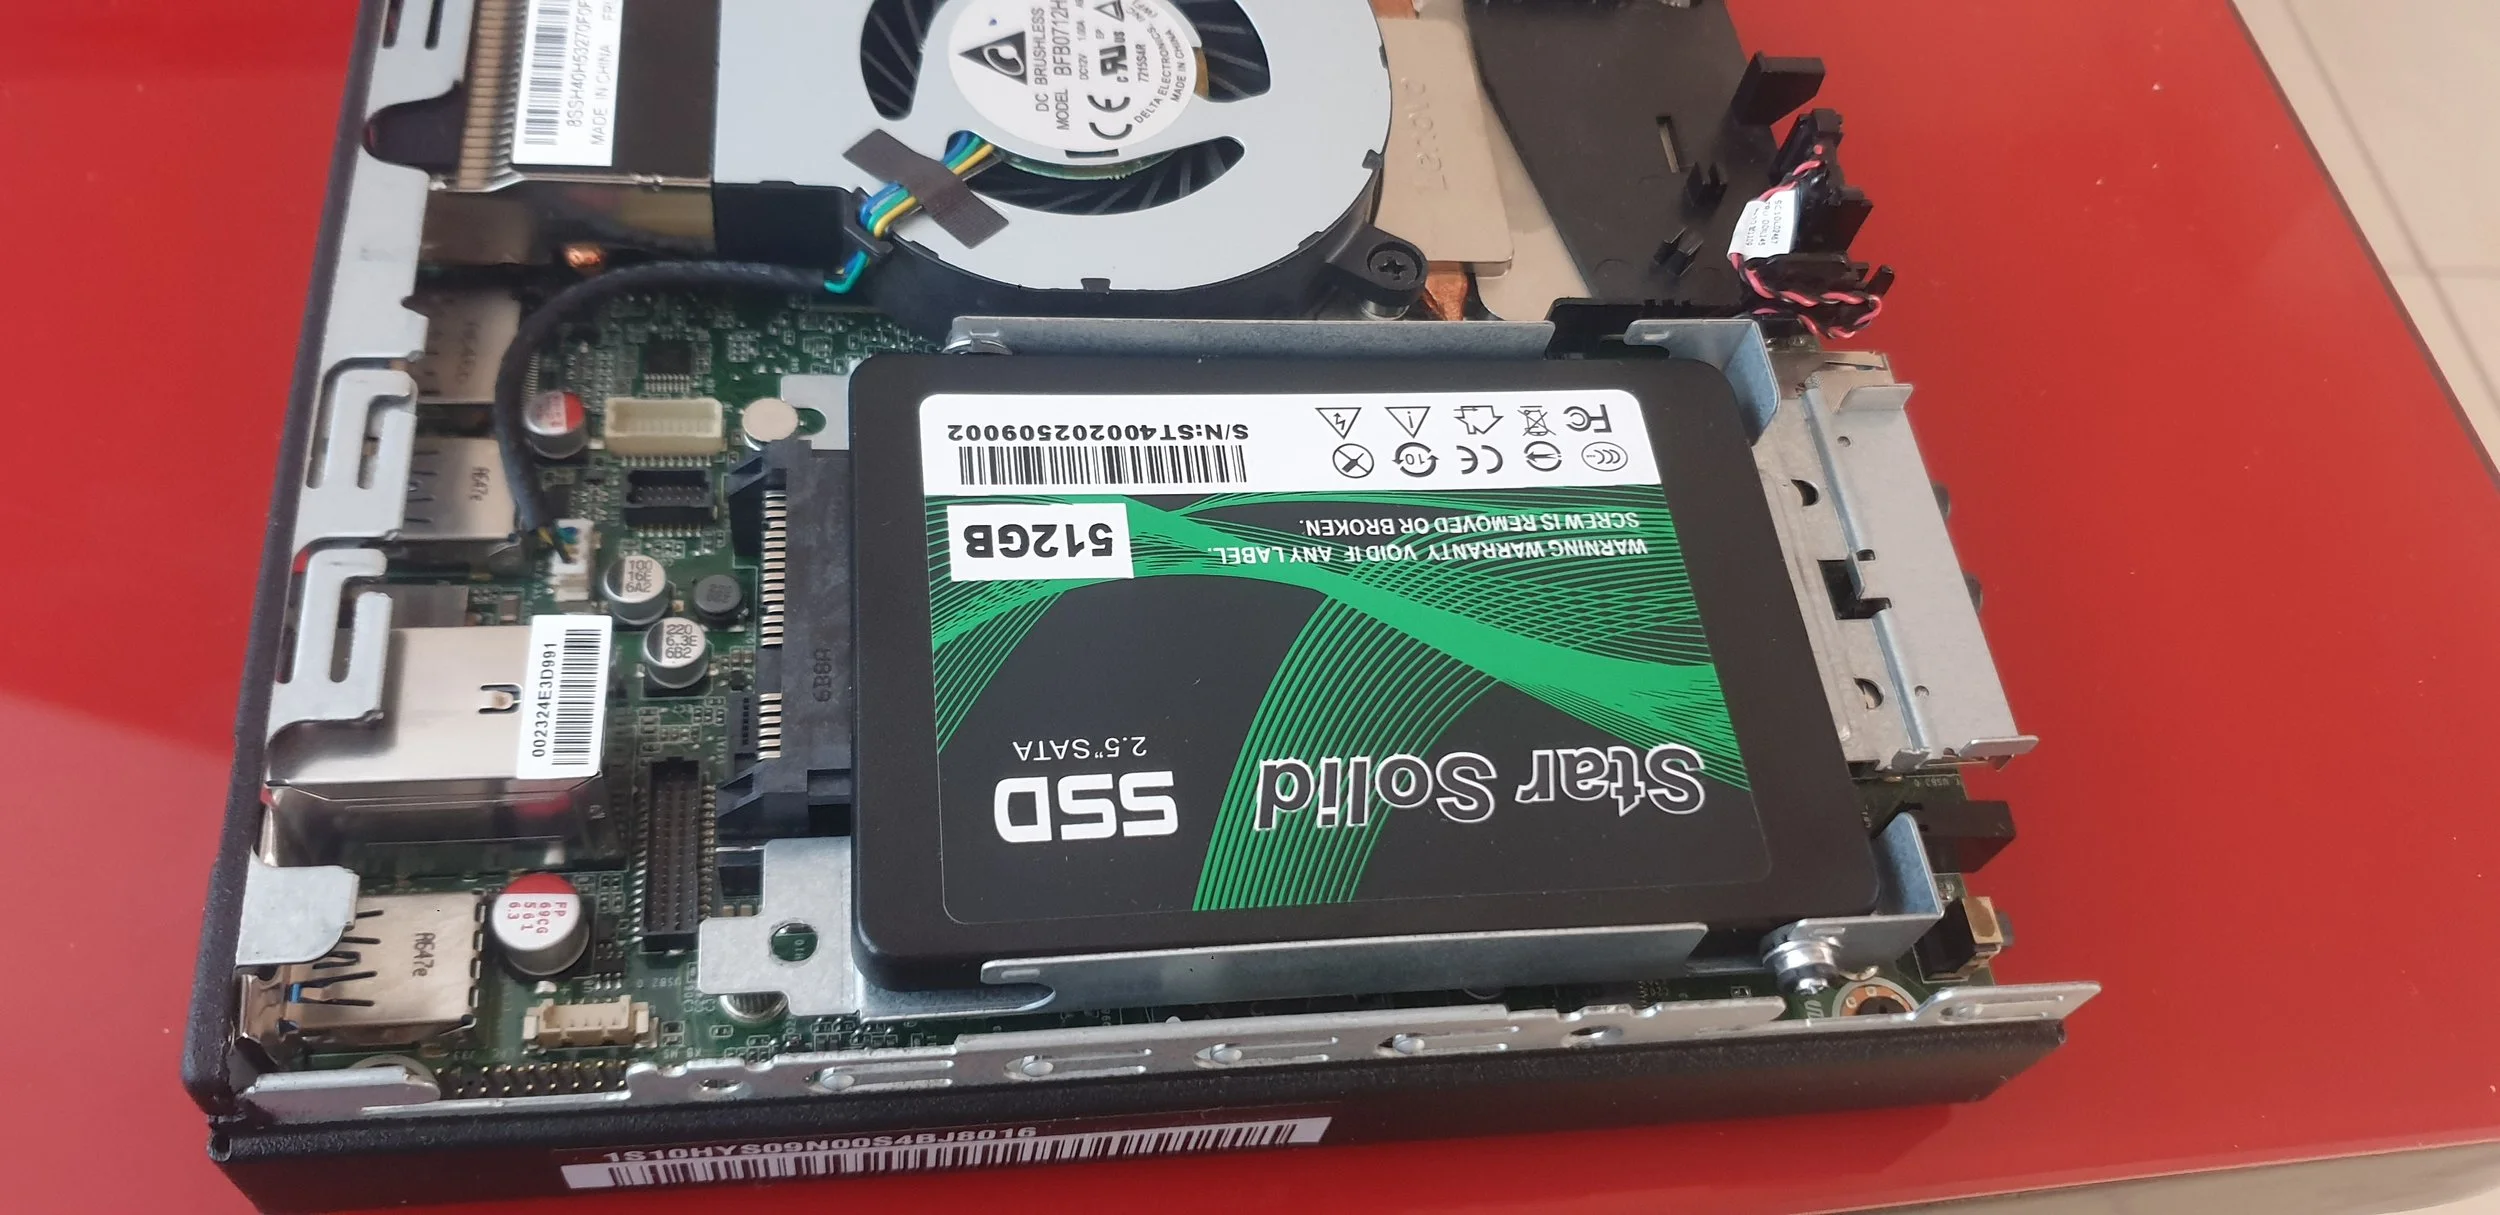
When opening the casket of the mini pc, we can see the sata ssd. This one will have to be removed so we can connect the cabeling to the right pcie port on the back of the pc.
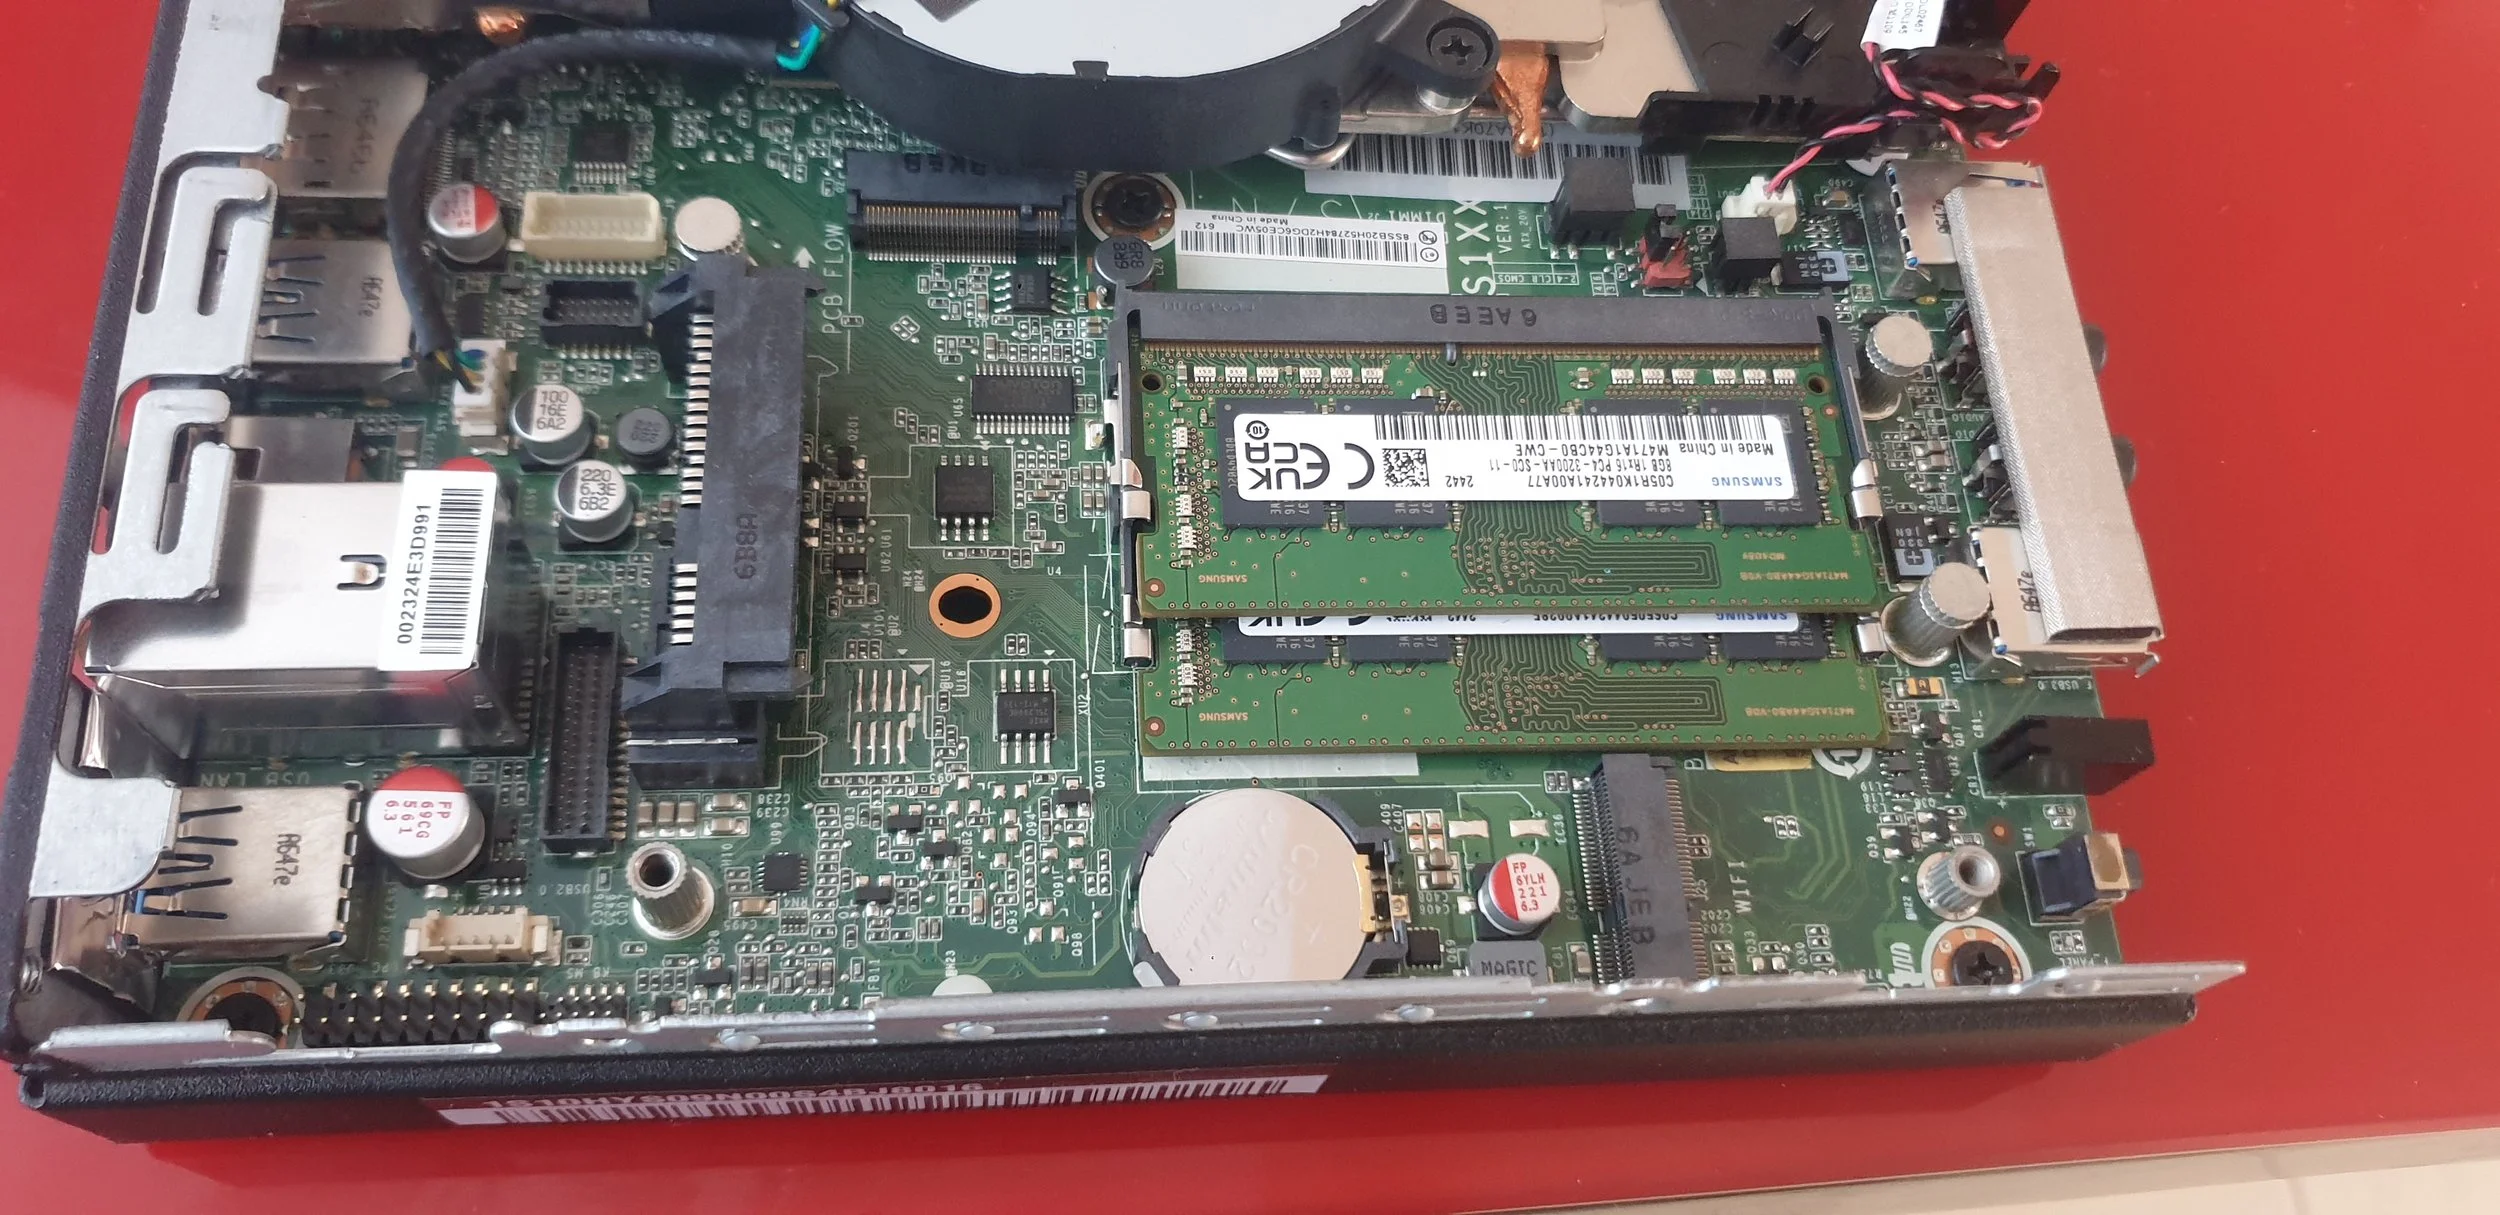
After removing the Sata SSD with the metal that holds it in place, there is now enough space to put the cabbeling through without any obstruction.


Before we can proceed with plugging the ethernet port on the right place, we have to put insulating tape so we don’t get electric passthroughs between the usb underneath and the ethernet port.


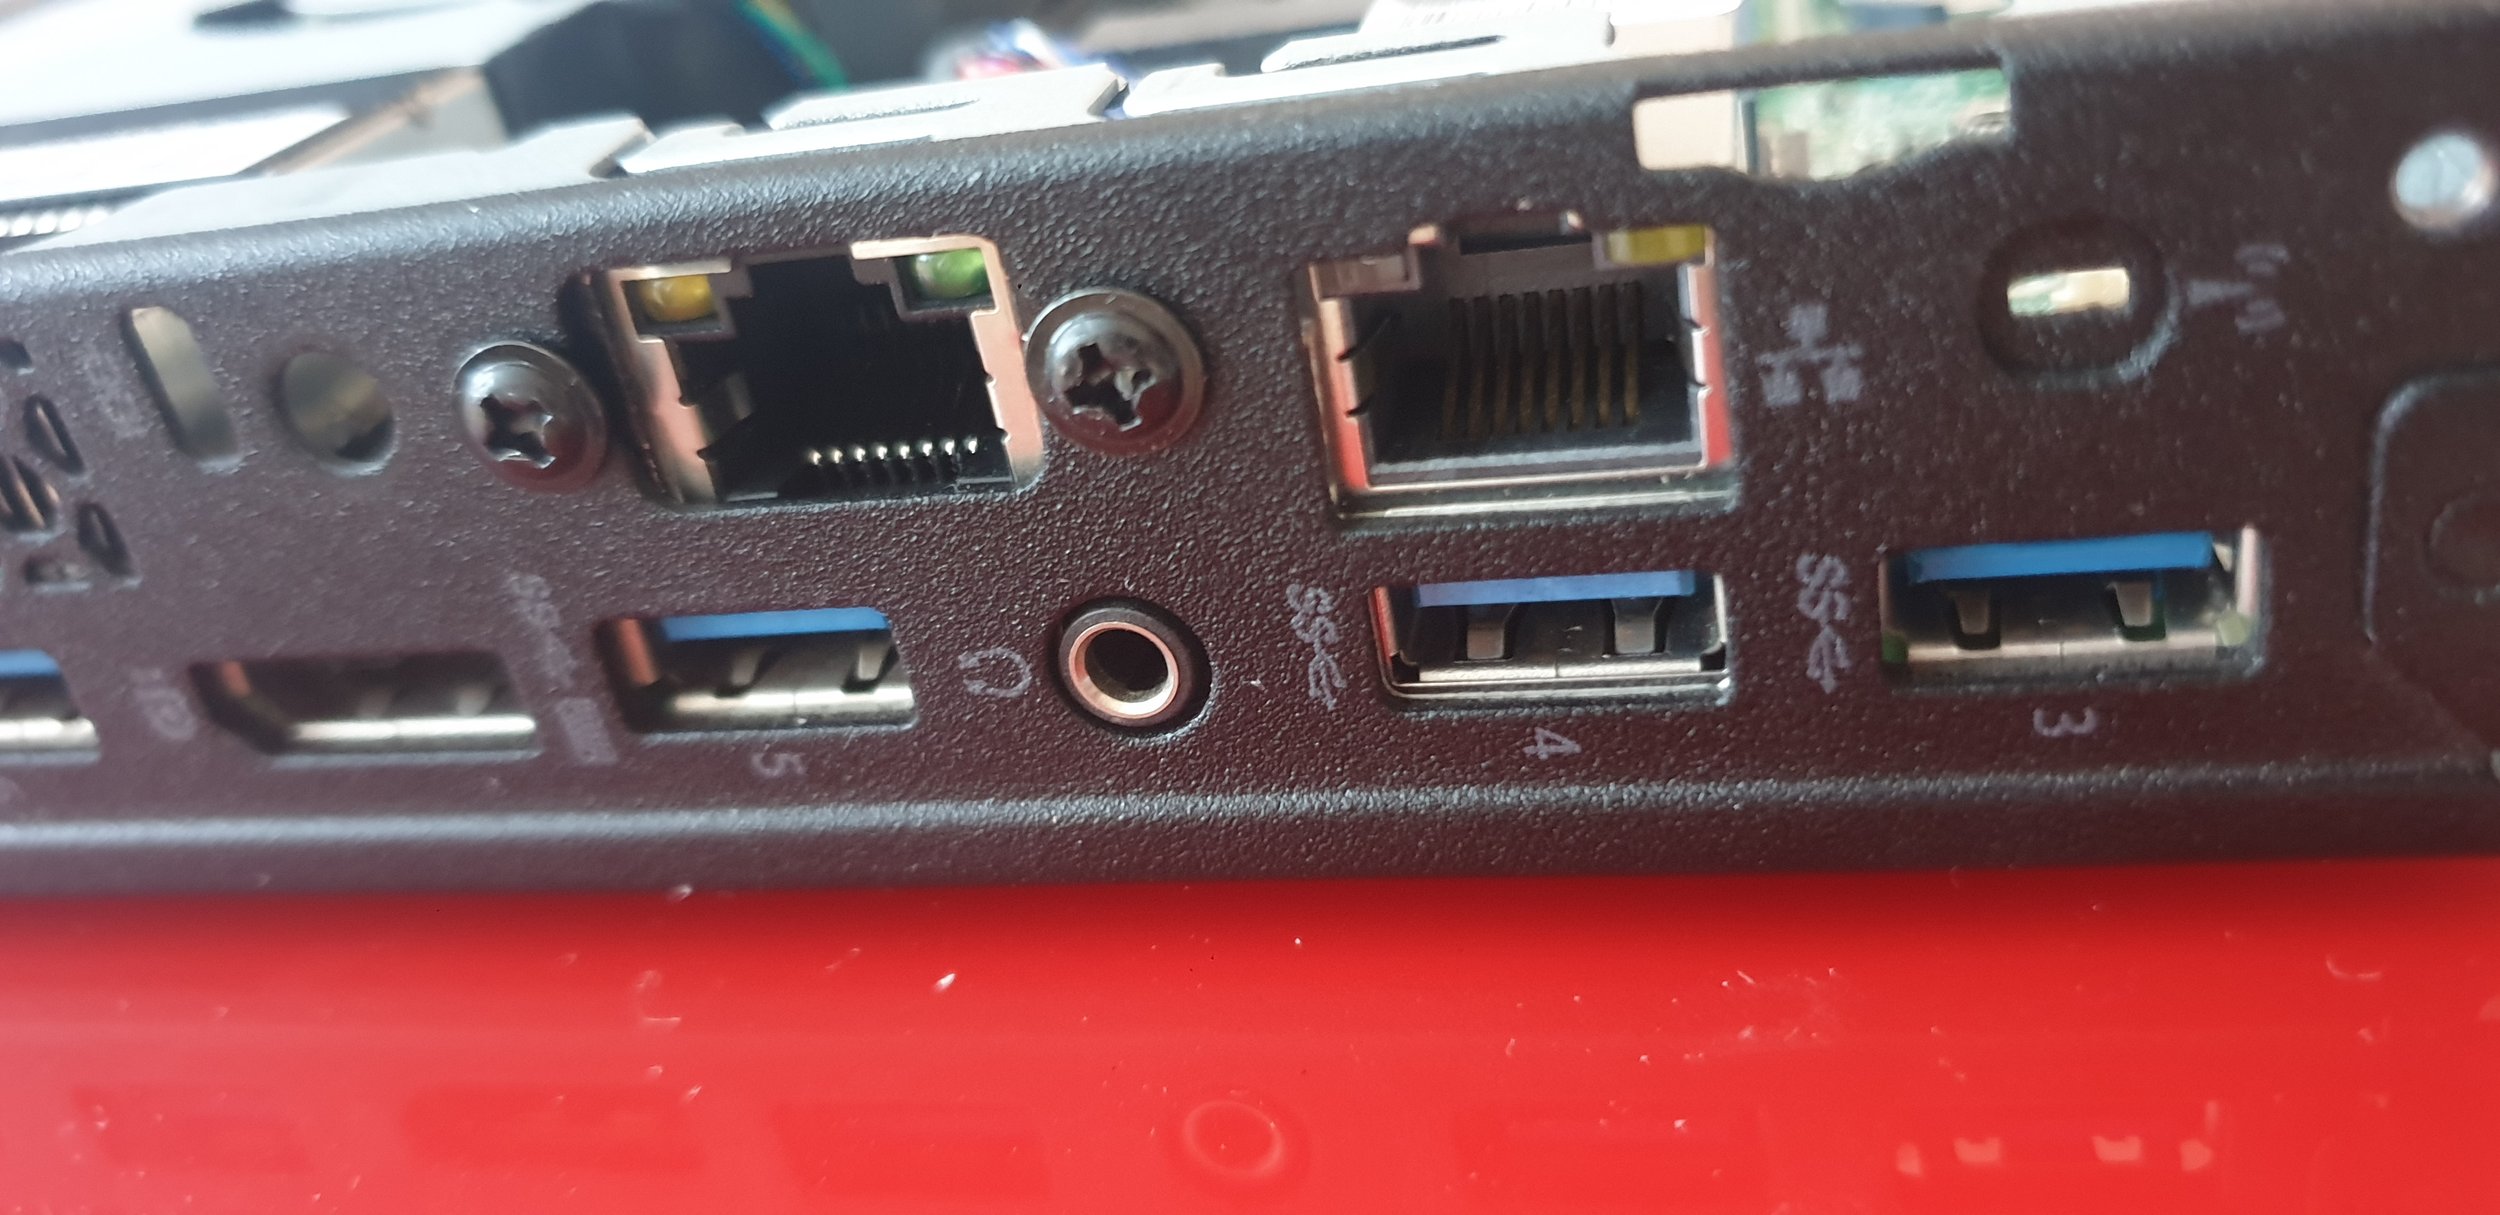

After applying the tape, it should be straightforward to position the Ethernet port over the opening and secure it with screws so it remains in place.


The Ethernet card that connects to the PCIe slot must be secured with screws to prevent it from tilting upward.


Since the SATA SSD was removed, the PC was left without storage. To replace it, a new M.2 drive was installed in the only available slot, providing faster and more energy-efficient storage.
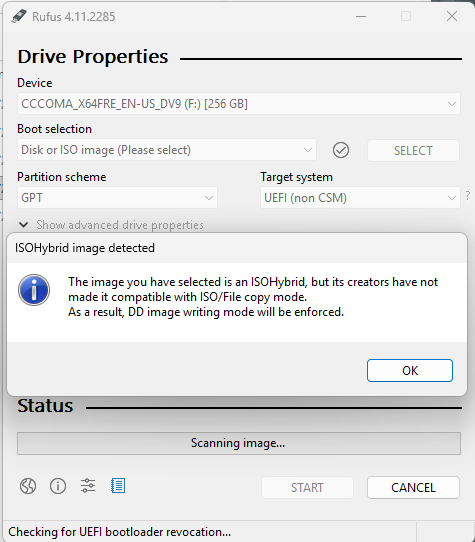
Then we need to create a Proxmox installation USB using Rufus. Then, we’ll use that USB to install Proxmox on the ThinkCentre. If you receive a warning about the ISO, simply click OK—it’s not an issue. Then click Start.
Configure Proxmox
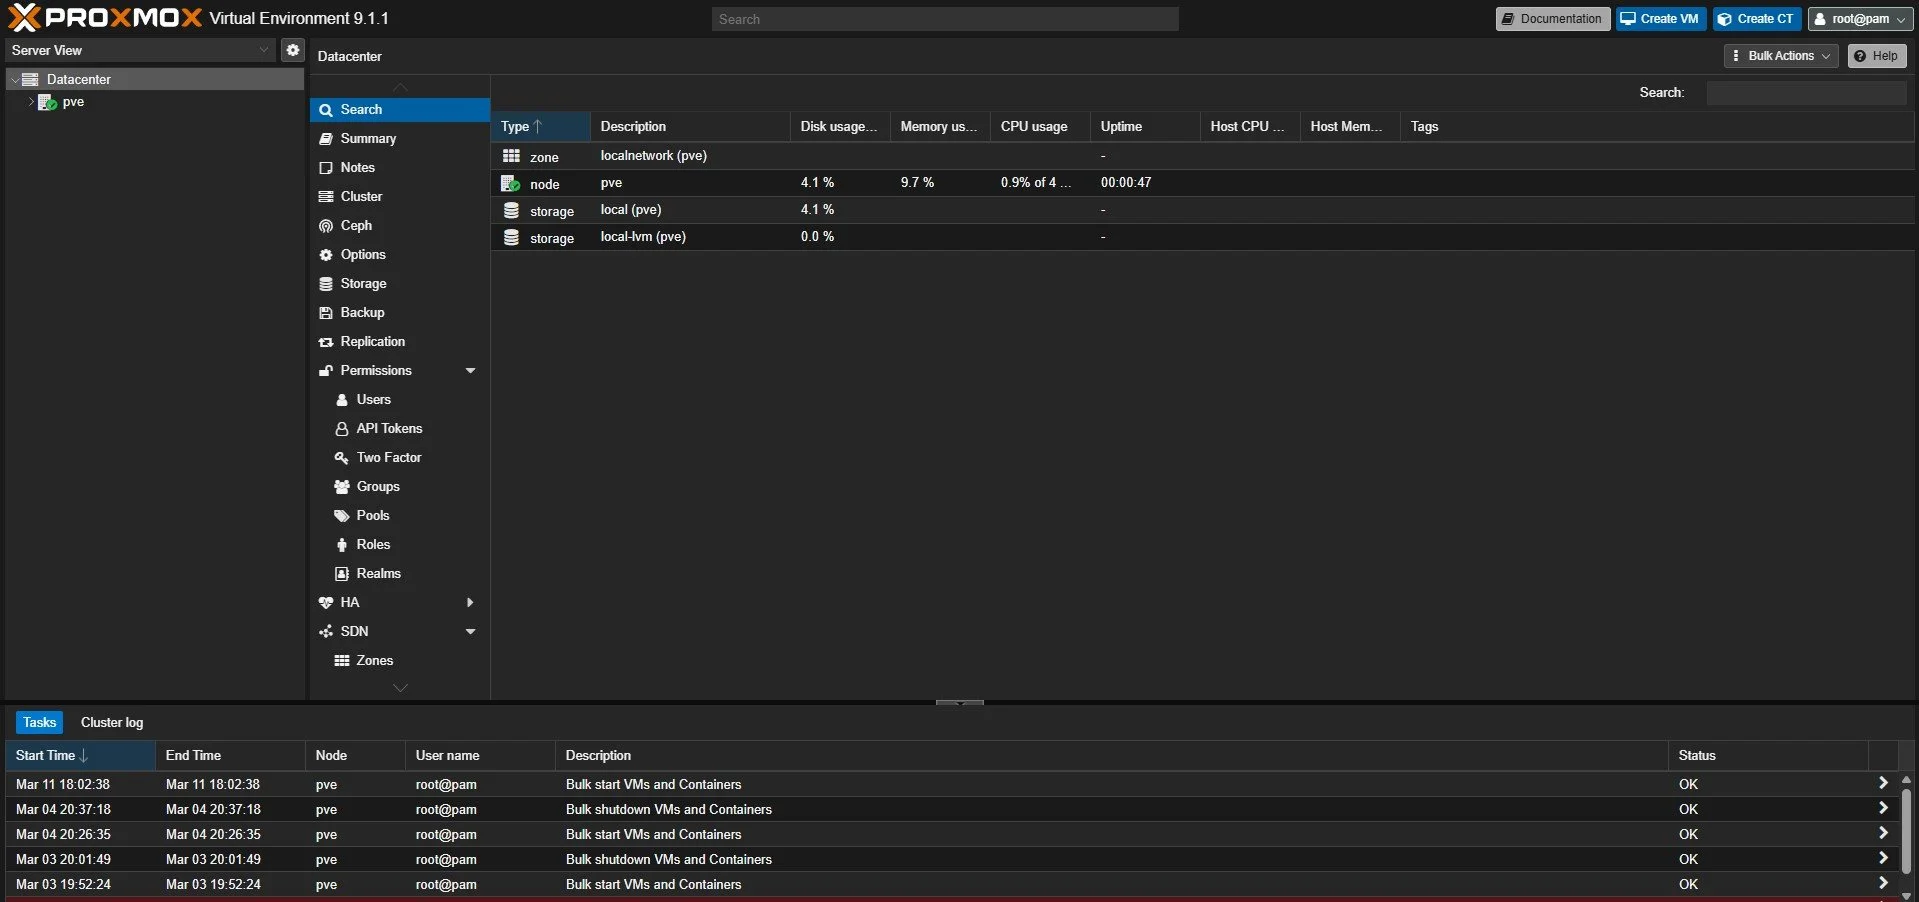
After you have installed Proxmox, you can log in with the password you created and with the username root.
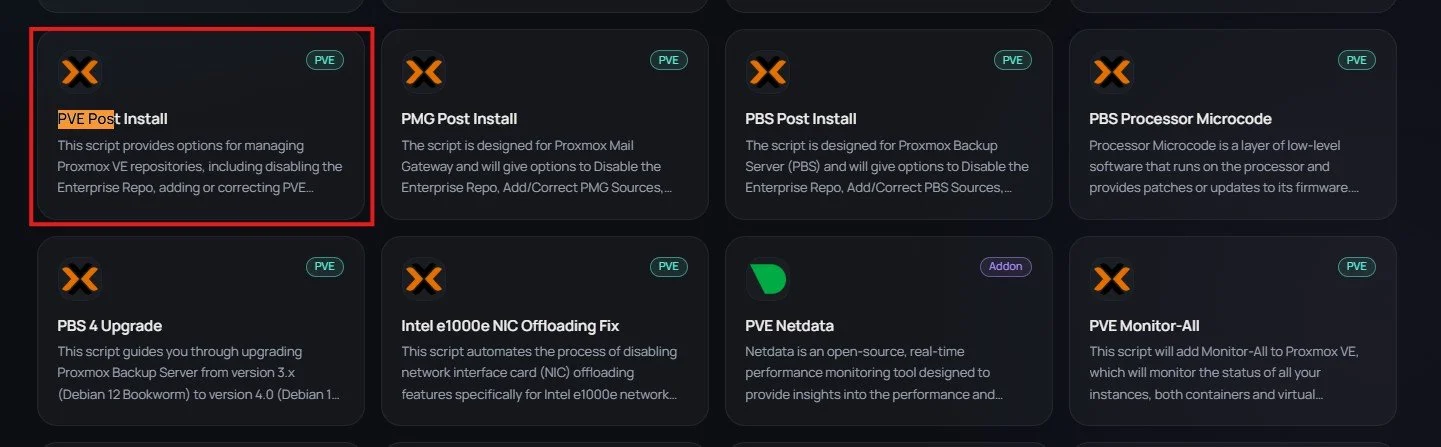
Then go to the website https://community-scripts.org/category/proxmox-and-virtualization and find the PVE Post Install to be able to get the PVE packages.
There should be somewhere a command that you can copy to install those dependencies.
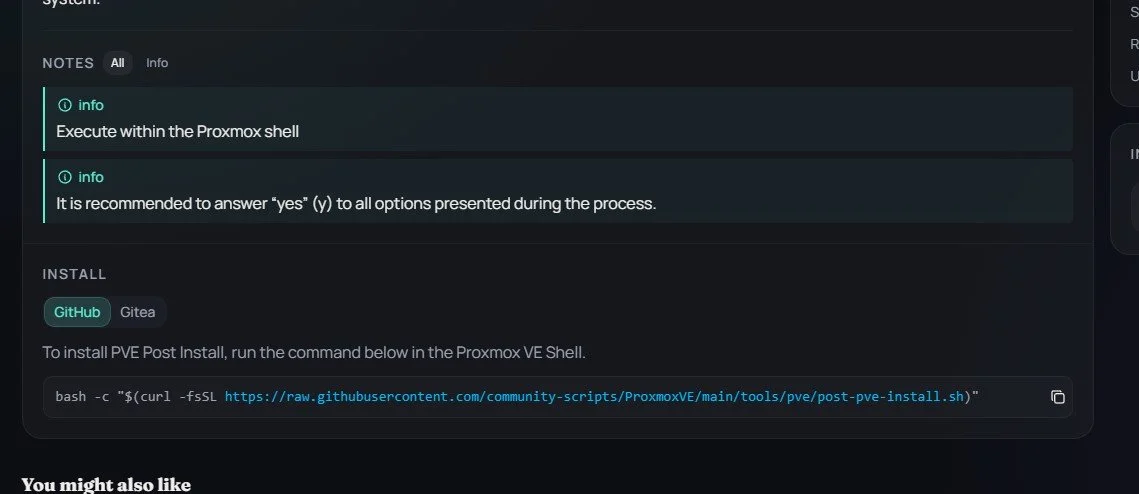
Copy the line bash -c "$(curl -fsSL https://raw.githubusercontent.com/community-scripts/ProxmoxVE/main/tools/pve/post-pve-install.sh)"
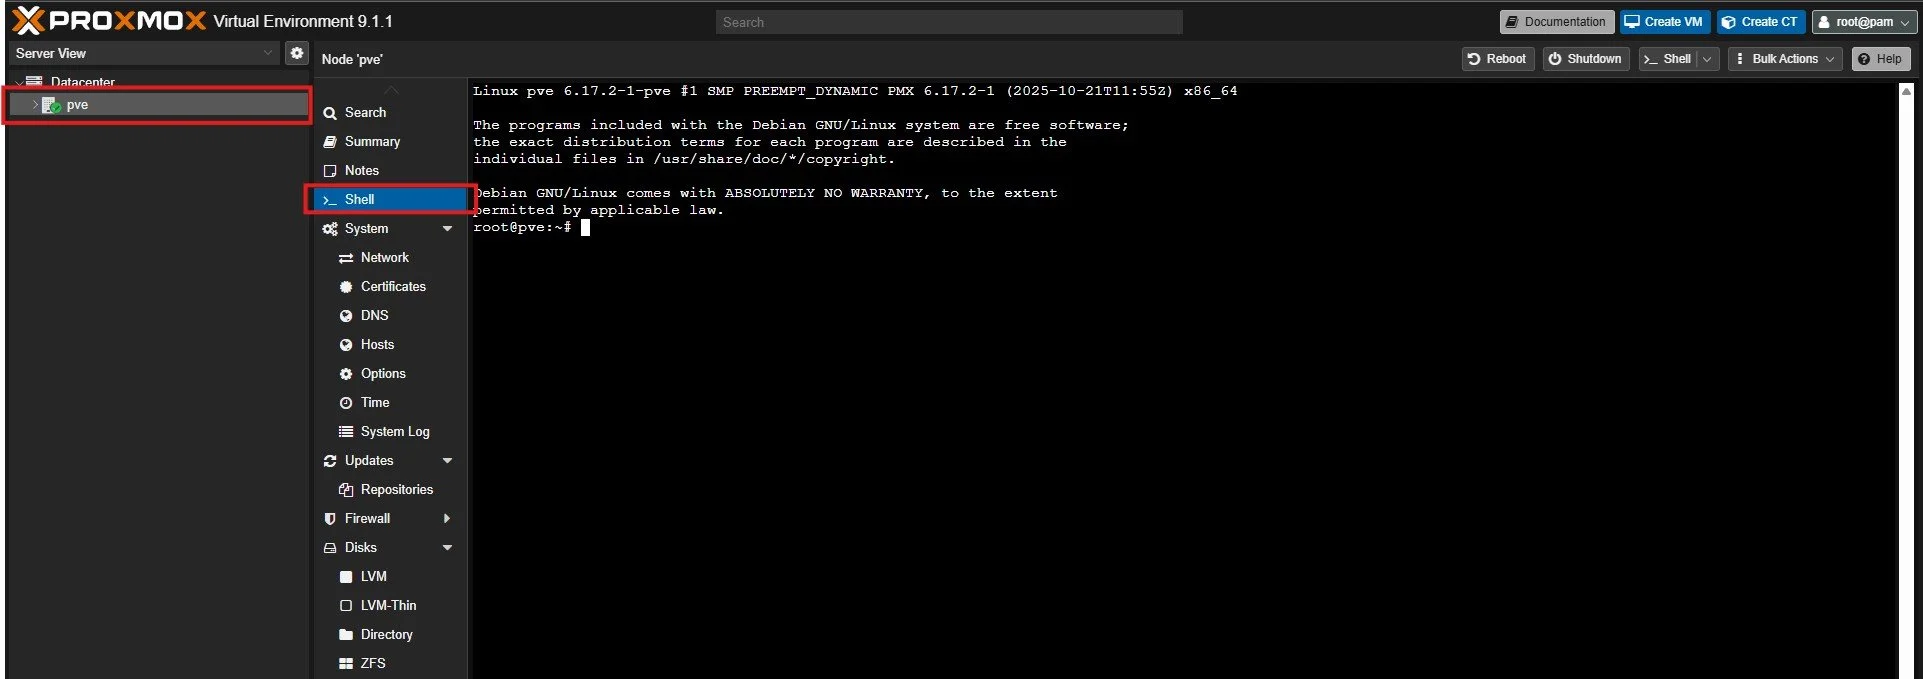
Then under PVE and Shell paste the command to install the packages with control+shift+v.
After clicking enter say yes to the question and proceed to install the modifications.
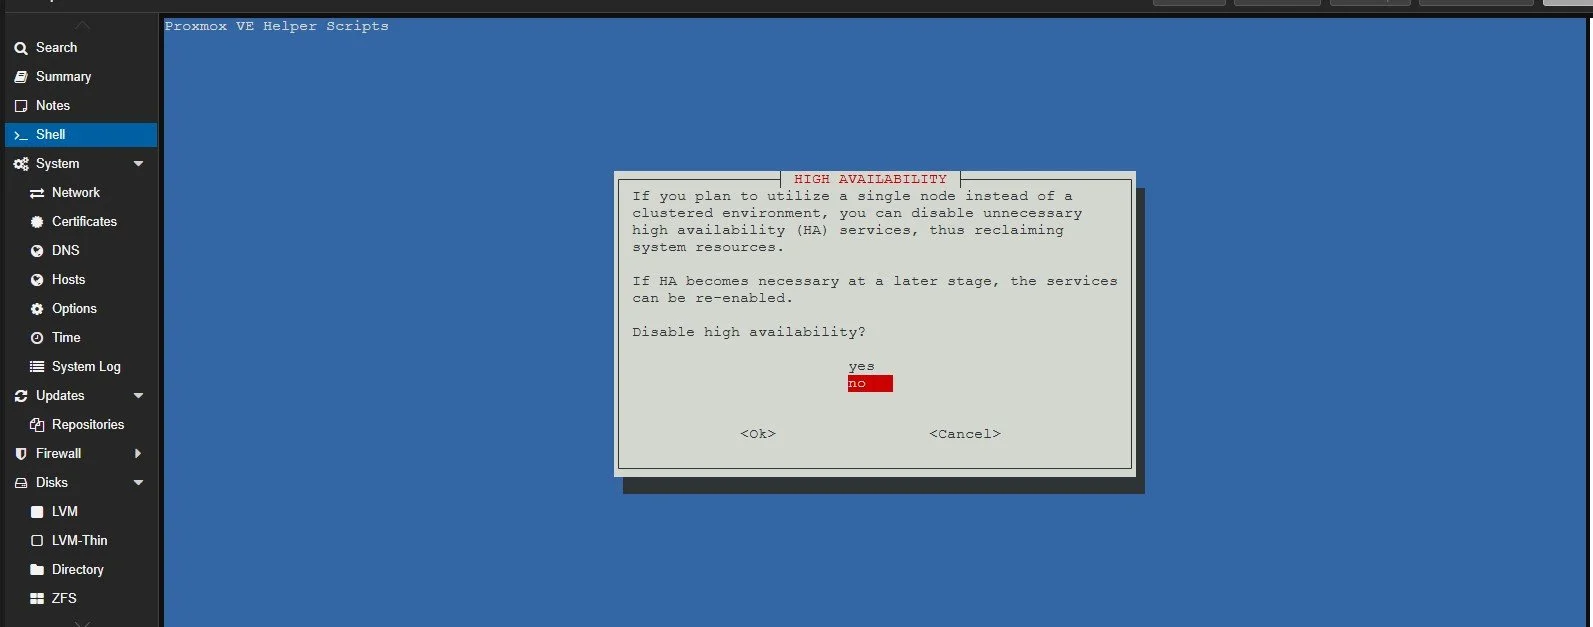
In this setup I chose not to get high availability since I only have one machine with proxmox in place but, in the future if I ever need it, it should be easy to enable it again.
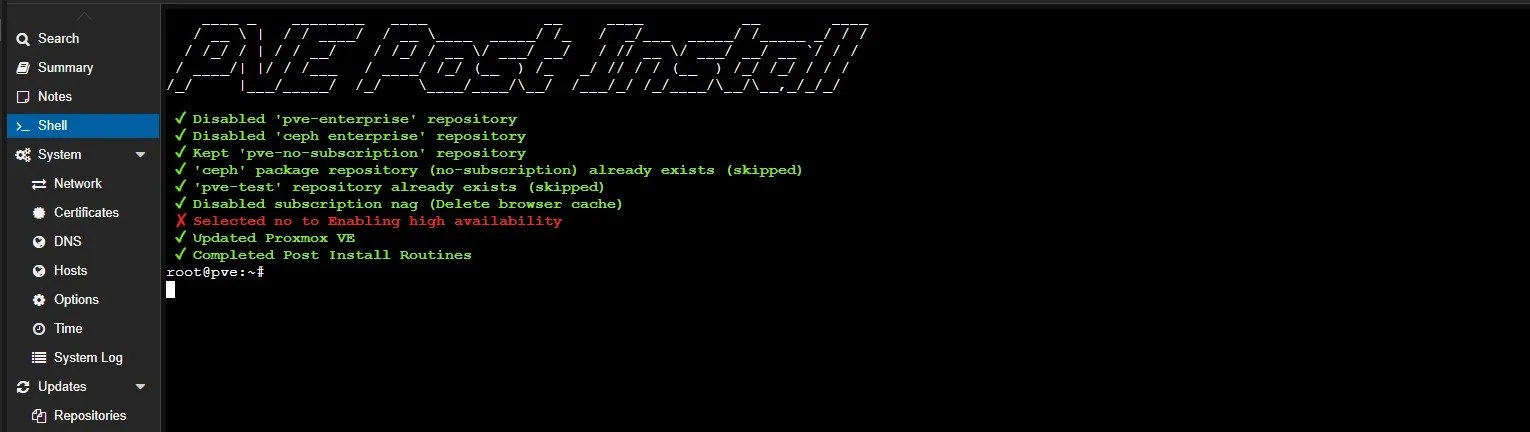
At the end if everything went fine it should look like this.
Configure PFSense
I won’t show the whole configurantion since I already did that in PFSense Lab Series 2. What I didn’t cover in the other two projects about PFSense was how to create a connection to the internet that is outgoing so the wireguard peer can also have access to the network through the home network where he connected with Wireguard VPN.
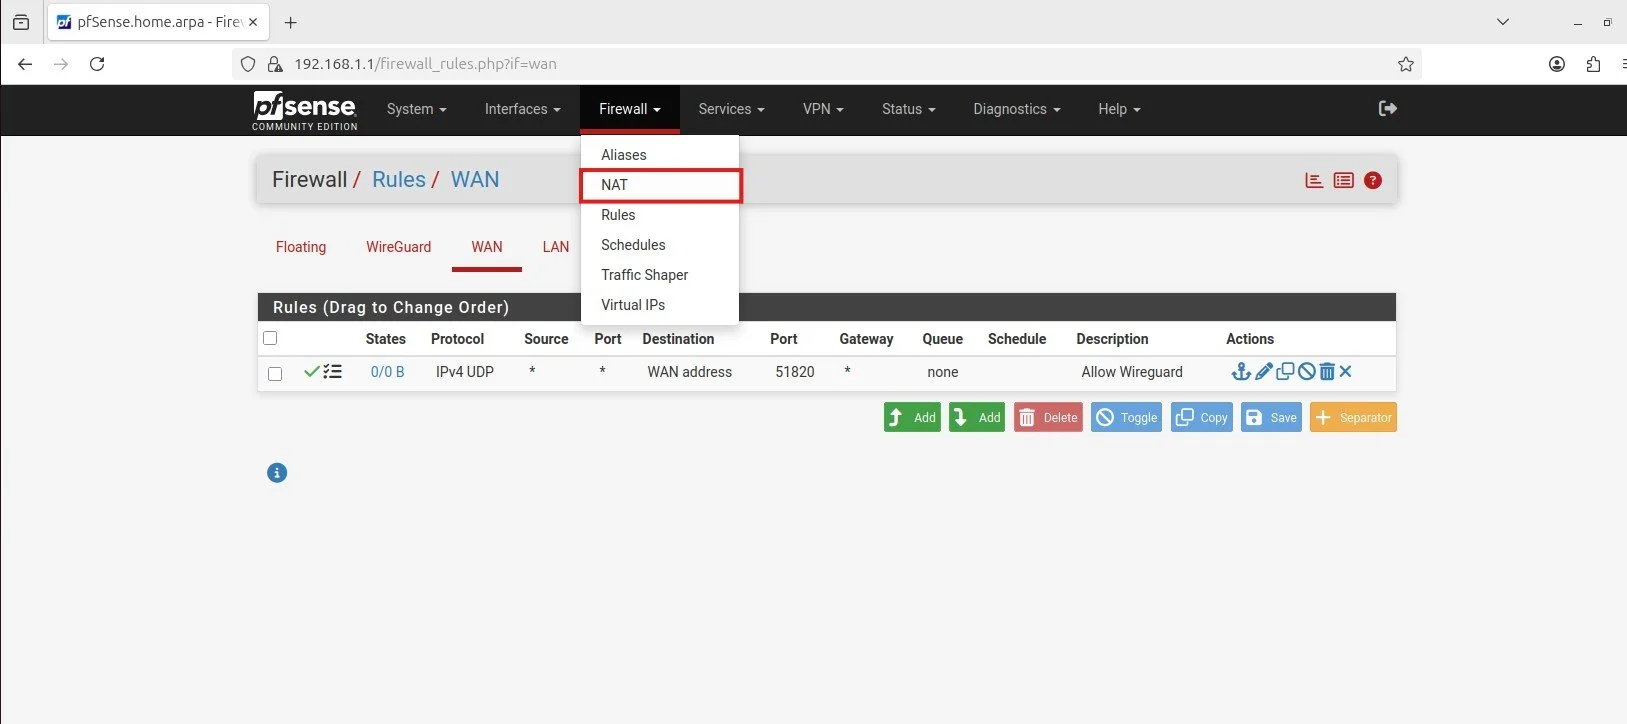
Go to the Firewall setting and click on NAT.
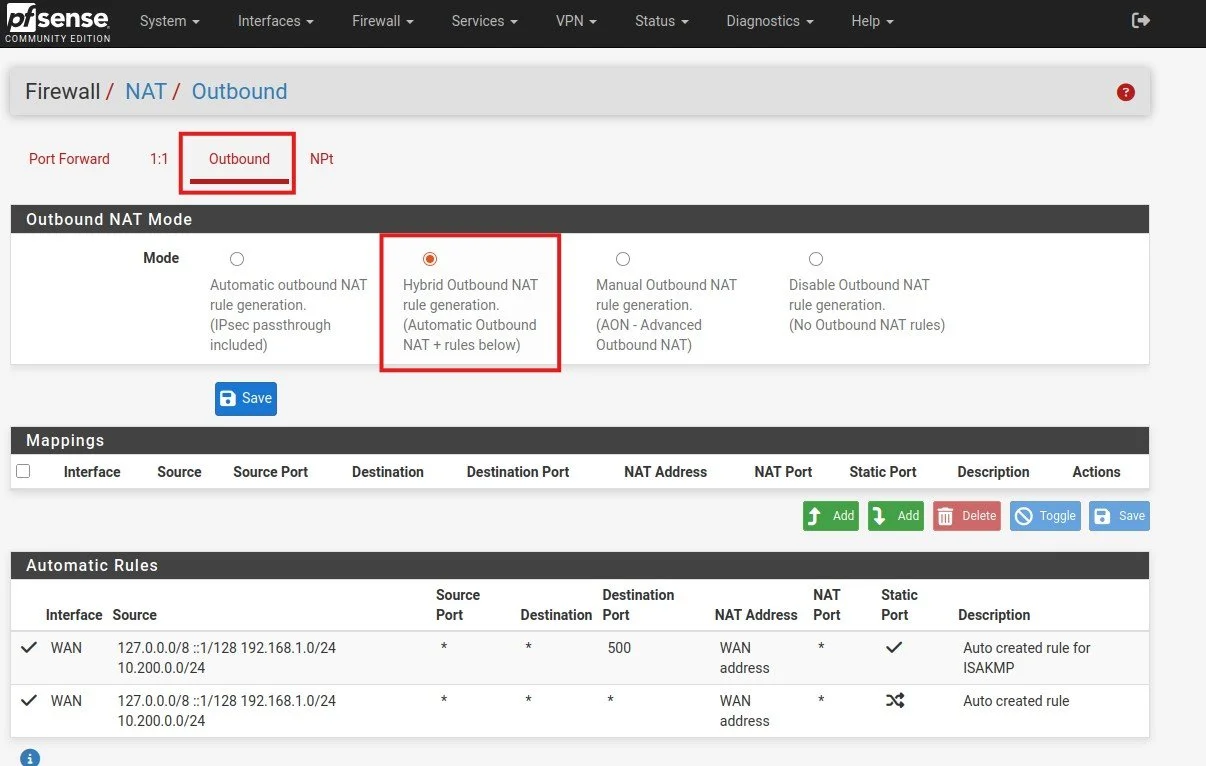
Then click on outbound and Hybrid rule. Don’t for get to hit save on hybrid first !!!!
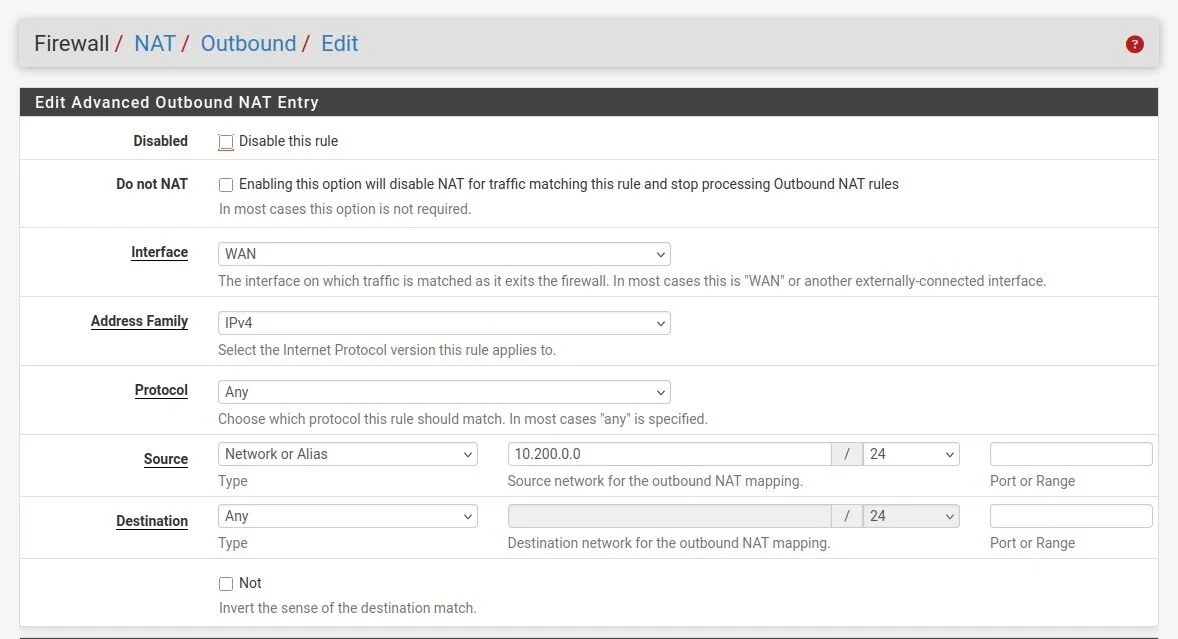
Then create a new rule with interface WAN and source network, to be able to give internet access for the VPN client.
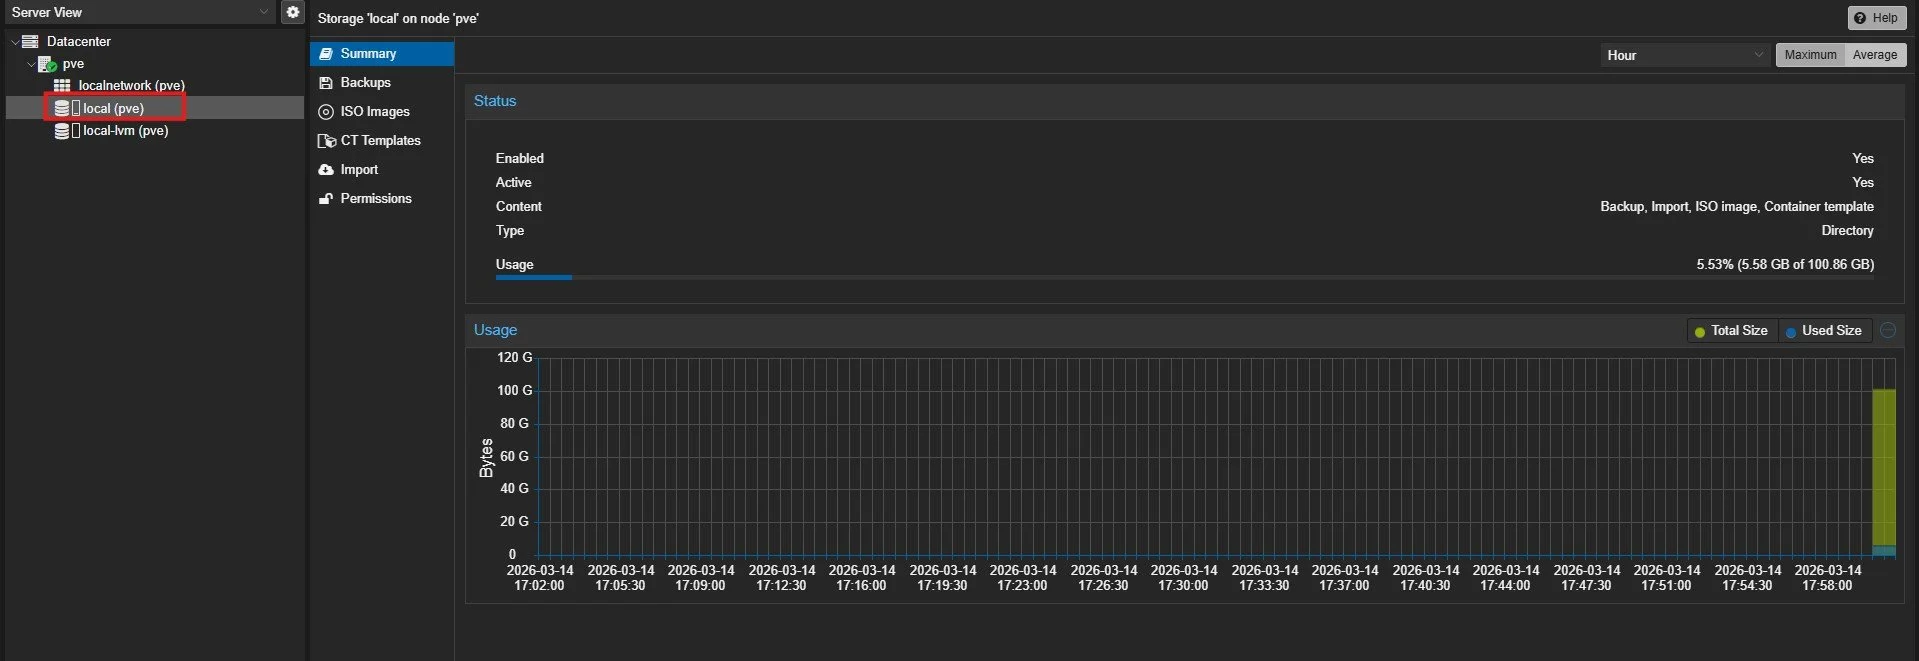
The next thing is to go to proxmox and click on local (pve), where you can upload your iso files.
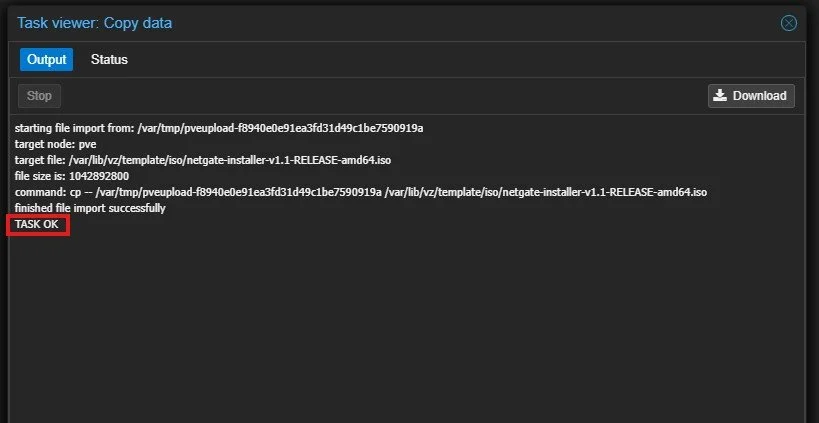
At the end it should say that the task of uploading succeeded.

Then create a virtual machine for the PFSense.
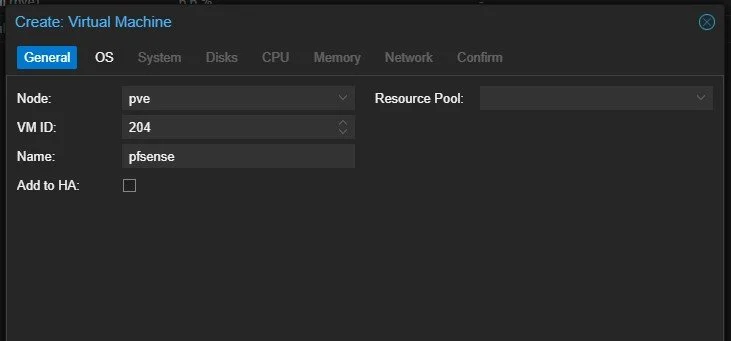
The next thing I did was to give the new VM an appropriate IP ending with 204 and gave it the name pfsense.
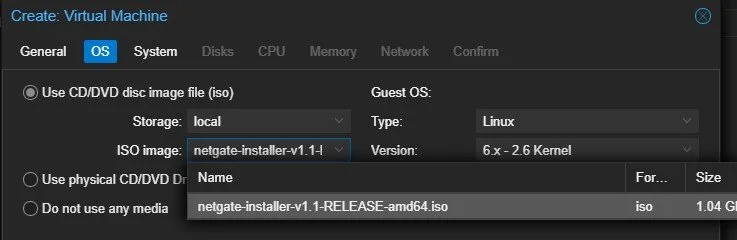
Then select the right image. Then click on next for System since you only need default on graphic card. I used 32 gb of disk space, one core for of cpu and 2 gb of RAM.
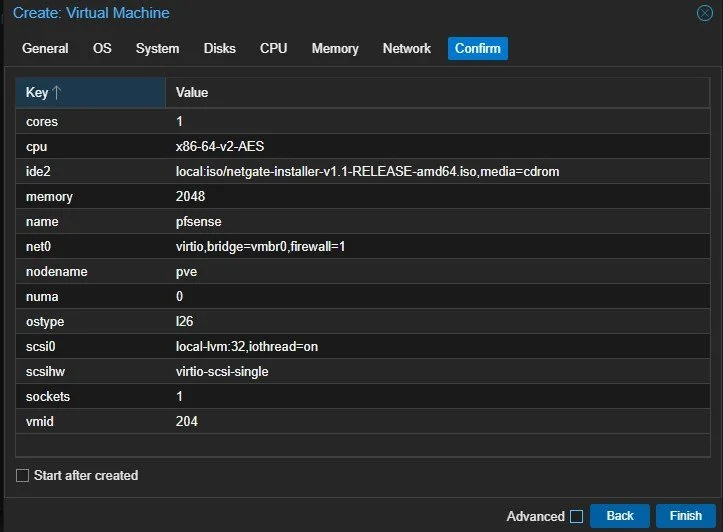
It should look like this at the end.
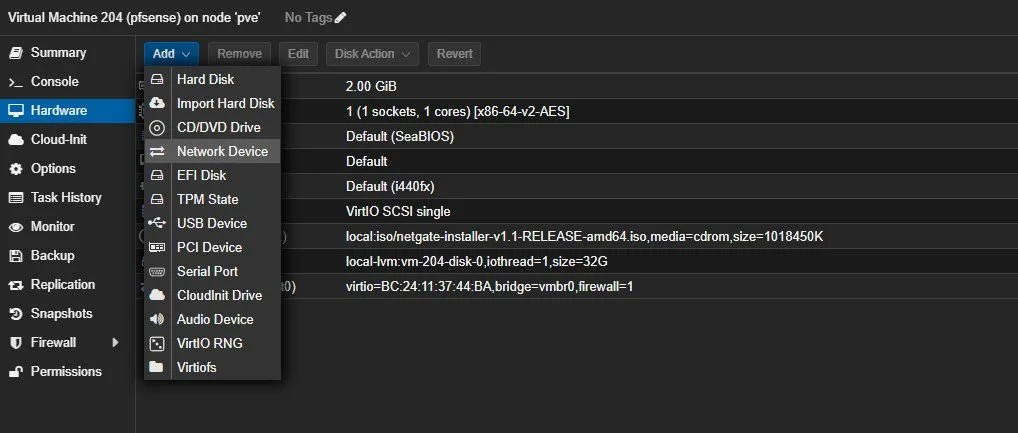
The next step is to add another network adapter to be able not just to get traffic but also pass it when needed.
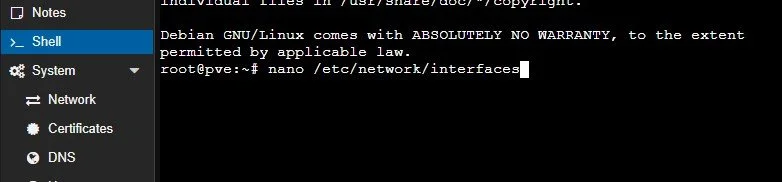
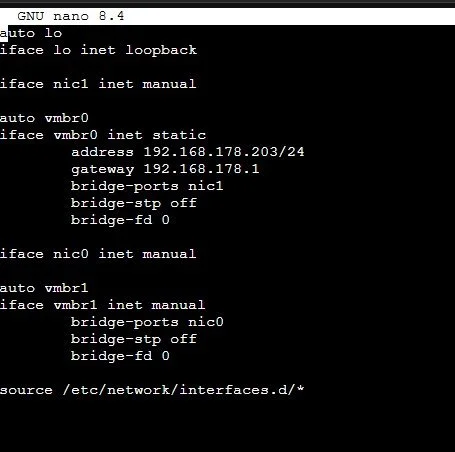
Before you do you have to create a second interface for the second ethernet port so it can be recognized on proxmox. The command is nano /etc/network/interfaces
auto lo
iface lo inet loopback

iface nic1 inet manual

auto vmbr0
iface vmbr0 inet static
        address 192.168.178.203/24
        gateway 192.168.178.1
        bridge-ports nic1
        bridge-stp off
        bridge-fd 0

iface nic0 inet manual

auto vmbr1
iface vmbr1 inet manual
        bridge-ports nic0
        bridge-stp off
        bridge-fd 0

source /etc/network/interfaces.d/*
This is the code for the second interface.
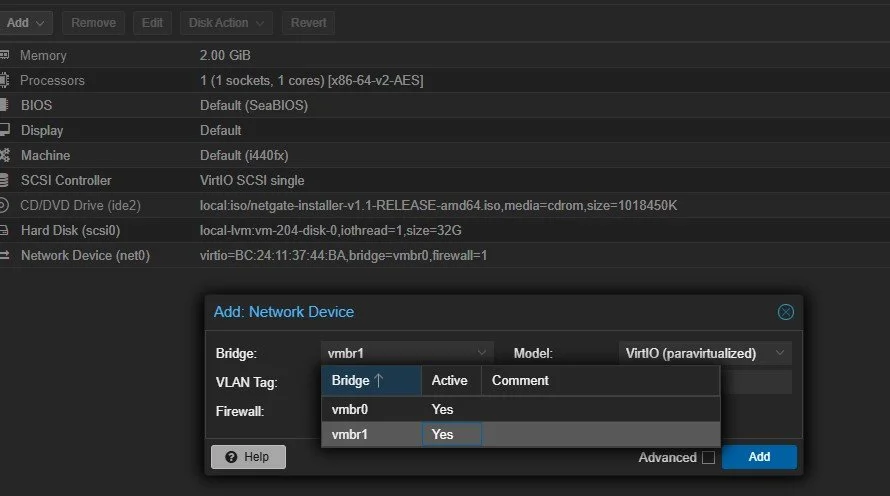
Now the second ethernet port should show up. Select it and you should have a second port for the LAN.
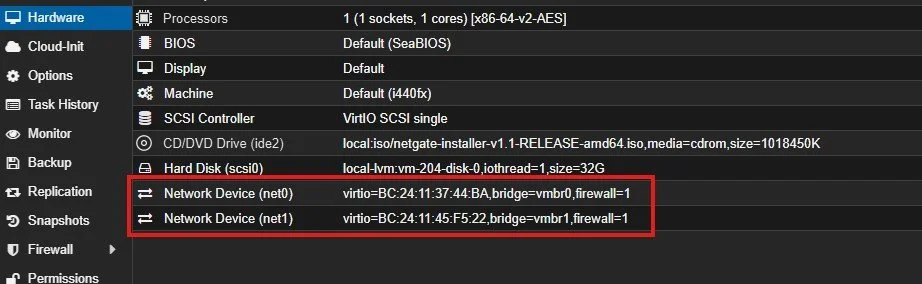
If everything is done right you should have two now.
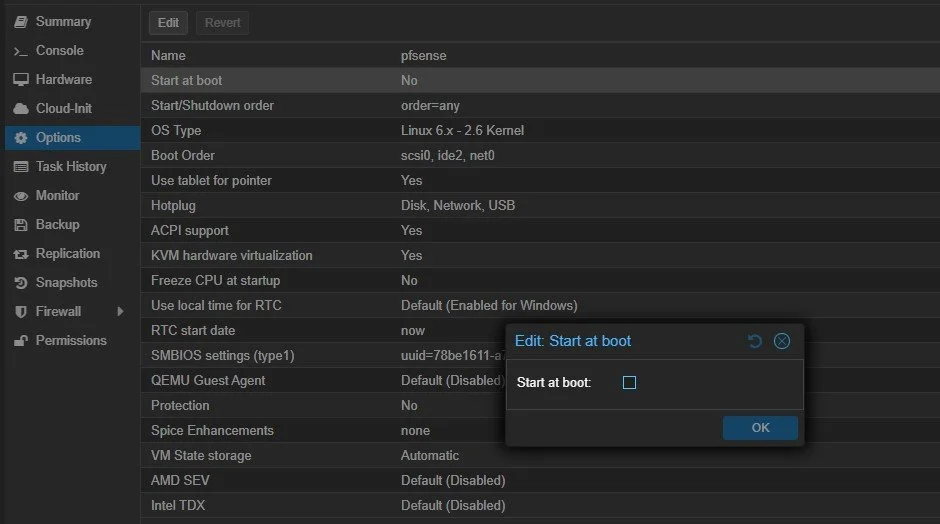
Also making sure that the VM with PFSense starts at boot.
As for the installation it was already done on a previous PFSense project.
Sources
Installing promox on mini pc: https://www.youtube.com/watch?v=Dya5sow-cdc
Proxmox installation: https://www.youtube.com/watch?v=PnS6Ybyf7Zw&t=976s
pfSense on Proxmox installation and configuration: https://www.youtube.com/watch?v=mwDv790YoZ0
The Complete Tutorial for Installing pfSense on Proxmox: https://www.youtube.com/watch?v=rleCSRJZw3Q