pfSense Lab Series - Part 1: Lab Setup
Project Overview & Architecture
In this series, I’m building a virtual network lab centered around pfSense, an open-source firewall and routing platform. The goal of this project is to create a flexible environment where I can experiment with network segmentation, IDS/IPS, DNS-based ad-blocking, and general firewall administration—all without affecting my real home network.
The virtual lab will act as a controlled environment for experimenting with network segmentation, IDS/IPS, DNS-based ad-blocking, and general firewall concepts. By laying out the structure in advance, I can build a setup that is flexible enough for future testing while keeping everything isolated from my real home network. In this post, I’ll go through the planned network layout, the tools involved, and the features I intend to explore in later parts of the series.
Network Topology
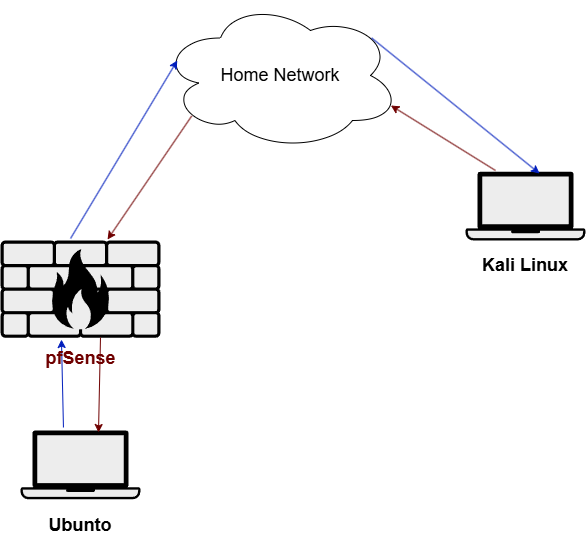
For the initial phase (Part 1) of the project, I’m setting up a simple layout: a Kali Linux machine placed on the external side (connected to the home network) and a pfSense firewall positioned between the Ubuntu system and the home network to provide controlled internet access.
Installation of VMs
In this lab, we install three virtual machines—Ubuntu Desktop, pfSense, and Kali Linux—to create a simple but realistic network environment for learning.
The Kali Linux VM is the penetration-testing machine. It comes with tools for scanning, attacking, and analyzing systems. In this setup, it acts as the attacker, letting you safely explore cybersecurity techniques and test defenses.
The Ubuntu Desktop VM acts as a normal user workstation. It’s used for everyday tasks like browsing, running applications, and testing connectivity. In this security lab, it represents the target system you can safely experiment on.
The pfSense VM serves as the network’s firewall and router. It controls how traffic moves between your virtual networks, provides security filtering, and can offer services like DHCP and DNS.
Installing Kali Linux
For the Kali Linux on this VM lab, I have chosen to use a pre-built virtual machine instead of an ISO. So the installation on VMware is going to be a little different.
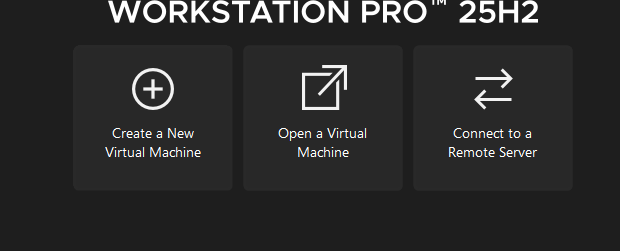
In the home page on VMware, click on Open a Virtual Machine. Chose the pre-built file and then power the machine on.
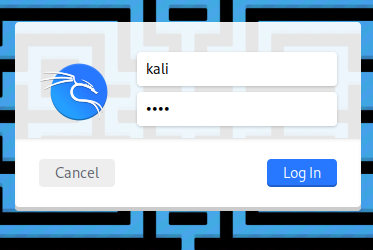
The only remaining step is to enter the username and password—both of which are kali. After that, the setup is complete.
Installing Ubuntu Desktop
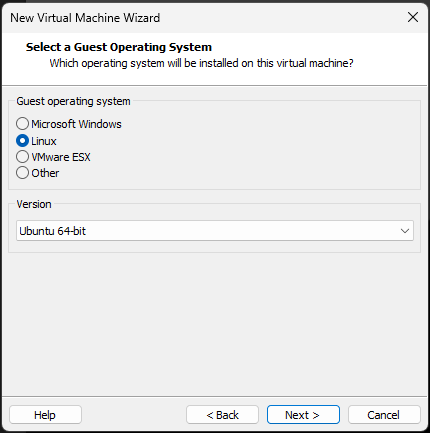
Select Linux and use the version Ubuntu 64-bit.

I am using 4GB of RAM and 2 cpu cores, there is only one more thing to change. The NAT adapter has to be changed to a private LAN.
The adapter has to be changed to Private Lan 1 for the ubuntu client.
Installing pfSense
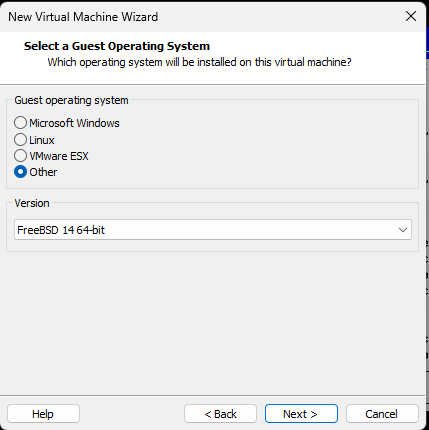
The right FreeBSD version should be 15 but if it isn’t on the vmware select version 14 for the pfSense.
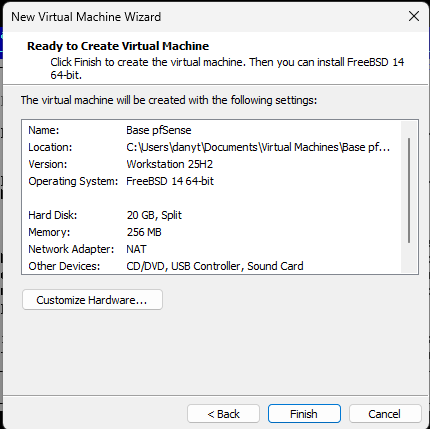
I used 20GB of space for pfSense and one cpu core. Am only using 256MB of RAm but recommended should be 1-2GB. Don’t try to use the recommended amount of RAM but instead more cause otherwise you will get a faulty installation of pfSense and it won’t work.
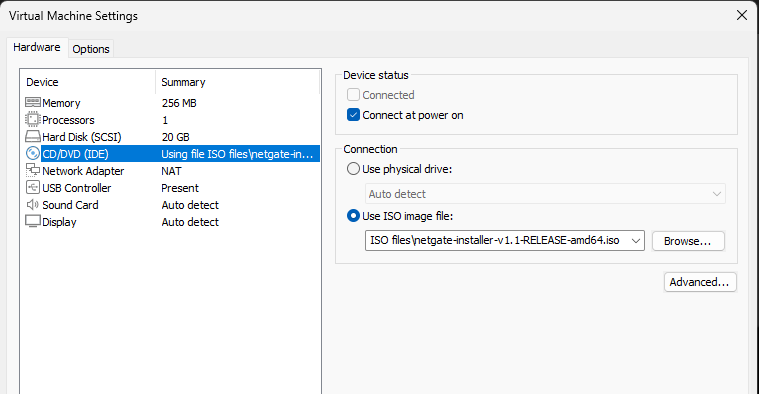
At the end click on the pfSense VM then go to edit vm, and in CD/DVD put the right path for the pfSense ISO.

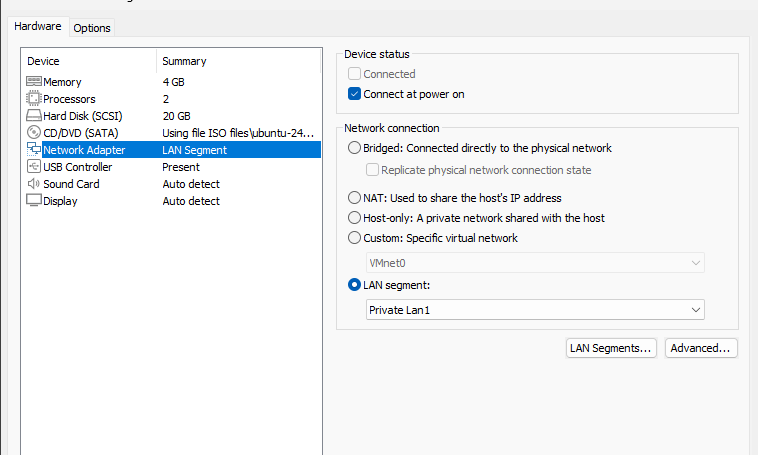
You have to create a second adapter, to do so click on add then Network adapter.

Make sure to select private network to be able to link it up with our ubuntu client on the private network.

I put the second Network Adapter on a LAN segment and creating a new virtual LAN with the name Private Lan1.
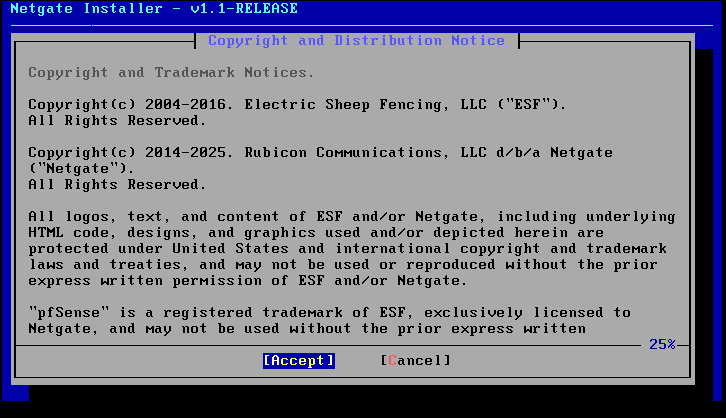
Start the VM and then click Accept. Then say yes to install pfSense.
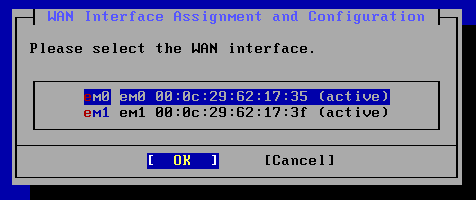
Here you have to select the NAT adapter so you are able to connect to the WAN. To select the right NAT adapter you can see that one on VMware network adapters and find the MAC address.
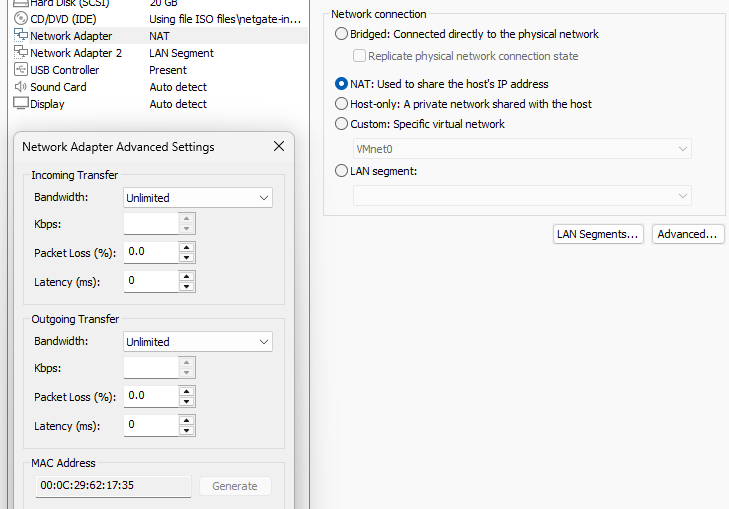
Click on the network adapter NAT, then on Advanced…, my MAC address here is 00:0C:29:62:17:35. So for me on the pfSense installation I have to select em0. Then select continue.

Then for the internal network we have to select em1 which is going to be used for our LAN interface.

This is how it should look at the end. Select install CE which is the free edition of pfSense and click enter.

The version used in this installation is going to be 2.8.1.
Reboot at the end.
Network Overview after Installation
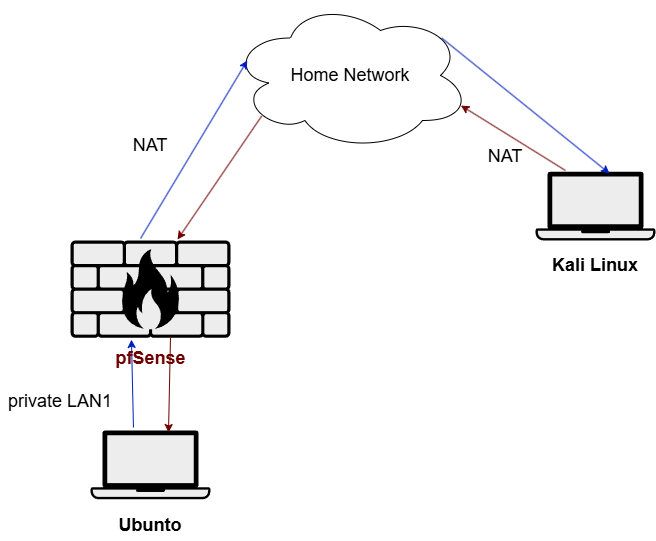
Kali Linux reaches the firewall through the NAT over the internet. The firewall has internet access through the NAT and also connects to the internal network via the private LAN1. The Ubuntu desktop accesses the internet by connecting to the firewall through the private LAN1.
Configuring pfSense
To configure the pfsense we will have to do it through the gui, the problem is that after the installation the pfsense firewall will be activated and not allow us to use the interface through a browser, so first thing is to disable the firewall.
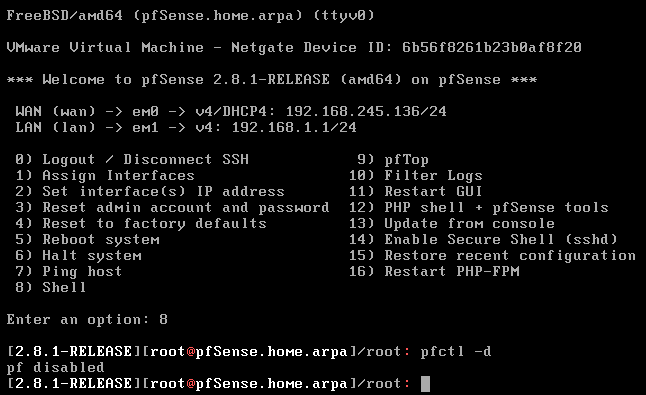
Start pfSense virtual machine, select 8 to get to the shell command line, the put the command pfctl -d. With it you can disable the firewall and then through the host browser connect to the pfSense gui. To connect you have to put the IP address given to the firewall, in this case being 192.168.245.136.
Put the IP address on the browser bar. The credentials are admin and pfsense. When entering you should hear a small pip sound.

Since the firewall is in a private network make sure to disable the RFC1918. Go through the rest of the steps, click finish and then do the command pfctl -d to disable firewall again and create a new WAN rule to be able to get permanent access to the firewall for the browser throught the WAN.
To add a rule go to Firewall/Rules on the navigation bar. Select WAN.
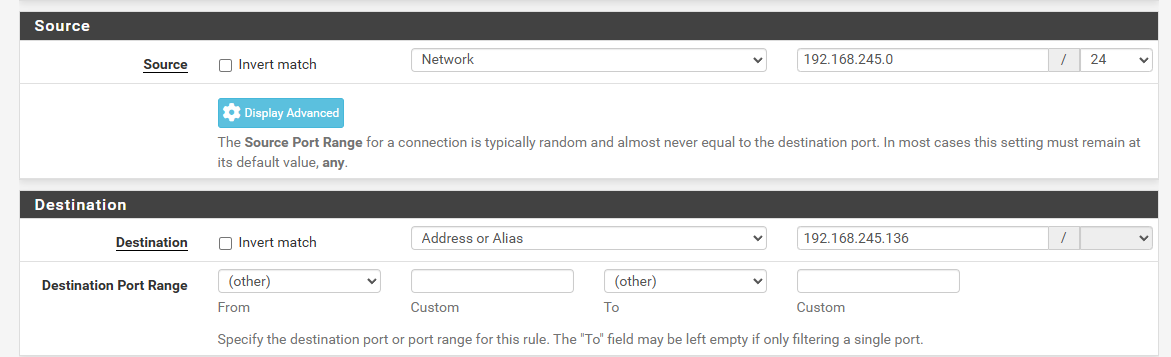
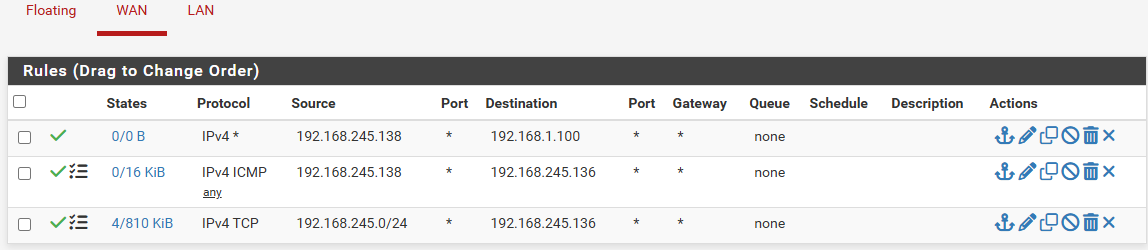
Select for source Network, for the IP addresses of our WAN network. in my case it is 192.168.245.0/24 and then for destination put the address of the firewall being 192.168.245.136. Now if you refresh the site it should create some traffic. Make sure to log before saving the rule to see the traffic.
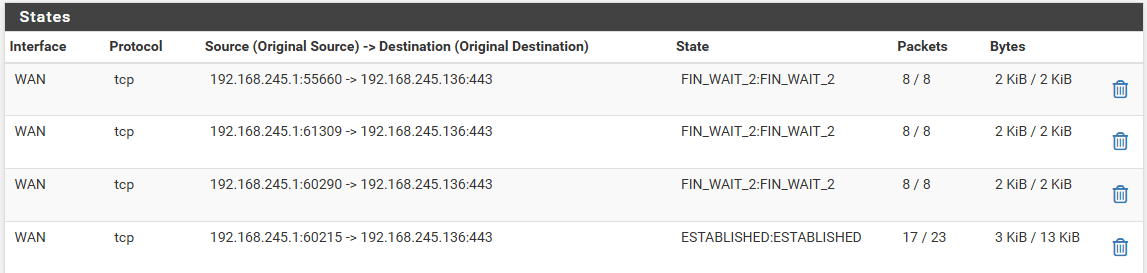
As you can see there is tcp traffic through 192.168.245.1 (our host) meaning we have permanent access now to the firewall through this rule.
DHCP Server for Ubuntu Client
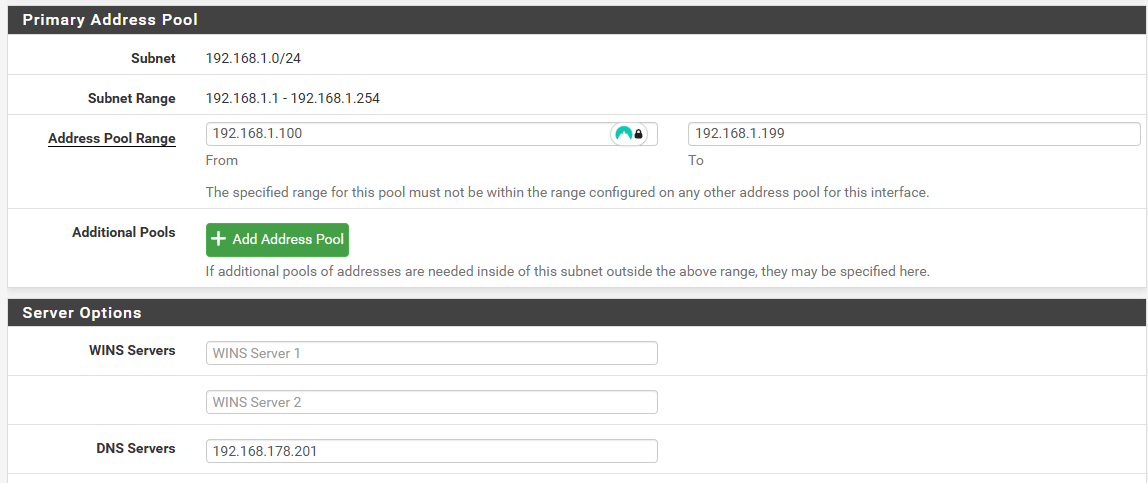
The address pool range is going to be the set of IP addresses that can be assigned on the LAN. For future access to the internet for the ubuntu client, I put the address 192.168.178.201 which is my pi-hole IP. Now we have to go to our ubuntu machine to see if we are getting assigned an IP address.
Testing IP assignment

Write on the terminal the command ifconfig, and the DHCP server has assigned the IP address 192.168.1.100 to our client.
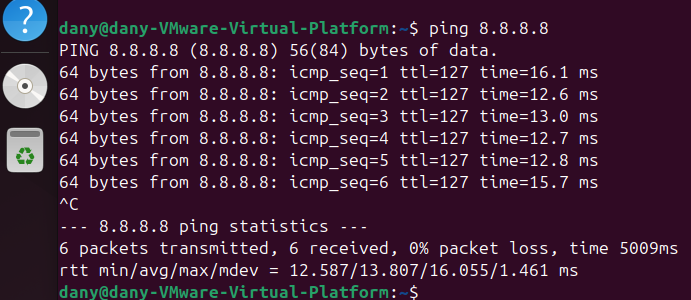
I at the end use ping 8.8.8.8 to see if i can get access form the client through the firewall and connect to the google dns server. In this case it worked.
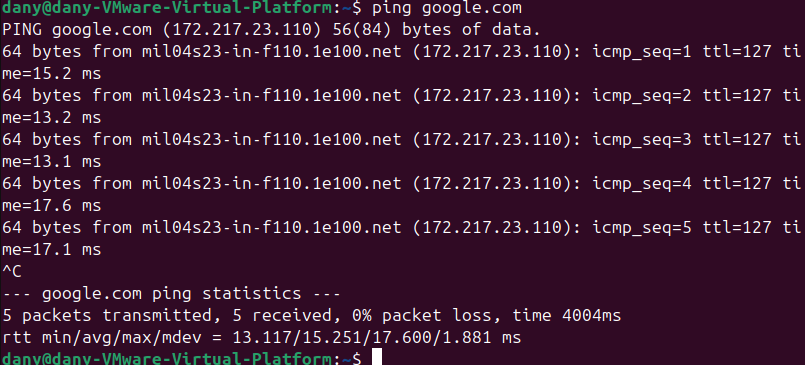
Last thing we can ping is an actual website just to see if our dns server resolves the websites to IP addresses.
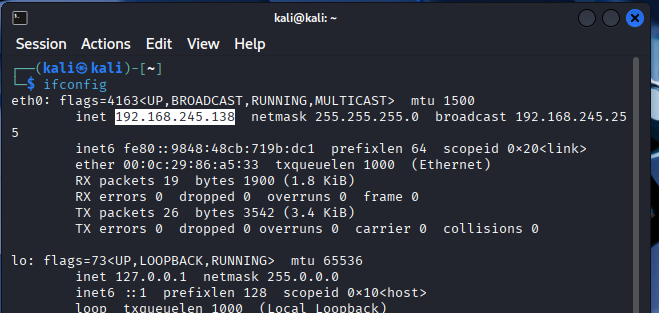
The kali vm gets an IP address of 192.168.245.138 with IP config.
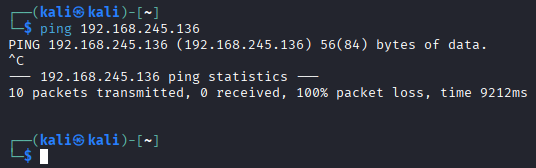
Now if we try to ping the firewall with our kali it shouldn’t work since the only rule that we allowed from the WAN to the firewall was the TCP protocol.
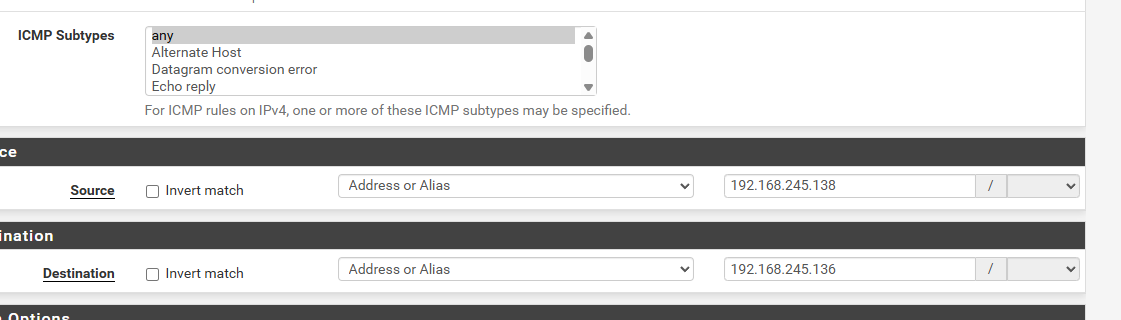

Go back to the pfSense interface and create under Firewall/Rules a new rule that allows pings. Put as the protocol ICMP, for source the kali IP 192.168.245.138 and for destination the firewall IP 192.168.245.136.
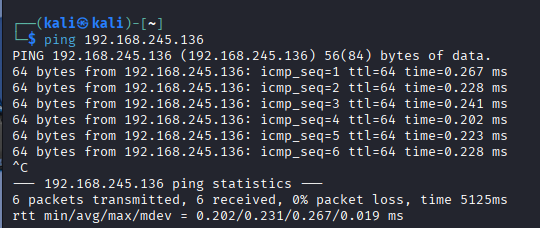
Now when I ping the firewall from the Kali VM, it actually receives a reply. Both the rules are stateful rules, meaning it allows the connection from one side and immediatly allows a reply back because it is the same session. Next step is to install Wireshark on the ubuntu machine. For that use the command sudo apt install wireshark. To activate the wireshark on ubuntu use sudo wireshark.
Simulating a DOS-Attack
We want to be able to capture the DOS packets with our ubuntu wireshark, so for that we have to create a new rule, in which the kali machine is able to send any packages to the ubuntu client throught he firewall.
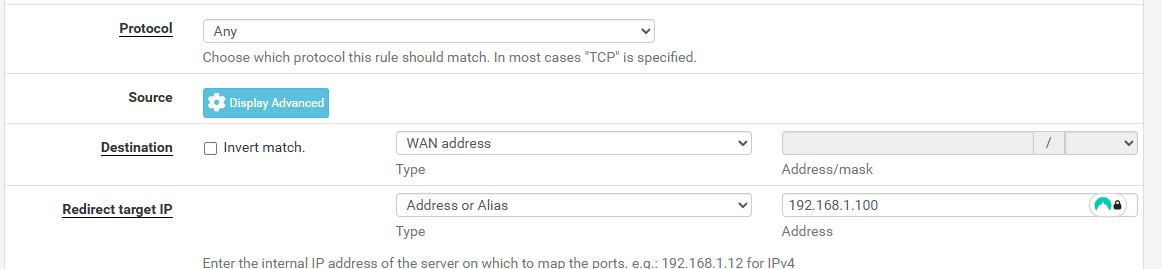

We need to be able to forward the incoming WAN traffic to the client which is in the LAN. For that we use as destination our firewall 192.168.245.136 and redirect target (where it is suppose to go) the client IP 192.168.1.100.
Here you can see me trying to flood the ubuntu client with ping -f 192.168.245.136, which are essentially a multitude of pings that are being send to the firewall and then forwarded to the client. The ubuntu client received over 19 thousand pings in a matter of a few second. Every time I try it the firewall gui becomes unresponsive, but I’m not yet sure if it is a defense mechanism or if this minimal flooding is already overwhleming for it.
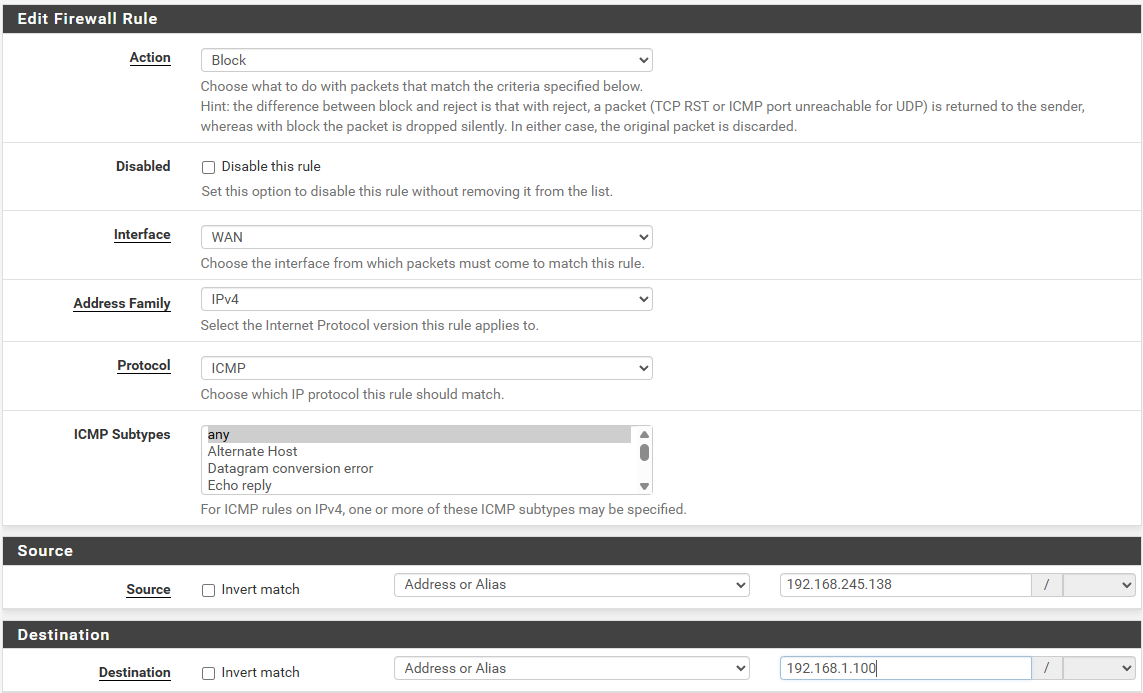

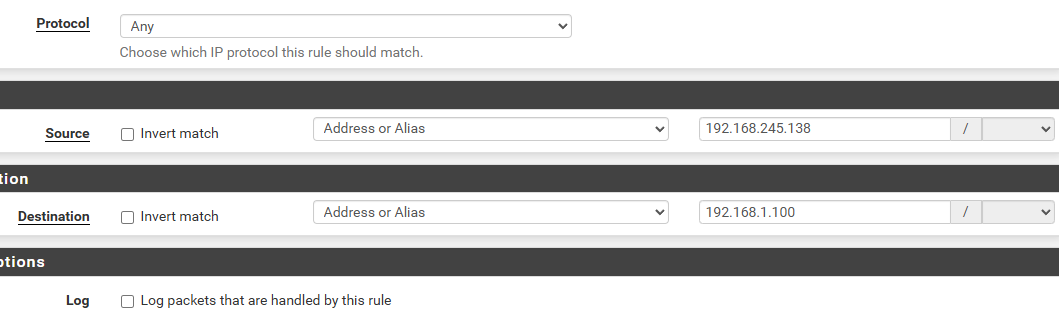
To prevent this from happening we have to create a rule that blocks the ping flooding. Go to the Firewal/Rules select WAN, put as action block, then add the protocol you want to block, in this case ICMP, and then the source being the kali linux and the destination being the ubunutu client. This should prevent another flooding from happening.
Sources
Installing kali linux: https://www.youtube.com/watch?v=A1Bm9KmPQ0o
Installing pfSense: https://www.youtube.com/watch?v=Y-Dj8lHmXy8
Adding second adapter on vmware: https://www.youtube.com/watch?v=aSITeeGMvGQ&t=46s
pfSense Firewall rules configuration: https://www.youtube.com/watch?v=Vm98ofYp05g&t=3s
pfSense Configuration Guide - Zero to Hero!: https://www.youtube.com/watch?v=he3ENpMLMsc&t=317s